In this chapter, you will learn how to connect a new App to your bestzero® Hive and make it available to your users.
Once you are successfully connected to your Hive, you can create a new App by pressing button  .
.
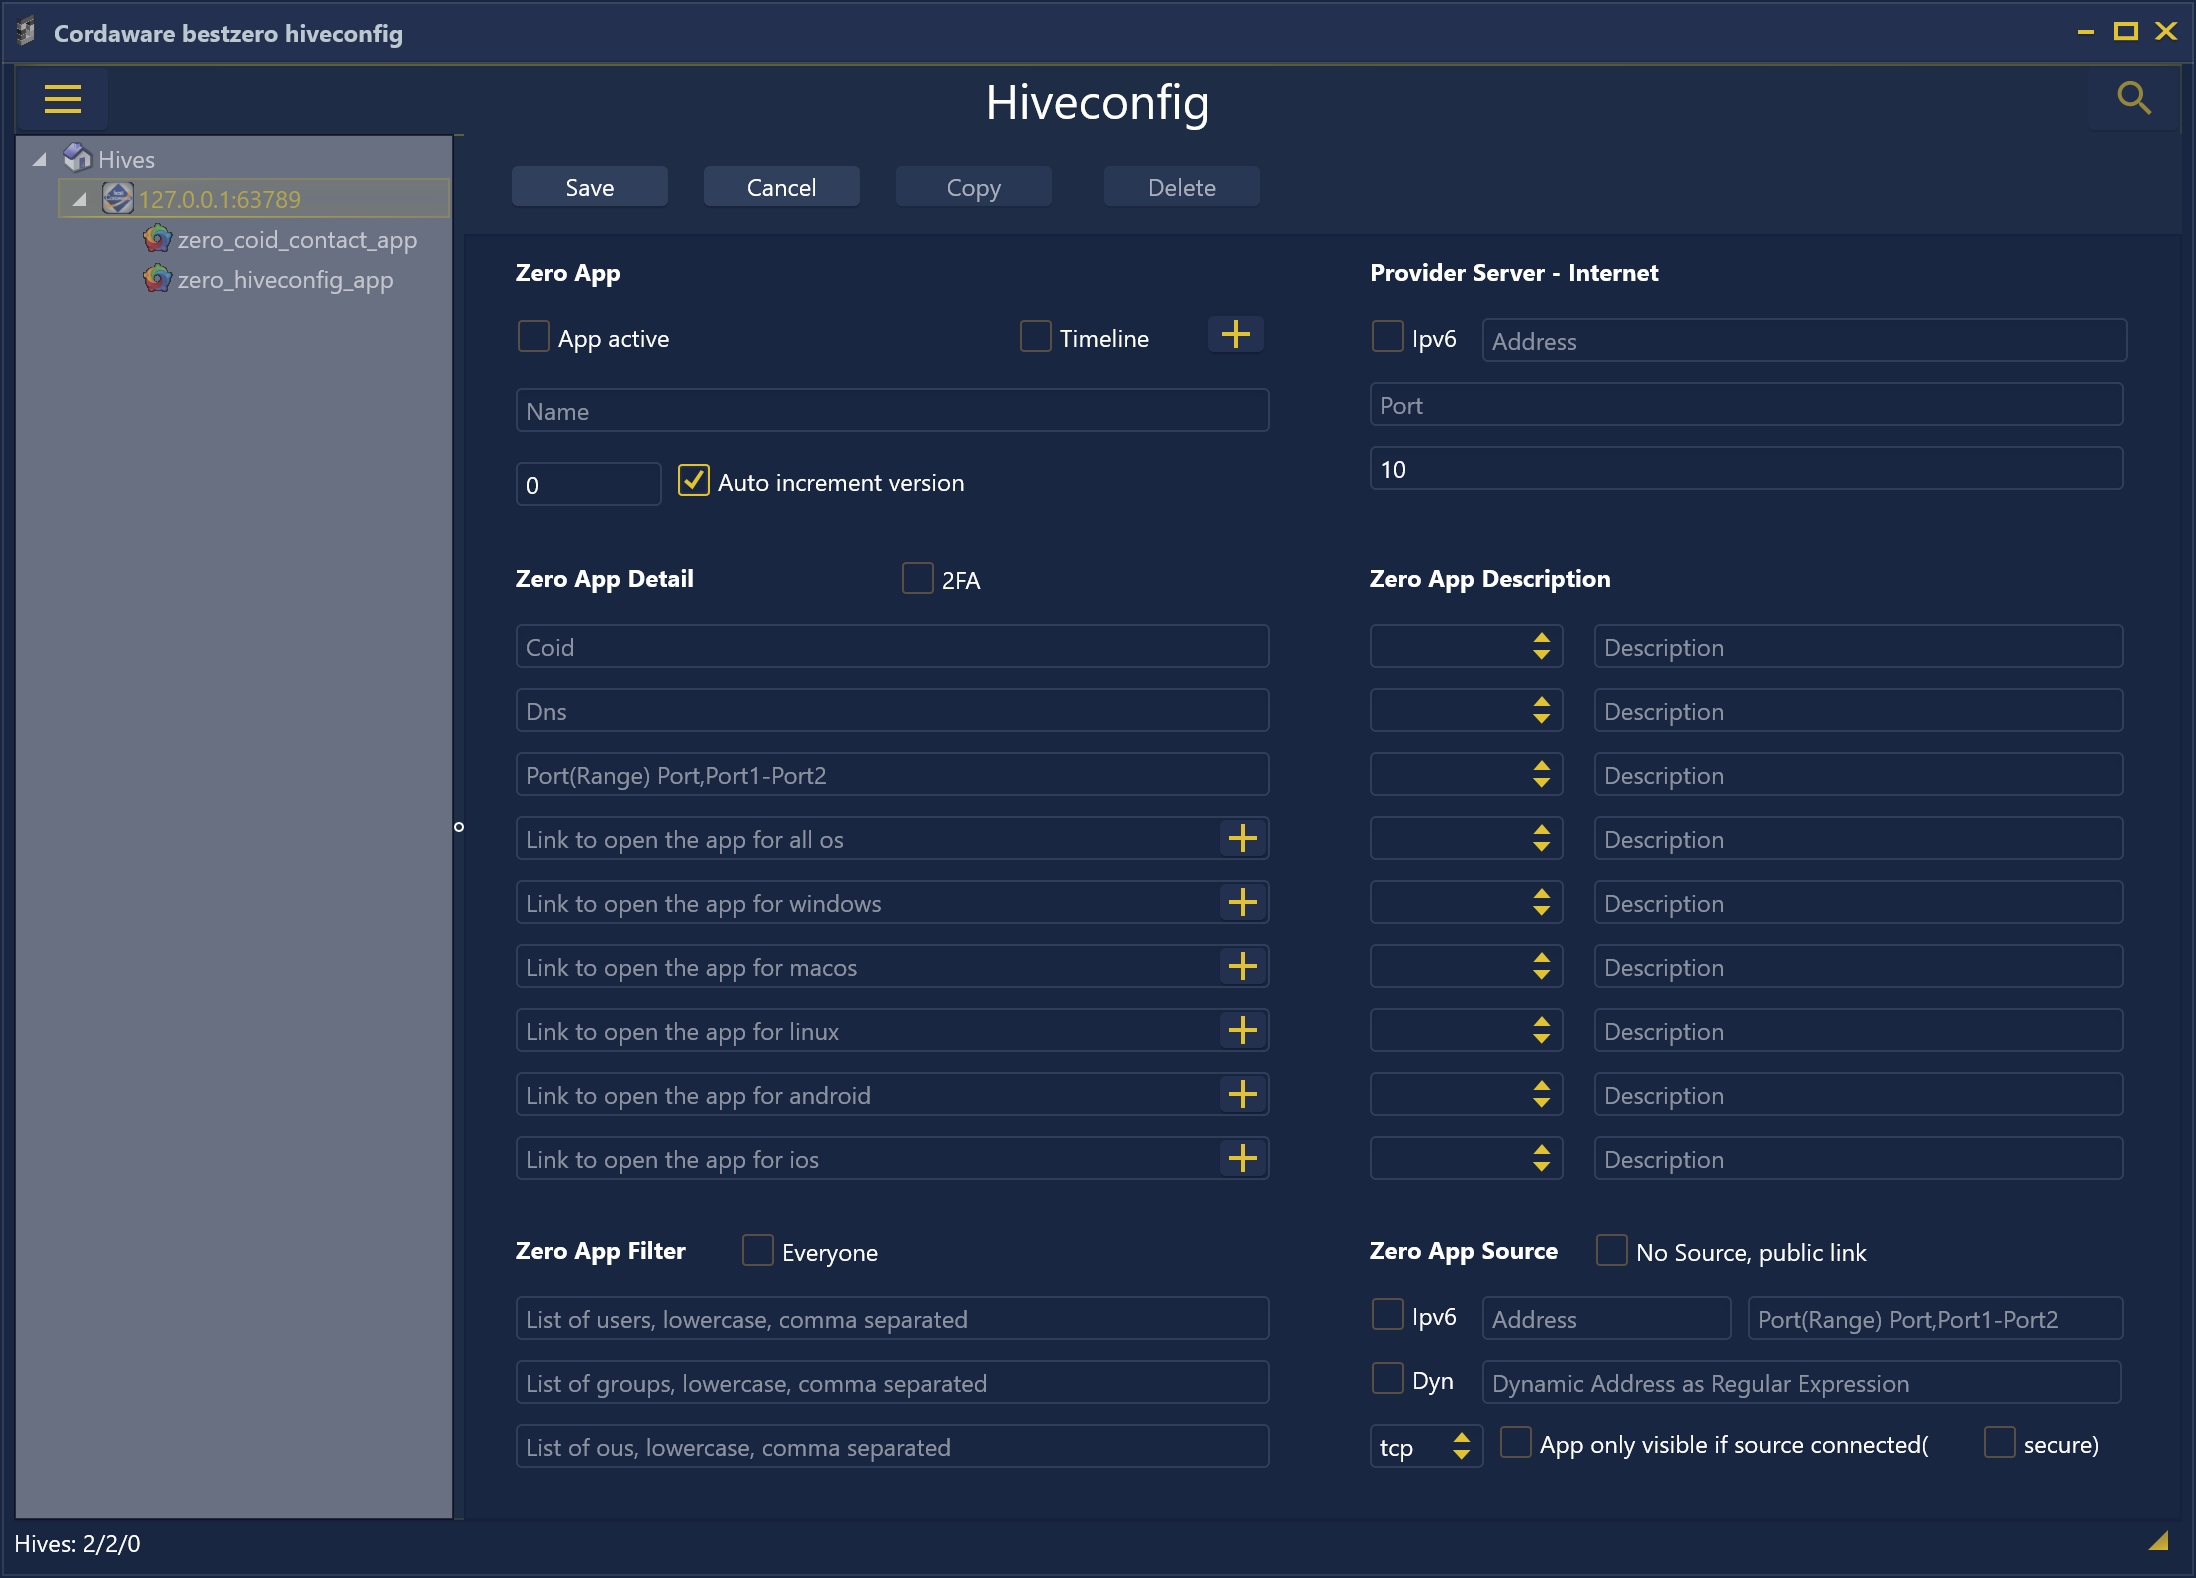
In this menu, you enter all the information that you can distribute through your bestzero® Hive.
There are the following sections to edit:
Enter the general information of your App.
This information is used to manage it in your bestzero® Hive.
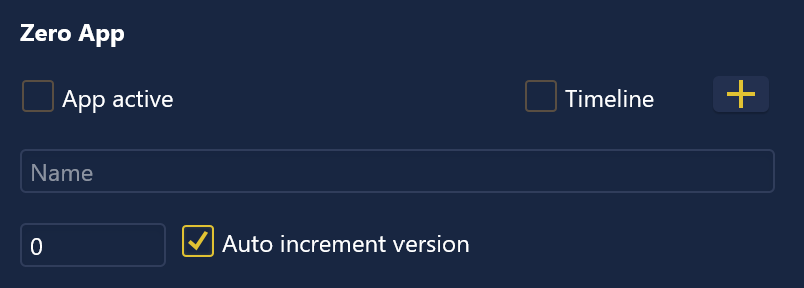
App active
|
Select this check box to make your app available to authorized users in the Appsbox.
If you uncheck this check box, your App will not be available in the Appsbox.
|
Timeline
|
Activate this checkbox to make your app available in the Appsbox on a time-controlled basis.
If you press the  "Three dots" button, you can make exact time settings when your app is active. "Three dots" button, you can make exact time settings when your app is active.
|
Name
|
Define the internal name of your App, which will only appear in the list of your Apps in the Hive Configurator.
|
Version
|
Set the internal version number of your App.
|
Auto increment version
|
Select this check box to have the internal version number of your App automatically incremented.
If you deactivate this checkbox, the version number specified under "Version" is used.
|
Only integer version numbers are incremented.
Example: 0, 1, 2, 3, ...
If it is a different version number consisting of alphanumeric characters, the internal version number will be preceded by the string "Z-" whenever your App is updated.
Example: a, Z-a, Z-Z-a, ...
|
It is recommended to let the version number increase automatically to counteract a version conflict!
|
If you want to maintain the version number manually, you must keep in mind that an app is only updated in the Appsbox if the version number also changes.
|
|
|
Enter the information about your provider server.
This information was usually provided to you by Cordaware GmbH.

Ipv6
|
Select this check box to connect to your provider server using an IPv6 address.
If you uncheck this check box, the address you enter will be interpreted as an IPv4 address.
|
Address
|
Enter the address of your provider server.
|
This typically follows a scheme such as px1234.bestzero.world and was made available to you by Cordaware GmbH.
|
|
Port
|
Set the port used to connect to your provider server.
|
Pool Count
|
Enter the desired number of connections that are available at the same time. These are set up in advance by your bestzero® Hive to your provider server. Requests via your users' Appsbox will be sent to your provider server. Data exchange with your bestzero® Hive is made possible via these already available connections.
|
Default: 10
This is not the maximum number of connections!
As soon as a user accesses this App, the bestzero® Hive will prepare an additional connection to the provider server so that the specified number of connections is always available at the same time.
|
|
Please note:
The higher this value, the better high user fluctuations can be processed. However, a high "pool number" also significantly increases the server load of your bestzero® Hives!
|
|
|
Provide all the information about your App that is necessary to work.
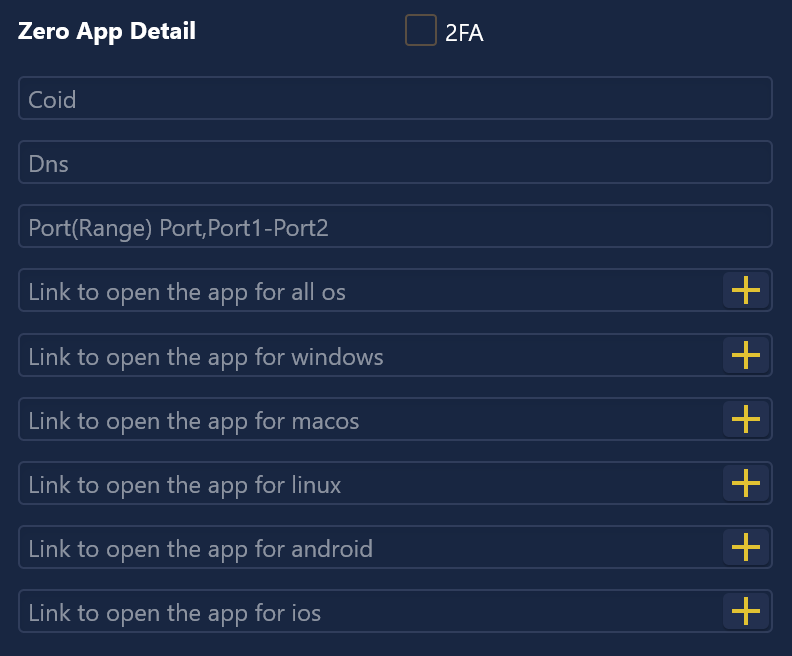
2FA
|
Check this box to lock your App with two-factor authentication.
|
Coid
|
Enter your company ID (CoID).
|
This was made available to you by Cordaware GmbH.
|
|
Dns
|
Enter your desired DNS record, through which your App should be available to your users. It is freely selectable and will be automatically entered in the "hosts" file by your users. Using these entries the Appsbox controls the access to external applications, among other things.
|
When choosing your desired DNS entry, make sure that there are certain top-level domains (TLDs) which, by definition, may only be accessible in encrypted form!
When using such TLDs, you must note that the application you want to deploy is also available in encrypted form.
|
|
Port(Range) Port,Port1-Port2
|
Specify the port you want to use to make your App available to your users.
This is also freely selectable.
|
It is recommended to use the default port of the protocol used (e.g. port 443 for HTTPS).
|
You also have the option to specify multiple ports comma-separated or an entire port range.
Individual ports and port ranges can also be combined. The order does not matter.
|
Example:
If you want to share ports 80 and 443, and port range 21 to 23 with an app, you can specify it as follows:
80,443,21-23
|
|
Link to open the App for all os
|
Specify the link that should be opened when your user opens this App in the Appsbox.
If you press the  Plus" button, you can also specify an Infotext that should appear in the Appsbox when the App button is pressed. Plus" button, you can also specify an Infotext that should appear in the Appsbox when the App button is pressed.
If an Infotext is already stored, a  "three dots" button will be displayed instead of the "three dots" button will be displayed instead of the  "Plus" button, which you can use to edit the existing Infotext. "Plus" button, which you can use to edit the existing Infotext.
Typically, this link contains your specified DNS record and port.
|
You can find out more about depositing an Infotext in the chapter Add Infotext.
|
|
Link to open the App for Windows
Link to open the App for macOS
Link to open the App for Linux
Link to open the App for Android
Link to open the App for iOS
|
If you want to use operating system specific links, you can specify them here.
If no specific link is specified, the link is used for all operating systems.
|
These links are opened on the Windows, MacOS, Linux, Android or iOS operating system respectively.
This is necessary, for example, for a link to your network storage, since this must be specified specifically for the individual operating systems.
|
If you press the respective  "Plus" buttons, you can also specify an operating system-specific Infotext that should appear in the Appsbox when the App button is pressed. "Plus" buttons, you can also specify an operating system-specific Infotext that should appear in the Appsbox when the App button is pressed.
As with the link for all operating systems, a  "three dots" button is displayed instead of the "three dots" button is displayed instead of the  "Plus" button if an Infotext for an operating system-specific link has already been stored. "Plus" button if an Infotext for an operating system-specific link has already been stored.
You can subsequently edit the existing Infotext via this button.
|
You can find out more about depositing an Infotext in the chapter Add Infotext.
|
|
|
Define the description of your App. This is the display name in your users' Appsbox.
You have the option of setting the description language-specifically.
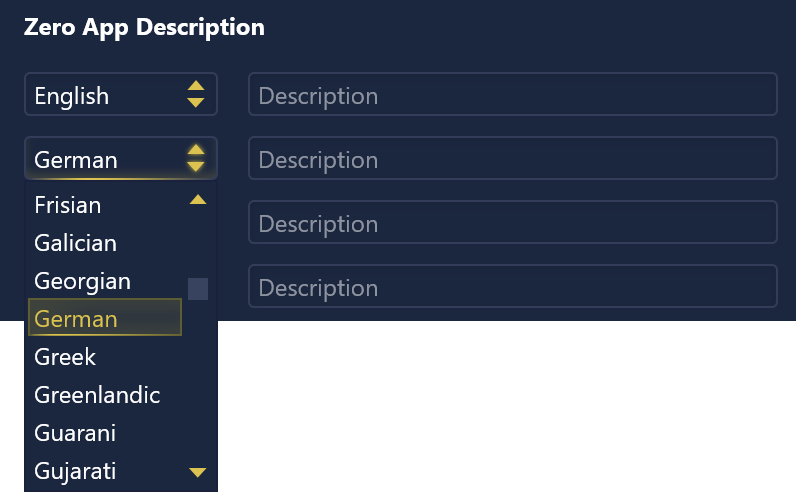
Language
|
Select your desired language here, for which you want to specify a description of your App.
|
If no description is defined for the language of your own operating system, the description of the English language is used.
In such a case, if there is no description for English, the name in the user's Appsbox will remain empty!
Therefore, you should always define a description for English at best.
|
|
Description
|
Define the language-specific description of your App.
|
This description appears in your users' Appsbox. It's the display name of your App in the Appsbox.
Example:

In this example, the description was set to "Cordaware Start website".
|
|
|
Set the access options, for which domain users your app should be available in the Appsbox.

Everyone
|
Select this check box to make your App available to every user registered in your domain.
If you uncheck this check box, your App will be released according to the following restrictions.
|
List of users, case-sensitive!
|
Specify a comma-separated list of login names of all users for whom your App should be available exclusively.
|
Please pay attention to the correct upper and lower case!
|
|
List of groups, case-sensitive!
|
Specify a comma-separated list of all groups for which your App should be available exclusively.
|
Please pay attention to the correct upper and lower case!
|
|
List of OUs, case-sensitive!
|
Specify a comma-separated list of all ous for which your App should be available exclusively.
|
Please pay attention to the correct upper and lower case!
|
|
|
Enter the information about the service you want to provide to your users.
This is the connection information through which the service can be reached internally in your corporate network.
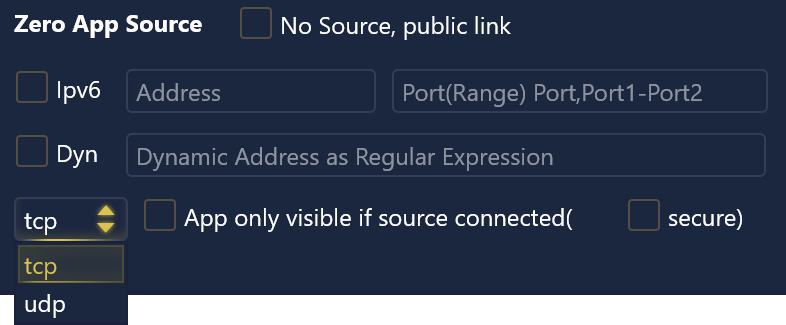
No Source, public link
|
Select this check box if your App is only a publicly accessible link and you want to share it in the Appsbox.
If you uncheck this check box, your application will be released according to the following information.
|
Ipv6
|
Select this check box to connect to your service from an IPv6 address.
If you uncheck this check box, the address you enter will be interpreted as an IPv4 address.
|
Address
|
Enter the address of your service to be released.
|
When specifying a FQDN, the address is resolved by the DNS server configured on the machine of the bestzero® Hive.
If you specify a FQDN here, make sure that the entries "DNS" and "Link to open the app" in the "Zero App Details" section are usually identical to avoid certificate errors for your users.
For example, if you want to share an internal website and it includes redirection or references to other internal servers, these must also be shared as an app to allow full access.
|
|
Please note:
Enter here only the FQDN or IP address of the machine on which your service is available.
|
|
Port(Range) Port,Port1-Port2
|
Specify the port over which your service can be addressed internally.
You also have the option of specifying several ports comma-separated or an entire port range.
Individual ports and port ranges can also be combined. The order does not matter.
|
Example:
If you need ports 80 and 443, and port range 21 to 23 for a service, you can specify it as follows:
80,443,21-23
|
|
Dyn
|
Check this box if you want to provide multiple sources with this one App.
|
You can use this feature to provide access via RDP to 100 machines at once, for example.
Without these dynamic addresses, you would have to create a separate App for each machine.
So this reduces the administration effort from setting up 100 different Apps to setting up a single App.
|
|
Please note:
For your users who use Appsbox on a Linux distribution, this functionality is only available when using "systemd-resolved".
|
|
Dynamic address as regular expression
|
Specify here the dynamic prefix of your address as a regular expression.
|
Example:
You have set "cordaware.local" as the address.
This is used in this case as a suffix for the addresses to be provided to the user.
Now the regular expression "winsrv[1-4]" is used here.
This means that the prefix of your address starts with the string "winsrv" and is followed by a number between 1 and 4 (inclusive).
Accordingly, this app will provide the following addresses for your users:
•winsrv1.cordaware.local •winsrv2.cordaware.local •winsrv3.cordaware.local •winsrv4.cordaware.local |
|
Protocol
|
Select the protocol over which your service can be addressed.
You can choose between the TCP and UDP protocols.
|
For example, for web applications over HTTP/HTTPS, select the TCP protocol.
|
|
App only visible if source connected
|
Select this check box if you want your App to be visible in your users' Appsbox only if the shared service is actually reachable.
If you uncheck this check box, your App will always appear.
|
secure
|
Select this check box if the query whether the shared service can actually be established should be SSL-secured.
|
|
Once you have provided all the information, you can save your App using the  button and thus share it with your users' Appsbox.
If you want to cancel the creation of your App, use the  button.
You can delete an existing App from the bestzero® Hive configuration via the button  , as well as the Appsbox.
Example of creating a new app
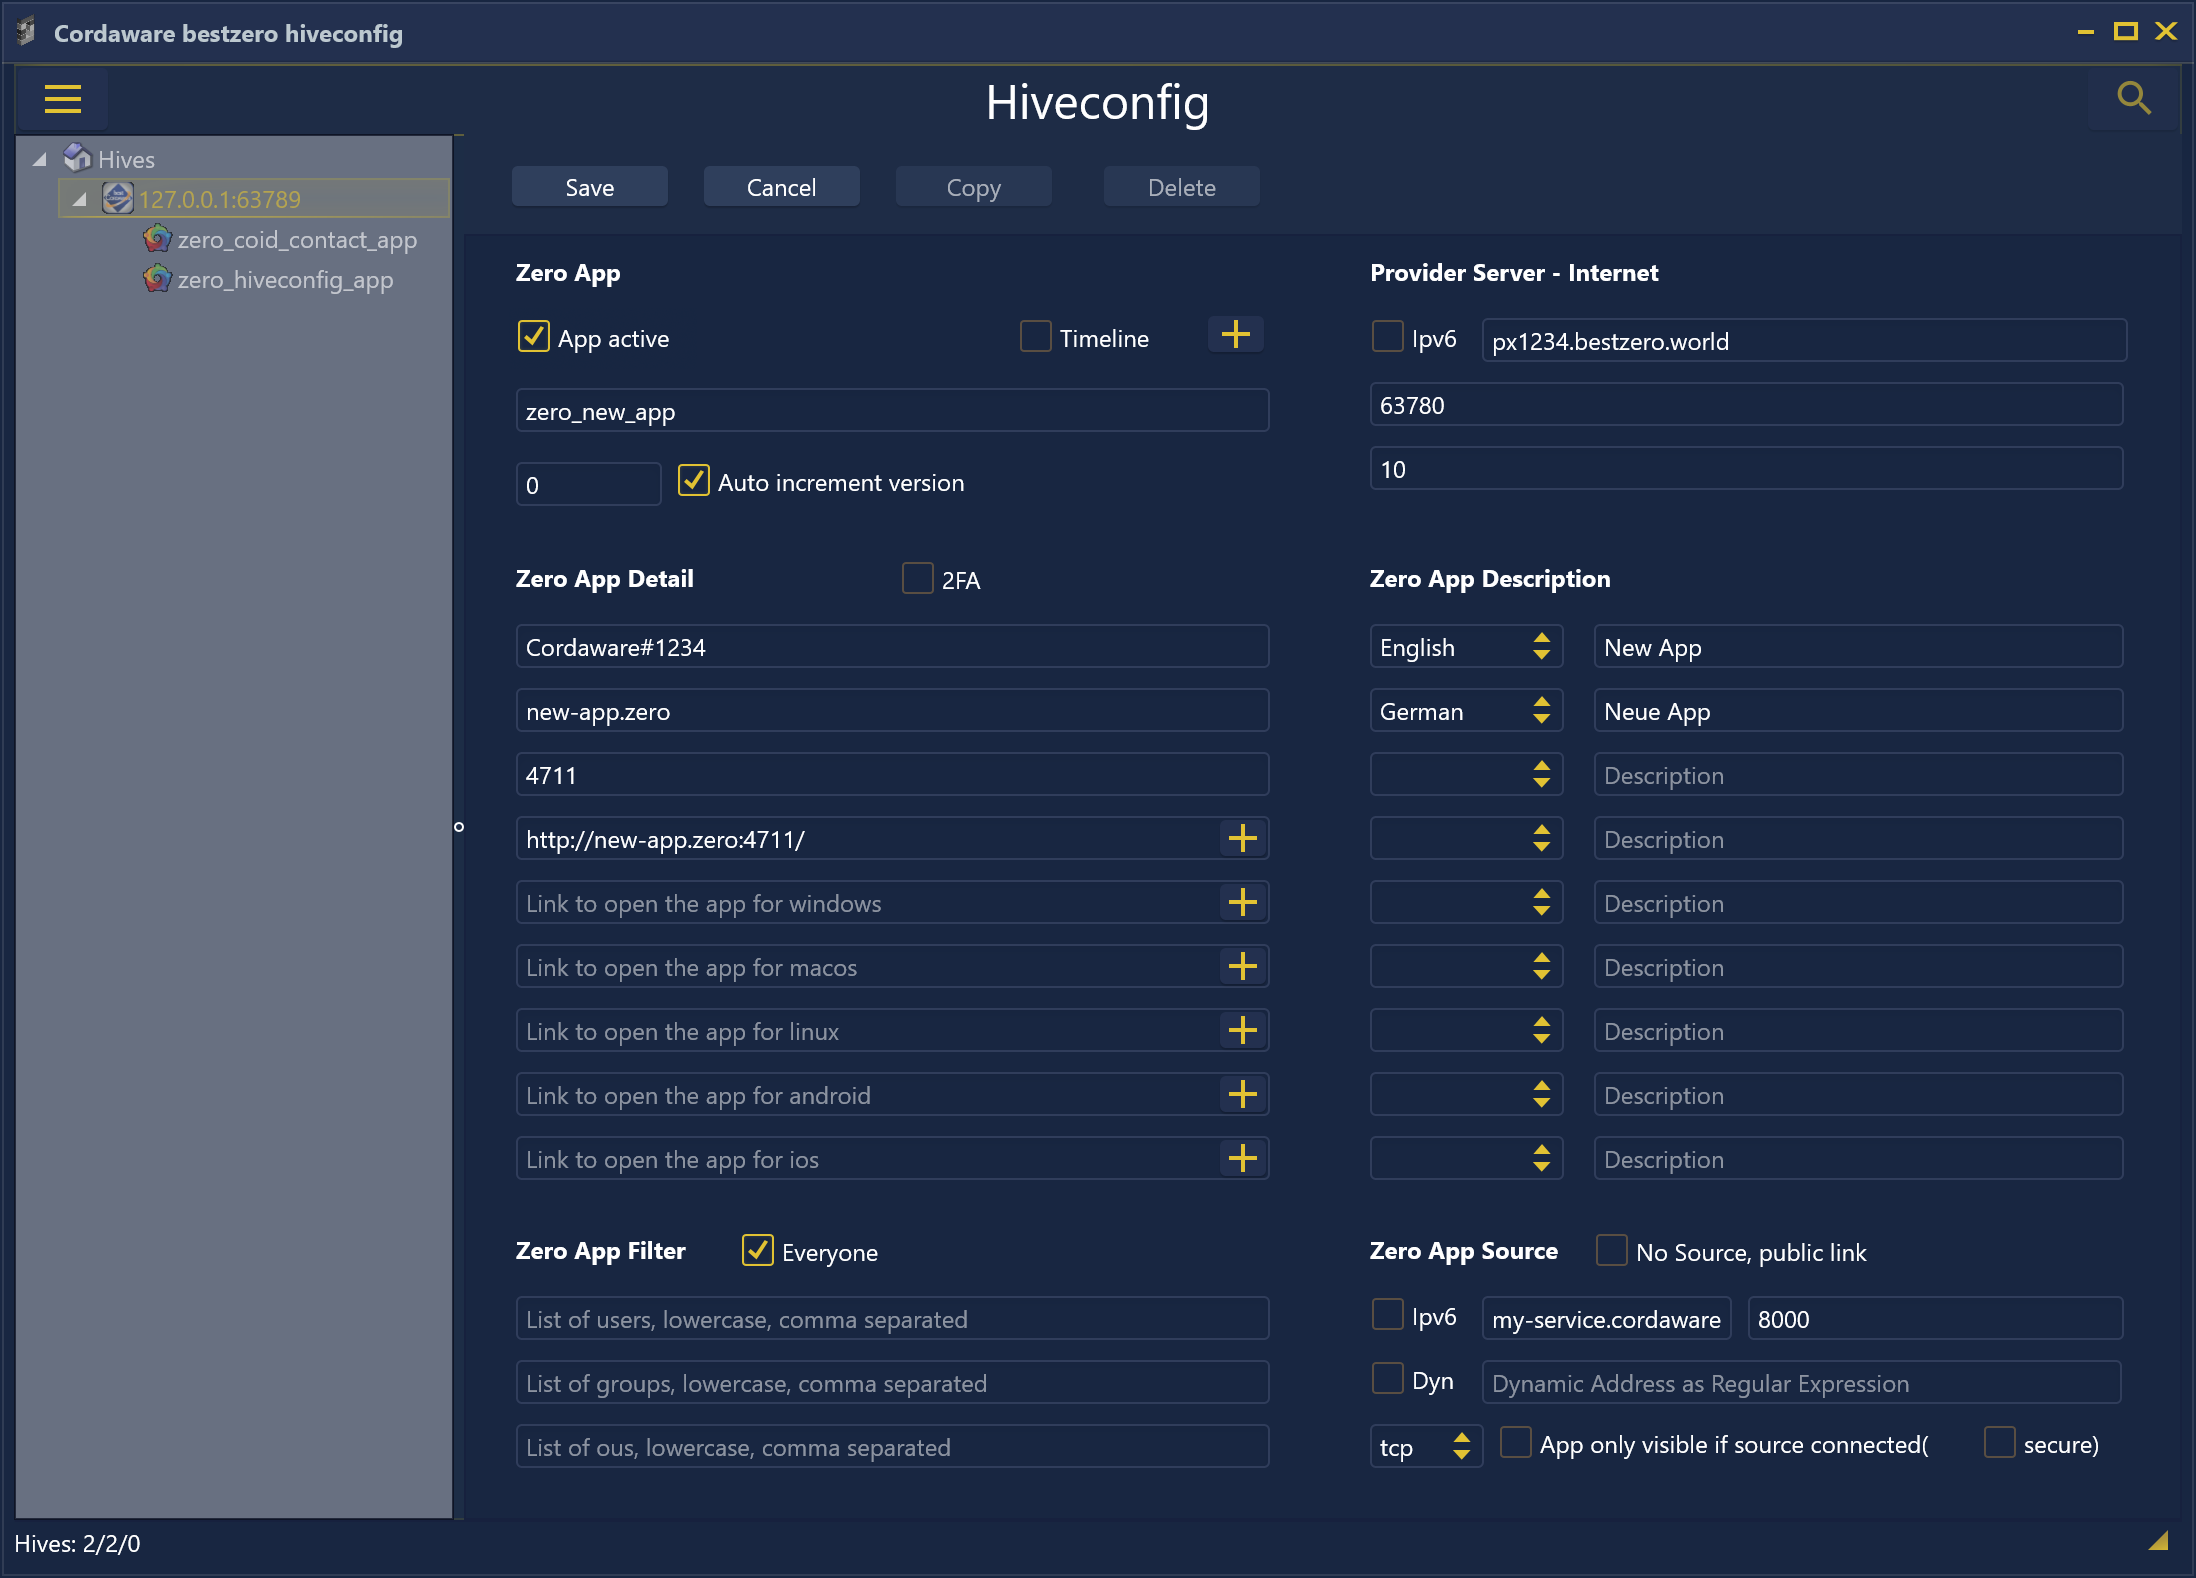
In this example, we create an App that opens the address "http://new-app.zero:4711/" when you click in the Appsbox.
Behind this address is a web application that can be reached from the point of view of bestzero® Hives via "my-service.cordaware.local" and port 8000.
It receives the description "Neue App" for German-language operating systems and "New App" for English-language operating systems.
It also gets the internal name "zero_new_app", which is displayed in the left sidebar of the Hive Configurator.
|
To learn how to customize an already created App, read the Customize an App chapter.
|
![]() .
.
![]() button and thus share it with your users' Appsbox.
button and thus share it with your users' Appsbox.![]() button.
button.![]() , as well as the Appsbox.
, as well as the Appsbox.


