In this chapter you will learn which time settings you can use to make your apps available in the Appsbox only at certain times.

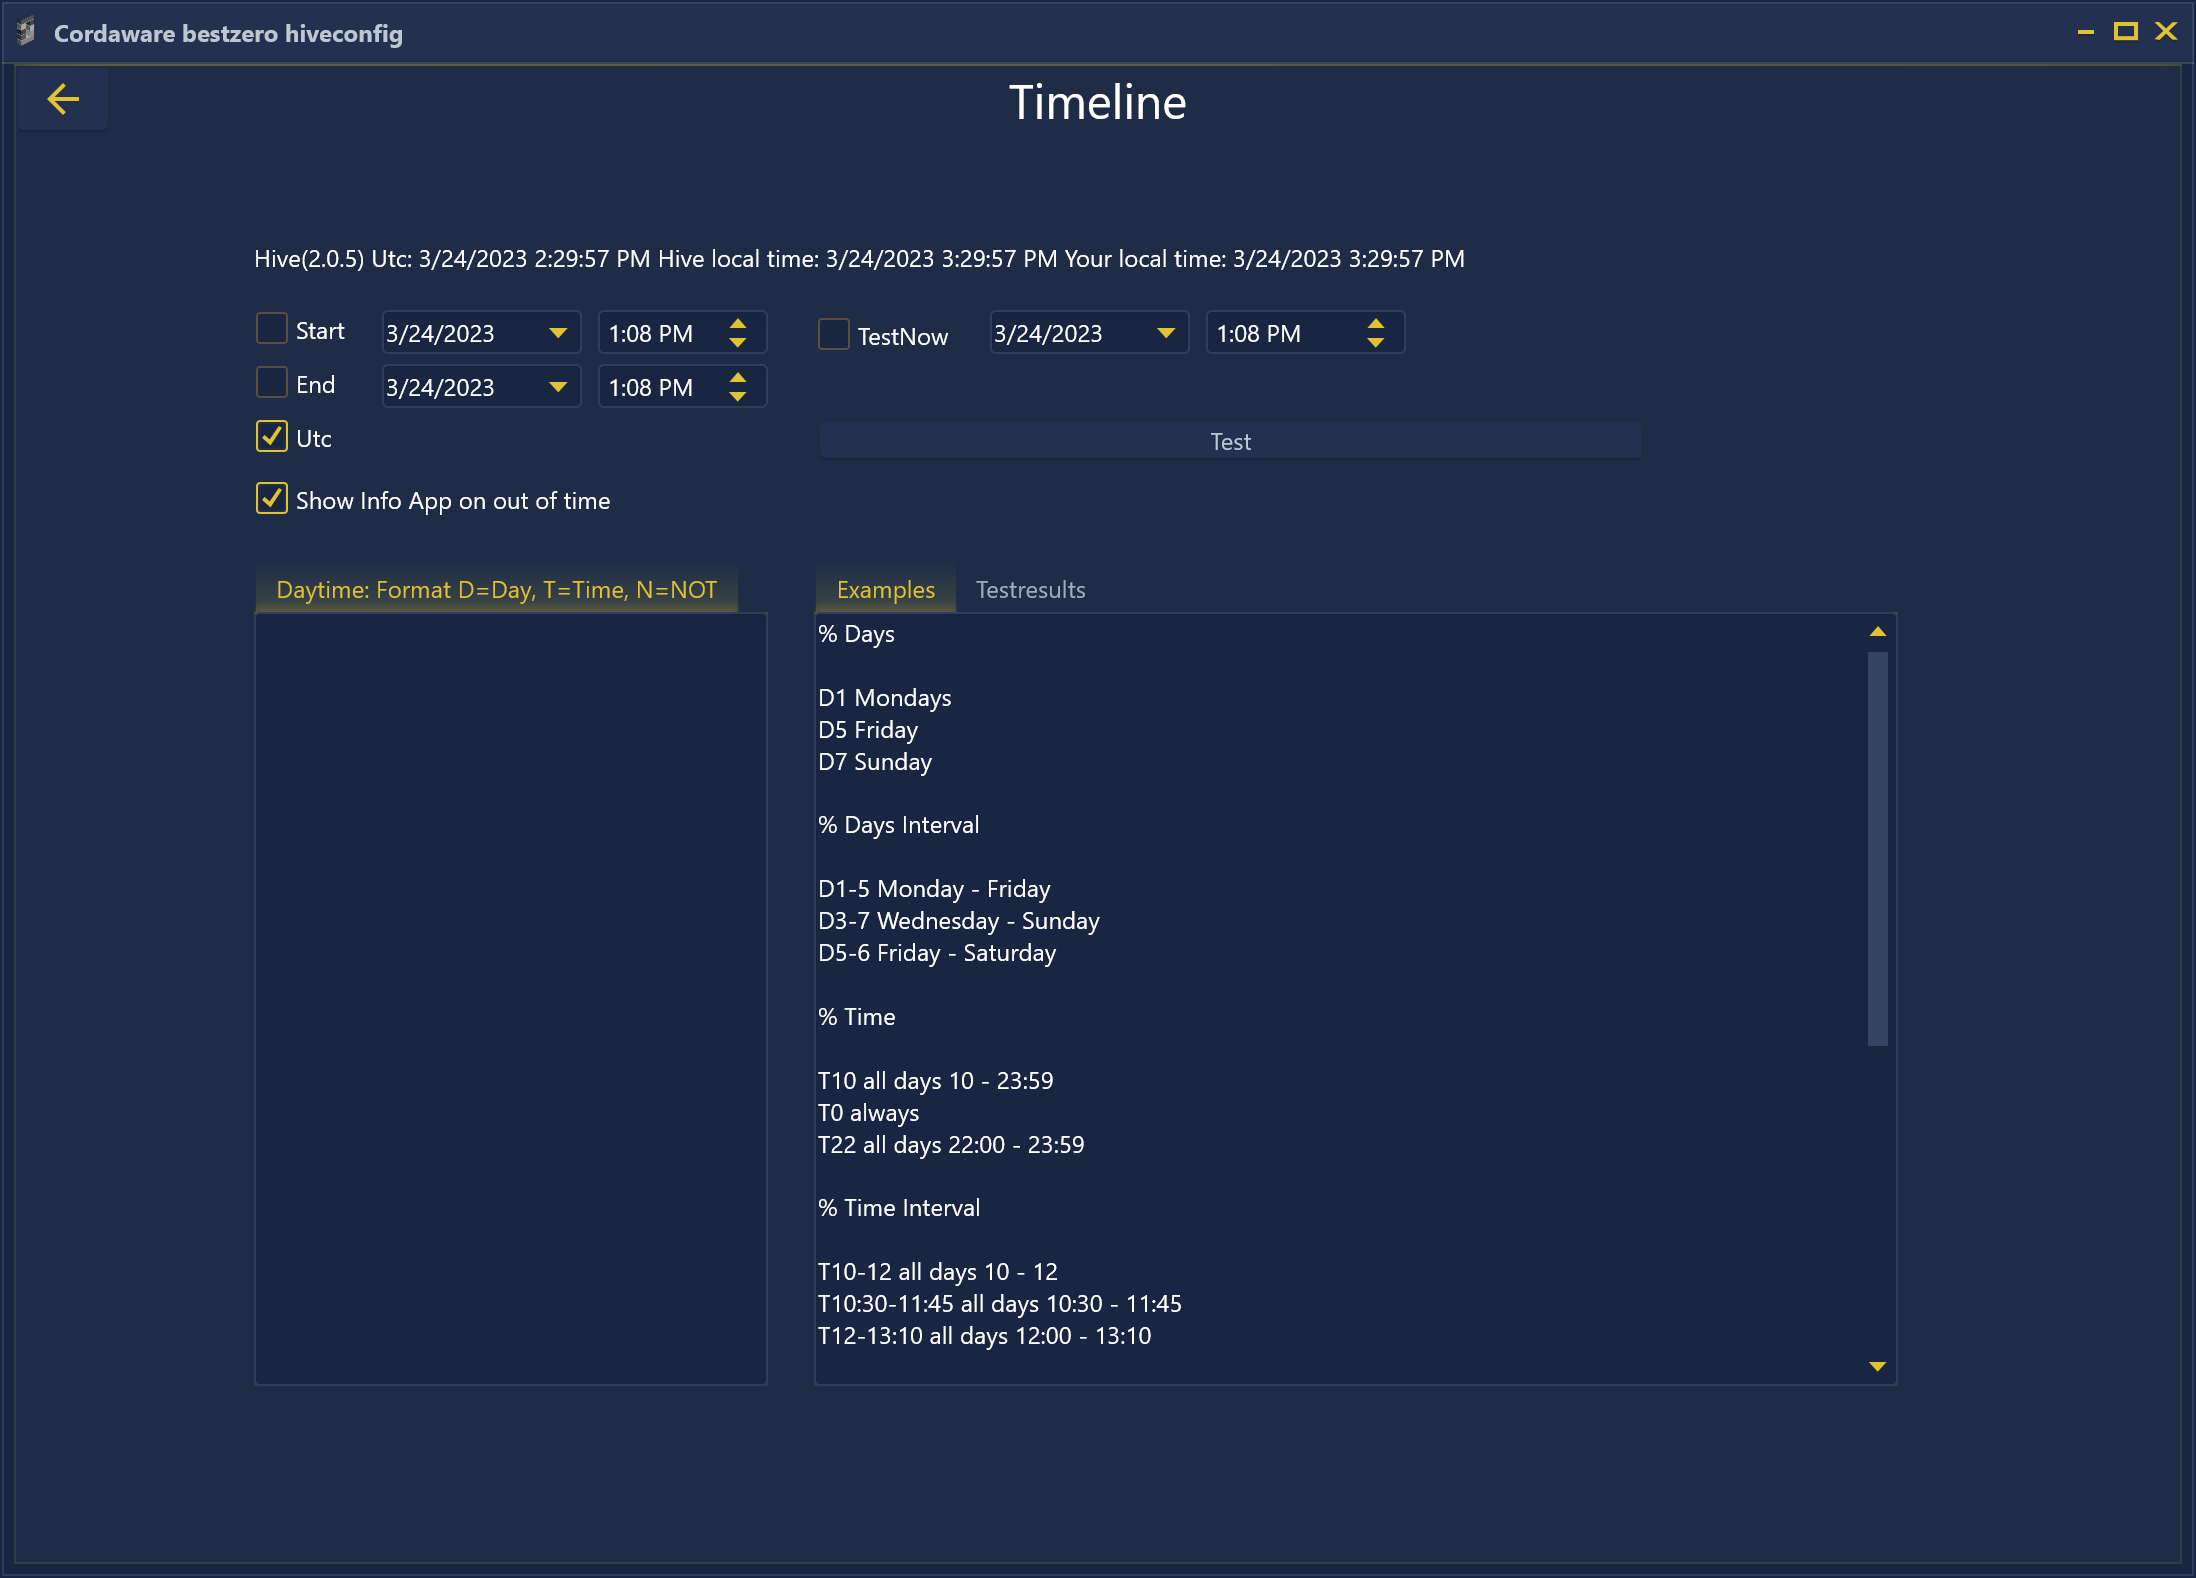
In this menu you can define the exact start and end time when your app should be available for your users.
With the help of the "Daytime" settings you can also make your app available periodically.
You can check your time settings at any time using the "Test" button to see if your app is available at the desired times.
Start |
Activate this checkbox if you want your app to be available to your users only from a certain start time. Also define the desired start date and time.
|
||
End |
Select this checkbox if you want your app to be available to your users only until a specific end time. Also define the desired end date and time.
|
||
Utc |
Select this check box if you want the defined dates and times to be treated as UTC.
|
||
TestNow |
Activate this check box if you want to use a specific reference time for checking your desired times. In addition, define the desired reference date and time.
If you deactivate this check box, the current time will be used as the reference time. |
||
Show info app outside time |
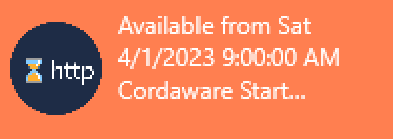
Activate this checkbox if you want your app, which is only available at a time in the future, to be displayed with the above mentioned note. If you deactivate this checkbox, this app will not be displayed, it will only be shown when the start time is reached. |
Daytime: Format D=Day, T=Time, N=NOT
With the help of this setting you can define your time settings periodically repeating.
The syntax of this functionality is explained in more detail below.
You can enter several lines for the "Daytime" here, all lines are then linked together by a logical OR.
You have the option to release an app only on certain weekdays. You only have to enter the character "D" followed by a weekday index as daytime.
If you want to link several consecutive weekdays you can also specify a range of weekday indices.
Examples:
|
You have the possibility to release an app on a certain day only in a certain time period. You only have to enter the character "T" followed by a time in the form "hh" or "hh:mm" as daytime. (h = hours, m = minutes)
Examples:
|
You can combine the two options above. To do this, simply write both setting options without separators within one line, starting with the definition of the weekdays.
Example:
|
You can also negate all previous options. To do this, simply write the character "N" in front of the corresponding weekday or time span definition.
Example:
|
When you are satisfied with your desired time settings, you can return to the app creation using the "Arrow" button and apply them there using the "Save" button.
Summary example
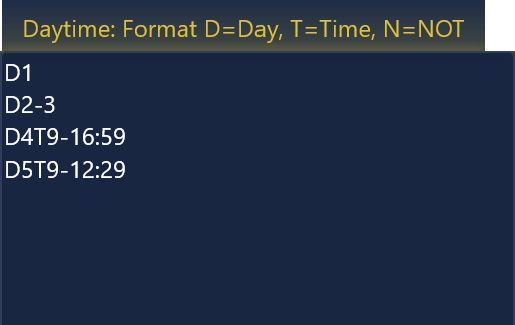
In this summary example, we will create a time setting that will make this app available to our users on Mondays through Fridays.
Here, the app is timed from 09:00 to 17:00 on Thursdays and 09:00 to 12:30 on Fridays.
The "Daytime" settings look like this:

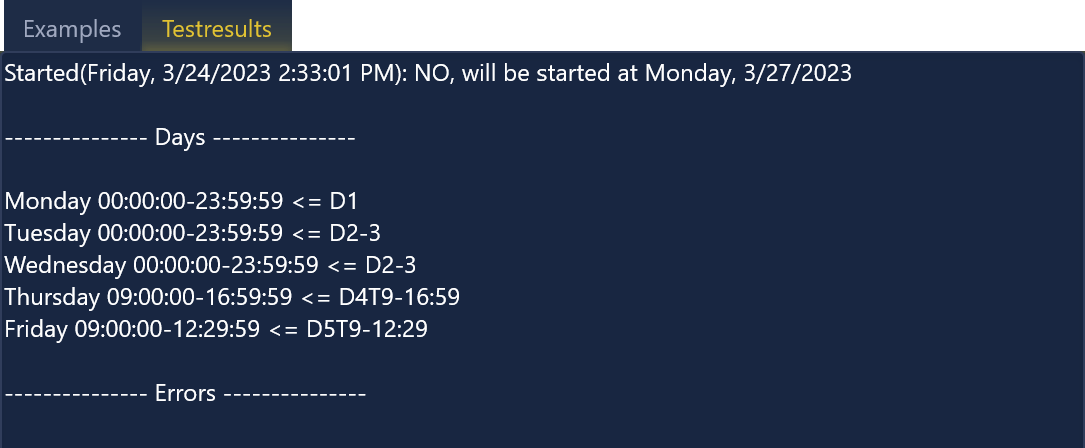
Clicking on the "Test" button results in the following test results:

Here you can see on which days the app is now available. In addition, at the end of the line it is indicated which of the rules defined at the beginning is responsible for the time restriction coming about for this day.
If multiple rules are used to restrict the time settings on one day of the week, they will be listed comma-separated at the end of the line.
