The device management enables you to maintain the devices you use for each organization and alert unit.
First call up the overview of the devices. Click on the following button:

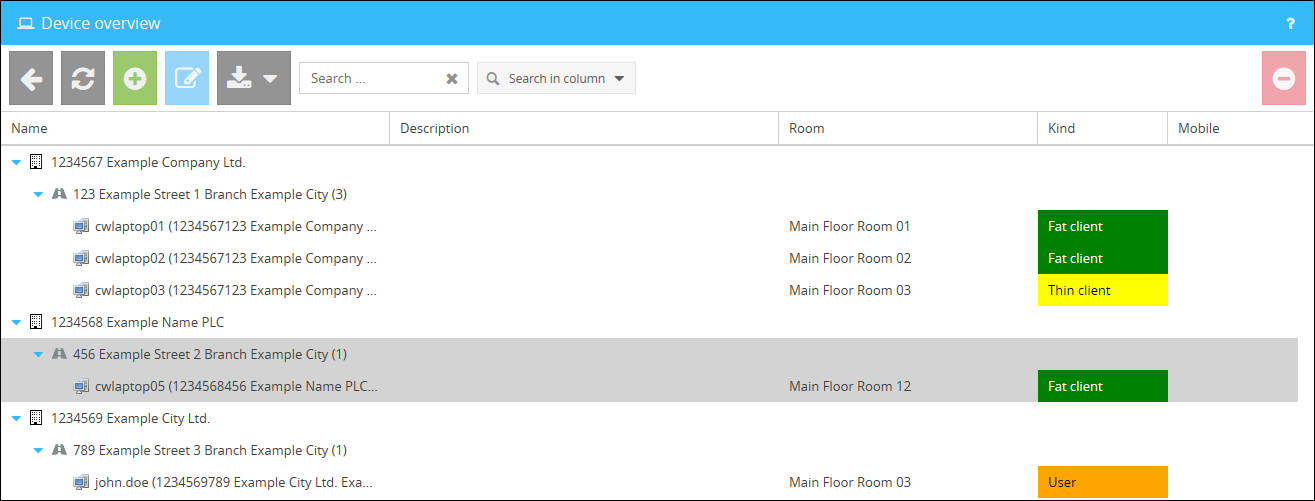
In the overview you will receive all information regarding your existing devices allocated to the respective alert units of the organizations.
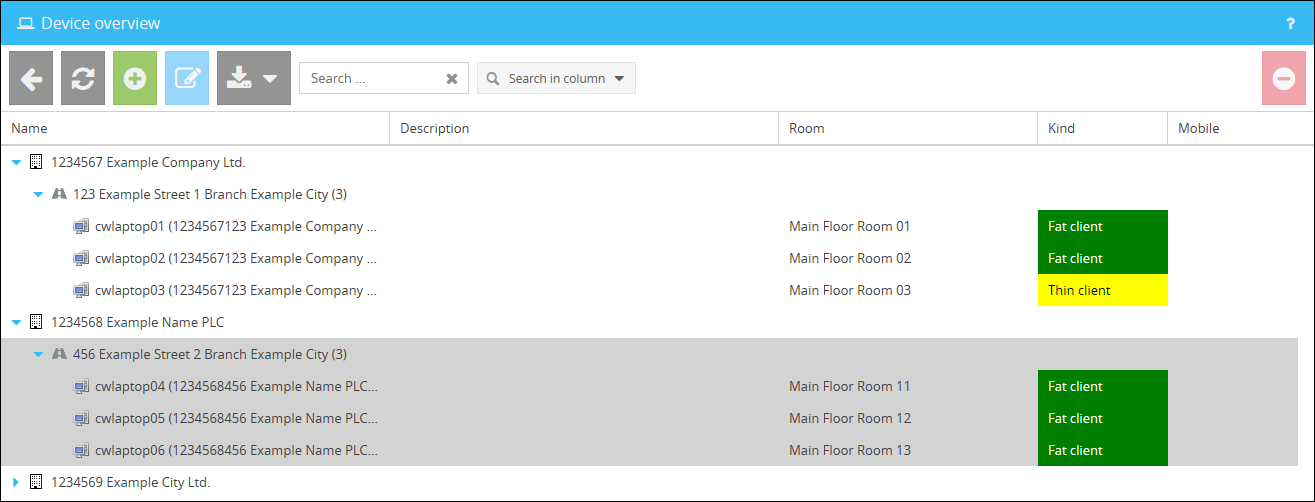
The following information is displayed in the device overview:
Name |
Displays the name of the organization |
Description |
Here you can read the optional description for your device. |
Room |
Displays in which room the defined device is located. |
Kind |
Displays the type of the device. A distinction is made here between |
Mobile |
Displays if the device is mobile or not. This information can not be defined while allocating a new device. It depends of the fact if the device ever changed its location through the Demand Info. More information about the Demand Info can be found in the chapter Demand Info. |
 , where alert units
  are allocated, in which devices
  are defined.
 ,
,  and
and
|
Please note:
If an alert unit is displayed with a grey background, this means that the respective alert unit is inactive. New devices can still be added to these alert units, but the functionality of the alert is not given in that moment. |
Adding new devices
New devices can be added by clicking on the button  in the overview. This will open an interface for the creation.
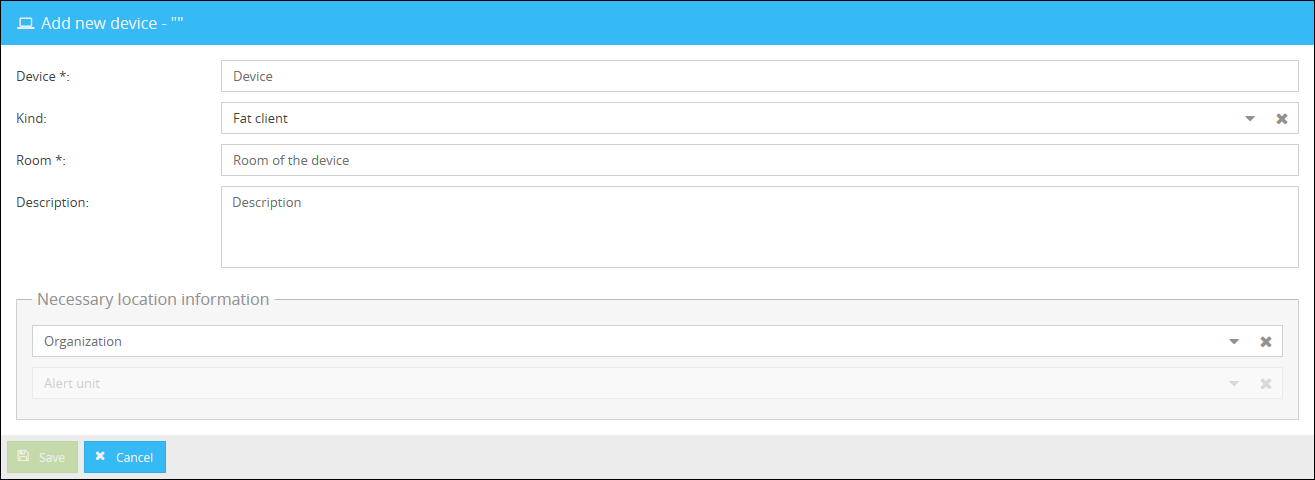
Device |
Enter the name of your device here. It has to be either the computer name or the user name of the respective device. |
Kind |
Select the type of your device here. You can select between Fat Client, Thin Client and User. |
Room |
Enter the room where the device is located. |
Description |
Here you can enter an optional description for your device. |
Organization |
Select the organization you want to allocate the device to by using the given menu. |
Alert unit |
Select the alert unit you want to allocate the device to by using the given menu. This can be done after selecting an organization. |
After saving the added device it will be displayed in the overview of the devices located inside the respective organization and alert unit with all its details.
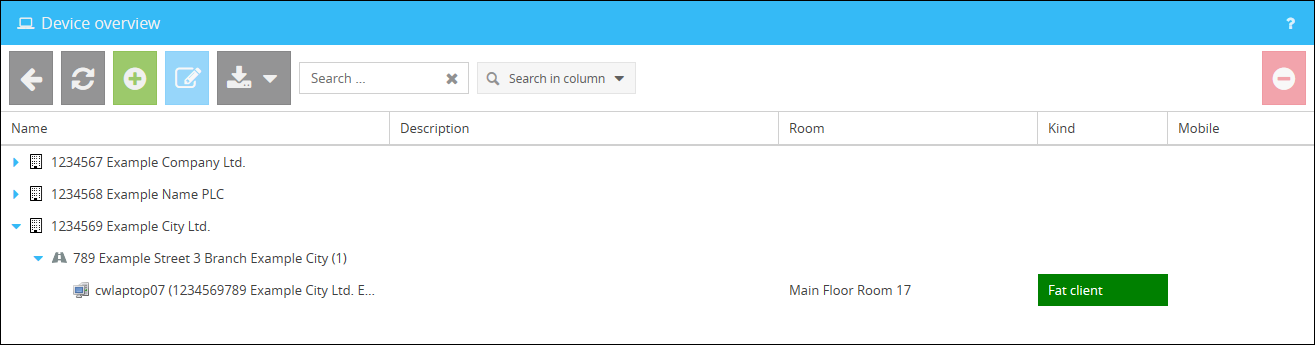
In the device overview you will additionally receive information about the amount of devices allocated to each alert unit through round brackets.
|
Please note:
An alert unit can only alert among oneself, when at least two devices are allocated to an alert unit. |
|
Note for the usage of user as devices
When adding an user as a device and this user will now login locally on any device, the respective Infoclient.ini of the user will be deleted and the Infolclient.ini of the Infoclient installation will be used instead, if not restricted by a setting. |
Importing and exporting devices
Since the manual creation and maintenance of data records with an extensive structure and therefore a high number of devices entails a high resource expenditure, you can import devices or export them if required.
The menu for these actions can be found in the overview of the devices by clicking on  .
.
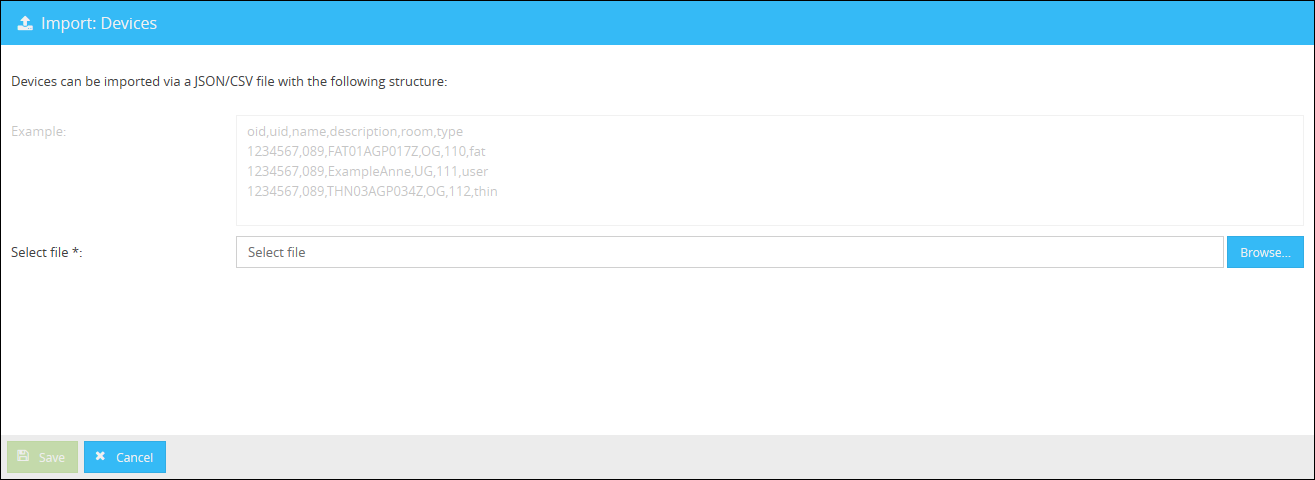
A list of devices can be imported as a CSV or JSON file. If you want to import a device list exported by the Alert Location Manager or a custom list, click the button ![]() after clicking the button .
after clicking the button .
The interface for the import of an CSV or JSON file will be displayed. In order to provide an import without any issue, the format of the CSV or JSON file should looks as follows.
You also have the option to start an automatic import via the ![]() button. For more information, see the chapter: Automatic import.
button. For more information, see the chapter: Automatic import.
Please make sure that the file you are using has UTF-8 encoding.
|
The file for an import of a CSV file could be structured like the following example:
"name";"description";"oid";"room";"type";"uid" "cwlaptop01";"Device description";"1234567";"Main Floor Room 01";"fat";"123" "cwlaptop05";"Device description";"1234568";"Main Floor Room 12";"fat";"456" "cwlaptop03";"Device description";"1234567";"Main Floor Room 03";"thin";"123" "cwlaptop02";"Device description";"1234567";"Main Floor Room 02";"fat";"123" "john.doe";"Device description";"1234569";"Main Floor Room 03";"user";"789" |
|
The file for an import of a JSON file could be structured like the following example:
[ {"name": "cwlaptop01","description":"Device description","oid": 1234567,"room": "EG Raum 01","type": "fat","uid": 123}, {"name": "cwlaptop05","description":"Device description","oid": 1234568,"room": "EG Raum 12","type": "fat","uid": 456}, {"name": "cwlaptop03","description":"Device description","oid": 1234567,"room": "EG Raum 03","type": "thin","uid": 123}, {"name": "cwlaptop02","description":"Device description","oid": 1234567,"room": "EG Raum 02","type": "fat","uid": 123}, {"name": "john.doe","description":"Device description","oid": 1234569,"room": "EG Raum 03","type": "user","uid": 789} ] |
The following section explains the structure of the files, their attributes and values.
oid |
The identification number of the organization to which the device should be assigned to. |
uid |
The identification number of the alert unit to which the device should be assigned to. |
name |
The computer name of your fat or thin client or the username of your user. |
description |
The description of your device. |
room |
The room to which the device should be assigned to. |
type |
The type of device. You can define whether it is a fat client (fat), thin client (thin) or user. |
Select the CSV or JSON file you want to upload by clicking on the button  and confirm the Upload by clicking on the button
  .
.
The corresponding devices are now displayed in the overview of the devices in the corresponding alert units of the organizations.
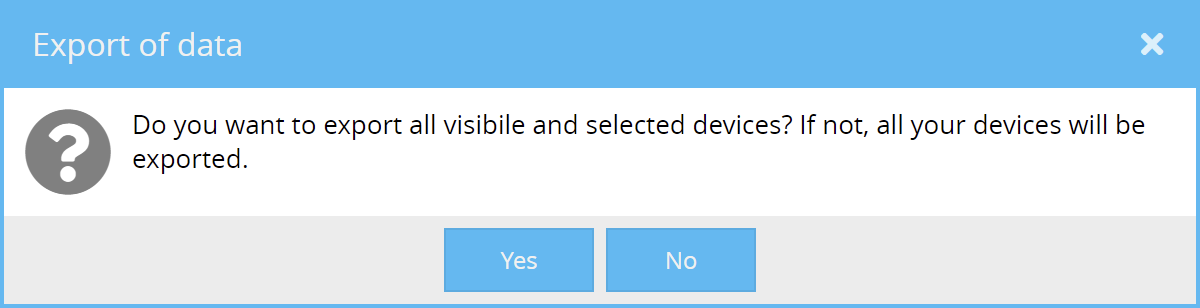
Exporting devices
An export of your existing data in the Alert Location Manager as CSV or JSON file is possible through the buttons ![]() and
and ![]() after clicking on the button .
after clicking on the button .
When you select individual devices, you can decide whether you want to export only these devices or all of them.
|
An exported CSV file is structured as follows:
"name";"description";"oid";"room";"type";"uid" "cwlaptop01";"Device description";s"1234567";"Main Floor Room 01";"fat";"123" "cwlaptop05";"Device description";"1234568";"Main Floor Room 12";"fat";"456" "cwlaptop03";"Device description";"1234567";"Main Floor Room 03";"thin";"123" "cwlaptop02";"Device description";"1234567";"Main Floor Room 02";"fat";"123" "john.doe";"Device description";"1234569";"Main Floor Room 03";"user";"789" |
|
An exported JSON file is structured as follows: [ {"name": "cwlaptop01","description":"Device description","oid": 1234567,"room": "EG Raum 01","type": "fat","uid": 123}, {"name": "cwlaptop05","description":"Device description","oid": 1234568,"room": "EG Raum 12","type": "fat","uid": 456}, {"name": "cwlaptop03","description":"Device description","oid": 1234567,"room": "EG Raum 03","type": "thin","uid": 123}, {"name": "cwlaptop02","description":"Device description","oid": 1234567,"room": "EG Raum 02","type": "fat","uid": 123}, {"name": "john.doe","description":"Device description","oid": 1234569,"room": "EG Raum 03","type": "user","uid": 789} ] |
The files generated by the export can easily be re-imported in their respective existing formats. A description of the individual values can be found in the section Importing Devices.