In addition to setting up and administering the ALM, the use of mobile workstations is nowadays a fix part of a company structure, especially when there are several locations or field staff. In order not to make the administration effort of the ALM dependent of these employees, you have the possibility to set up a so-called Demand Info. The Demand Info is a feature of the ALM with which these employees can proactively maintain their own location. You get the possibility to do this as soon as they establish a connection to the Infoserver with your Infoclient.
Setting up a Demand Info
The functionality of the Demand Info is deactivated by default.
To set up a demand info, first open the settings in the overview of the ALM using the following button:
Switch to the Mobile tab in the settings:
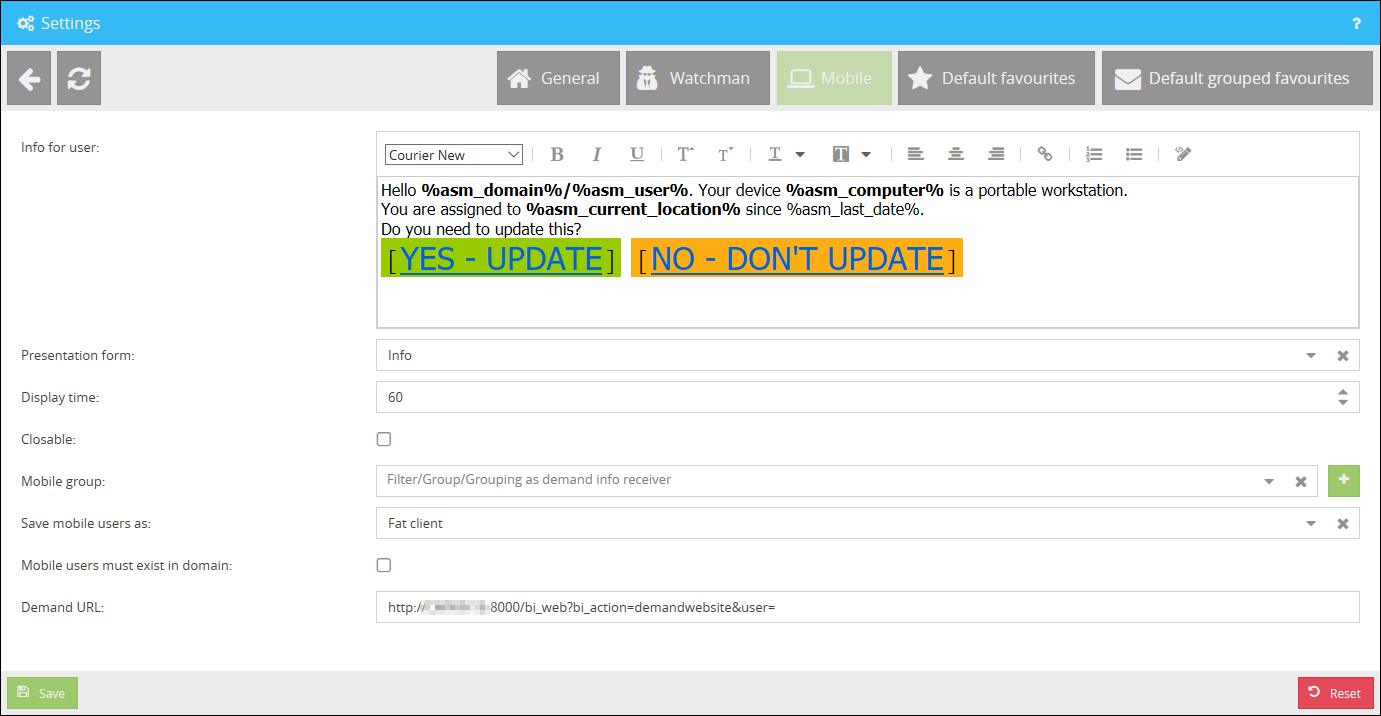
Info for user |
Here you can edit the information that appears to your mobile users as soon as they log on to a mobile workstation. |
Presentation form |
The display form of the info can be edited here. You can differentiate between a news ticker and a popup notification. |
Display time |
The display time of the info (in minutes) can be adjusted here. |
Closable |
With this option you can determine whether the info can be closed or not. |
Mobile group |
Enter a filter, a group, or a grouping here which should receive the demand info on the mobile workstations. |
Save mobile users as |
Select here how the mobile users will be entered after changing location. You can choose between Fat Client, Thin Client or User. |
Mobile users must exist in domain |
Here you can specify whether the mobile users must be present in the domain or not. |
Demand URL |
Here you can enter the URL to the Demand website where your mobile users can enter their master data. |
In the default template for the Demand Info are used several environment variables, explained as follows:
%asm_domain% |
Displays the domain of the user who gets the Demand Info. |
%asm_user% |
Displays the username of the user who gets the Demand Info. (sAMAccountName) |
%asm_realname% |
Displays the alarm displayname of the user who gets the Demand Info. |
%asm_computer% |
Displays the computername of the device. |
%asm_current_location% |
Displays the current organization ID, alert unit ID, the name of the organization, the name of the alert unit and the additional address information. |
%asm_last_date% |
Displays the last time the location of the device was edited. |
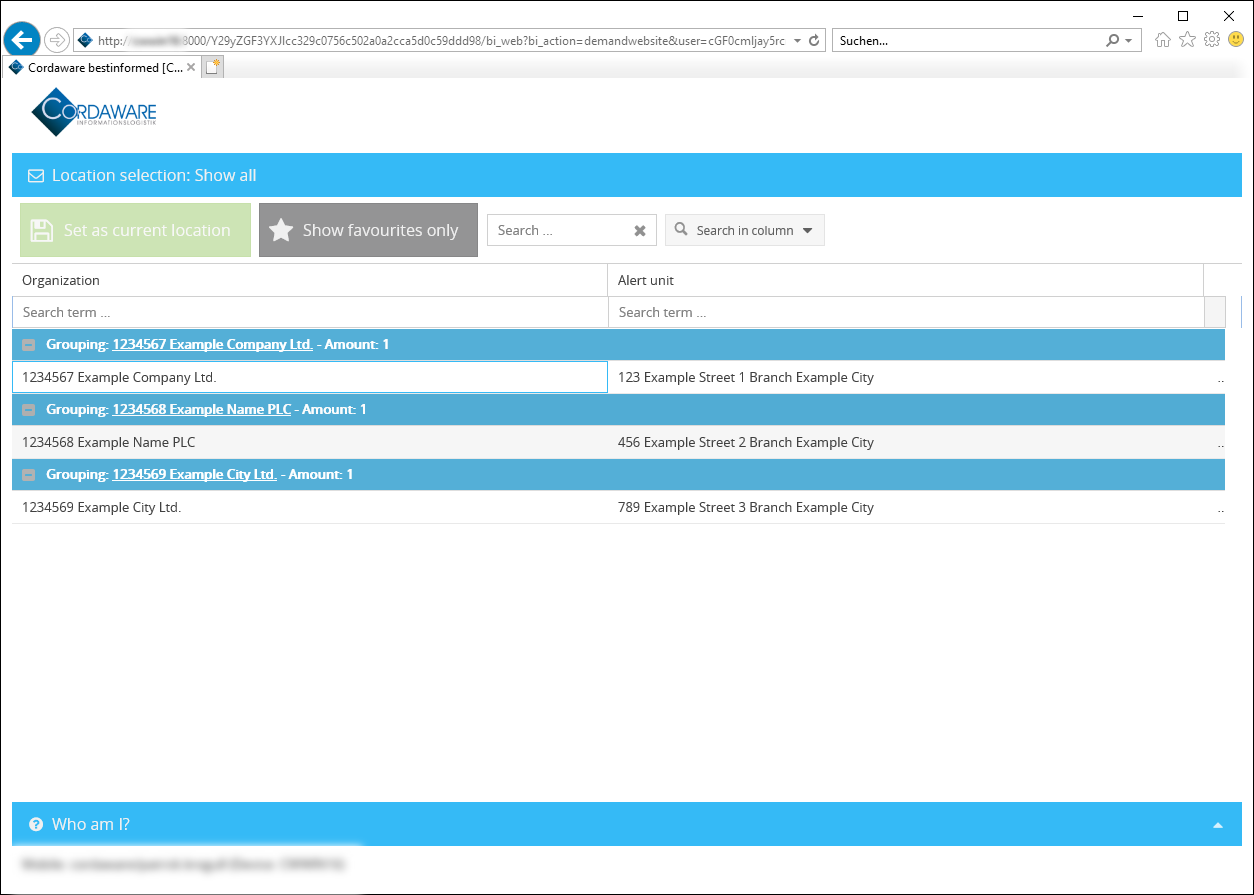
In the field Mobile Group you can use any filter creating by using the Filter app and enter it here. All users who log on to your PC will now have the opportunity to update their location:

If you want to update your location, you can click on the hyperlink Yes - Update to open the web interface for changing the location.
In this interface you can now select your new location from a list of possible locations:
|
As an administrator you can also edit the list of favourites and create additional favourites groupings. Further information can be found in the chapter Location Manager settings. |
After you have selected your new location you can now define your room. The room is displayed to the recipients of your alert message.
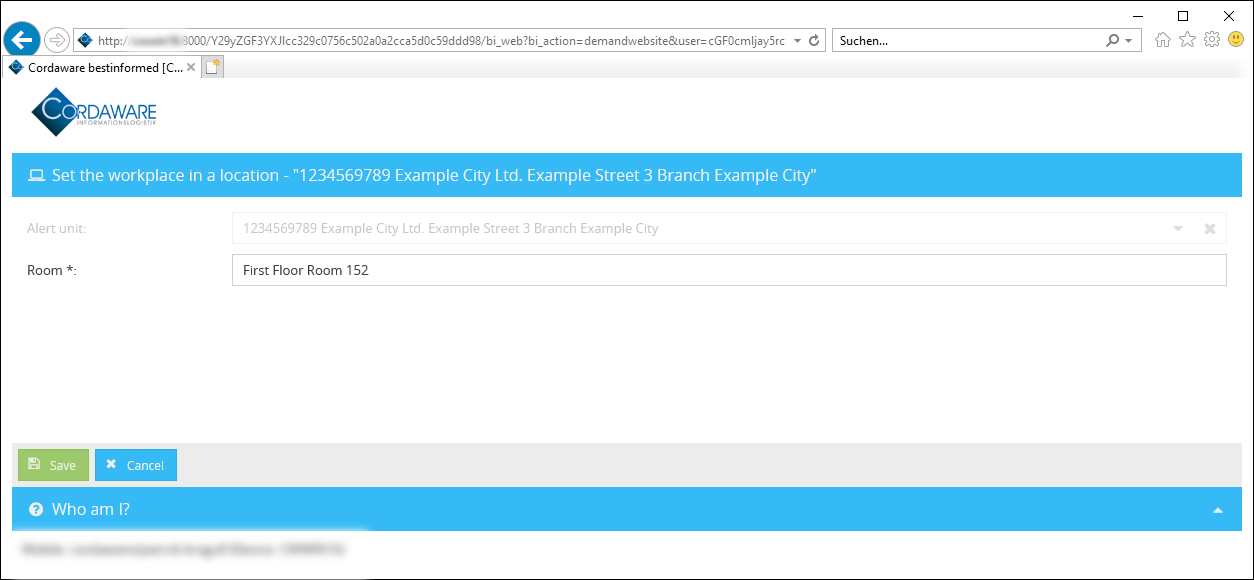
In the last step you can save your adjustment and send alerts without any problems.