With the Info Overview all sent Infos will be displayed and can be managed through a view. All Infos, which are active or have been ended/cancelled will be listed here. Every Info will be automatically moved into the Infohistory 24 hours after its end/cancelation. If needed, the Infos can be moved manually into the history.
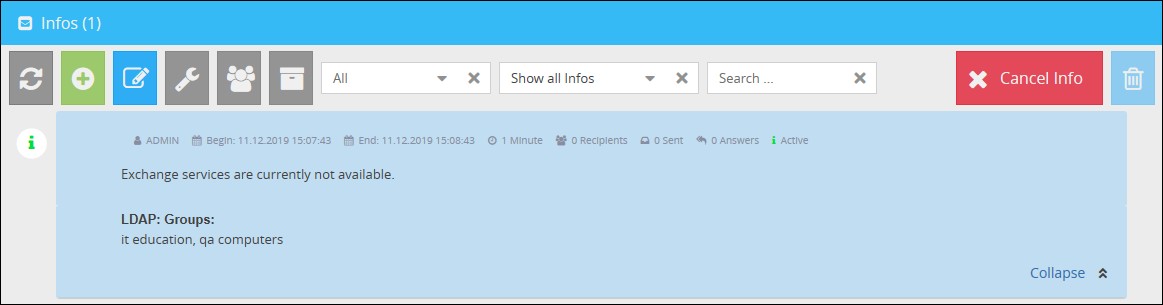
All Infos in the Info Overview are listed in a descending order depending of their creation date. Each Info in the overview will be displayed with the following details by default: Info text, creators profile, creation date, display time and status. The status of the Info is marked by a colored information sign. Active Infos have a green, ended Infos a yellow and cancelled Infos a red sign. You can double-click on an Info in the Info Overview to inspect more details as just the ones displayed in the table.
In the Info Overview you can open the Infohistory where you can examine older Infos.
Creating a new Info
A new Info can be created by clicking on the button ![]() (New Info) in the toolbar. The Infoeditor will open up, where you can create, configure and send out your Info by saving it.
(New Info) in the toolbar. The Infoeditor will open up, where you can create, configure and send out your Info by saving it.
Editing Infos
Only active or waiting Infos can be edited. In order to edit such an Info, select it and click on Edit Info in the toolbar.

The Infoeditor will open up and the predefined values will be shown in the editor. Those can be edited after your requirements (e.g. changing the layout or the recipients).
Copying Infos
In order to copy the settings of an existing Info, select the Info in the Info Overview and click on Copy Info through the ![]() (Info Management) menu.
(Info Management) menu.
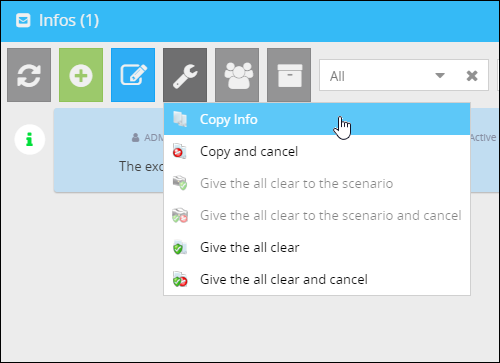
The Infoeditor will open up. The editor is now predefined with the settings of the copied Info. Saving the Info will create a new one.
Canceling an Info
In order to cancel an active Info, select the active Info in the overview and click on Cancel Info in the toolbar.
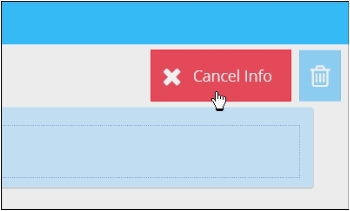
The Info will be cancelled afterwards. Clients, where the cancelled Info has not been displayed yet, will not get it anymore. Active Infos can be cancelled and copied at once in order to create a new Info afterwards. Select an Info and click on Copy and cancel in the toolbar through the ![]() (Info Management) menu.
(Info Management) menu.
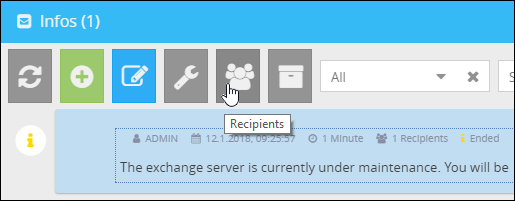
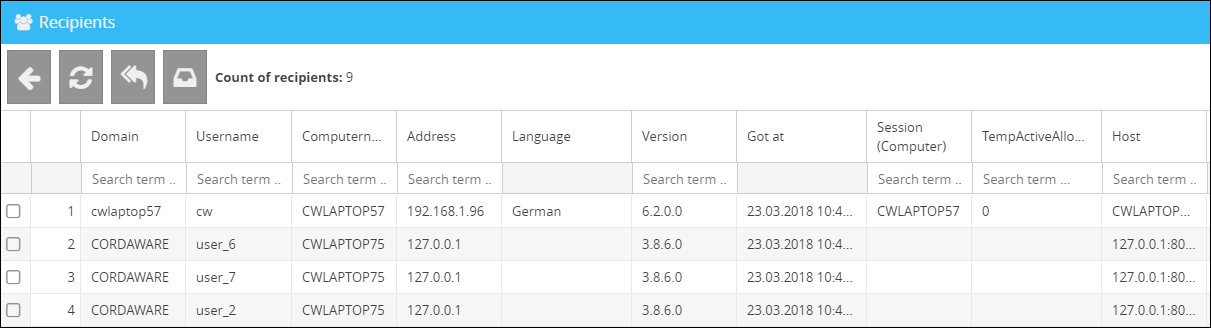
Recipients
In order to display the recipients of an Info, select the Info in the Info Overview and click on the button ![]() (Recipients). The recipients will be listed in a table afterwards.
(Recipients). The recipients will be listed in a table afterwards.

The absolute number of recipients will be shown here, that means the client (not the user) has confirmed the reception of the Info back to the server.
With an click on the button  (View responses) you get to the overview of the responses. More details regarding client responses can be found here.
The button  (View sent Infos) will lead you to an overview of where you can see the Info who was sent by the Infoserver.
Here are the clients to which information was sent.
Additional details in the overview from version 6.1.1.0 and higher
In the info overview additional details regarding the recipients can be shown.
In order to view these details click on the button in the bottom right corner of the info.
Detailed information regarding the recipients will then be displayed below the info.