This example describes step by step how to create a new alarm in Cordaware bestinformed version 6.
1) Create a template for your new alarm. Use the New Info app for this purpose.
2) Open the overview "My alarms".
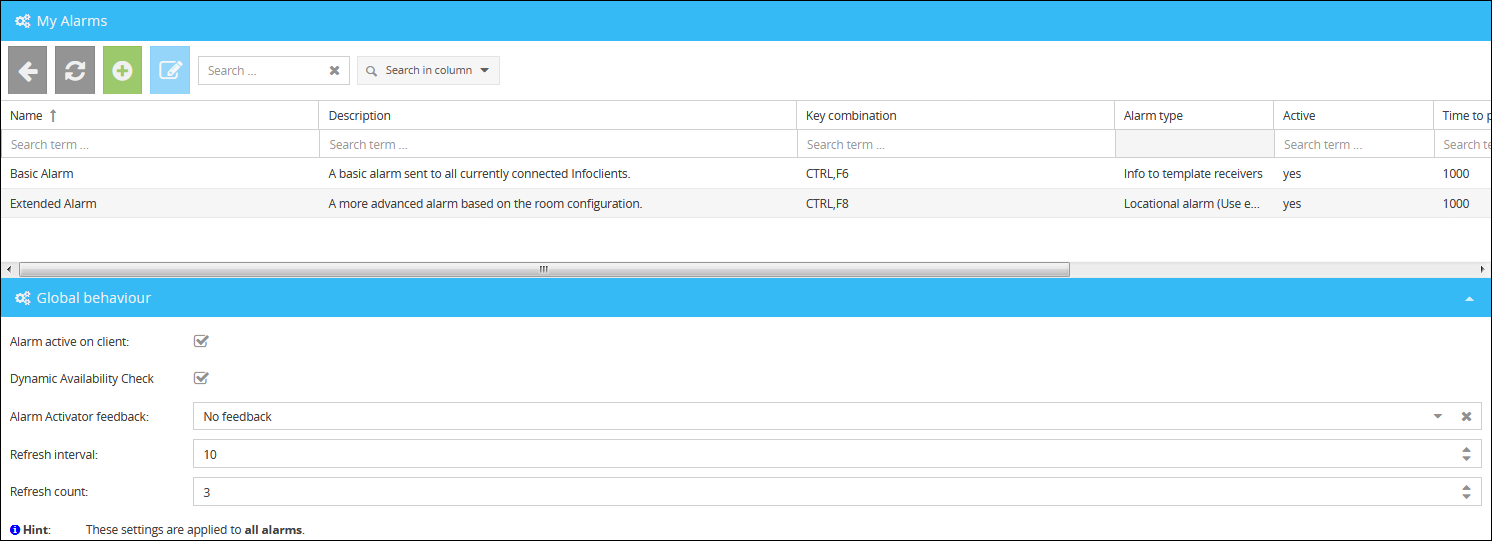
Now open the mask with a click on  to create a new alarm.
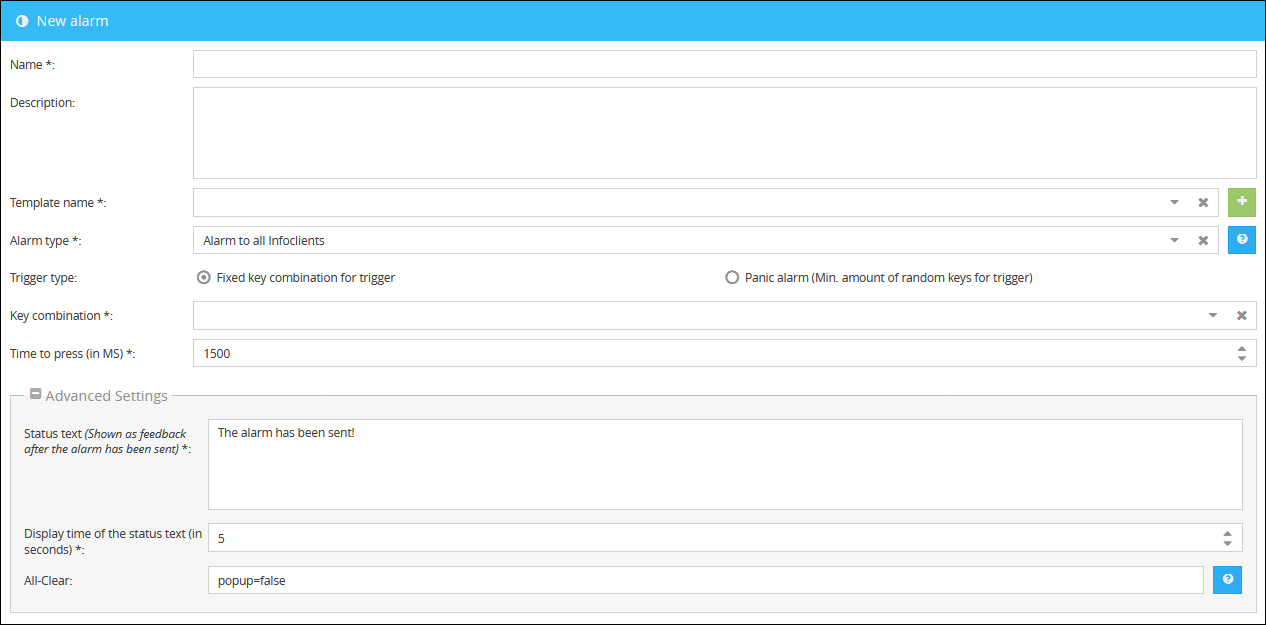
In this mask you can now define the settings of your new alarm. The following settings are available:
Name |
Enter the name of your new alarm here. |
Description |
Here you can enter a description of your alarm. |
Template name |
Select here the name of the template you want to send with the alarm. |
Alarm type |
The you can specify the type of alarm
Alarm to all other rooms: The alarm is sent to all currently connected Infoclients in rooms other than the trigger room. Unassigned clients won't receive an alarm!
Locational alarm (Use escalation levels): The alarm is sent as configured in the alarm circles.
Locational alarm within template receivers: Identical to "Locational alarm (Use escalation levels)". However, the recipients can be further restricted with filters etc. specified in the Template.
Info to template receivers: The recipients specified in the Template's filters etc. will receive the alarm, ignoring alarm circles.
Info to alarm sender: This alarm type is displayed exclusively to the client triggering it. Use this setting to test your alarms |
Trigger type |
Determines the trigger type of your alarm. (Key combination or panic alarm). You can find more about the panic alarm here. |
Key combination |
Define your individual key combination for this alarm here. |
Time to press (in MS) |
Select the press time in ms here. The alarm is only triggered when the key combination has been pressed and held for the specified print duration. |
Advanced settings
Status text |
The text entered here is displayed when the alarm has been sent. |
Display time of the status text |
Duration for how long the status text is displayed. |
All-Clear |
With the settings entered here, the all-clear message can be designed even further. |
Script |
Here you can store one or more filters of the Script type, which will be executed immediately after the alarm is triggered. |
Now check the box in the lower right corner to activate the alarm. You can then save your settings.
|
Attention! If you want to display the trigger name or the trigger location via ScriptVars in your alarm template, the alarm type Location based alarm (use escalation levels) must be selected! |