With the following settings you can customize the alarm plan.
Integrate your own header:
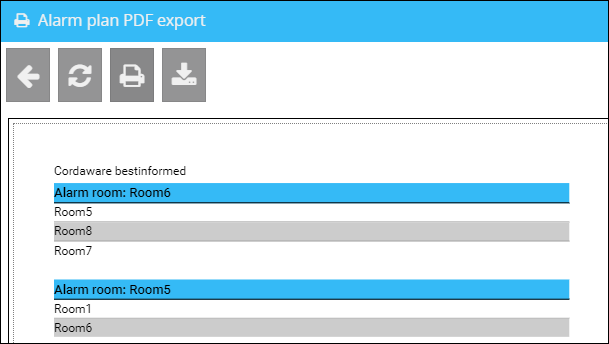
You can insert your own header (e.g. a company logo) above the table in the alarm plan. By default you will see the logo of Cordaware bestinformed here.
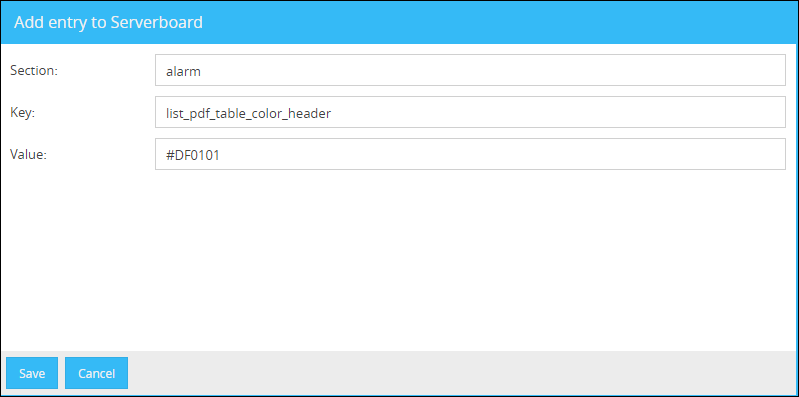
To insert your own header in the alarm plan, it is necessary to create an entry in the Serverboard (System -> Serverboard).
1. Click on the button ![]() (New Serverboard entry) to open the screen for an input of the entry.
(New Serverboard entry) to open the screen for an input of the entry.
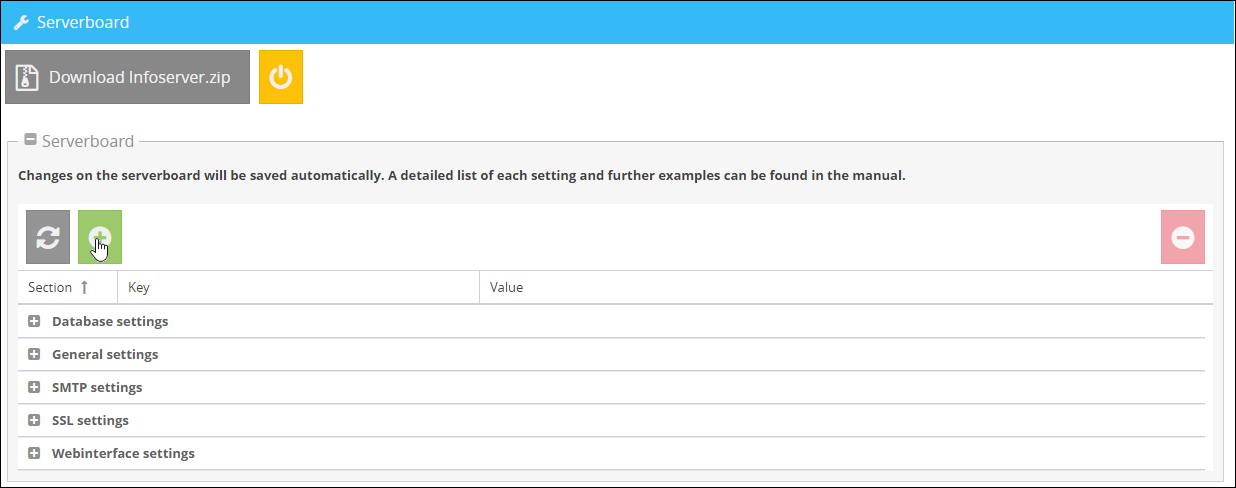
2. In this example, the value [] is set. If this value is set, the alarm plan only displays the table and removes the header.
The key for the header is: list_pdf_header
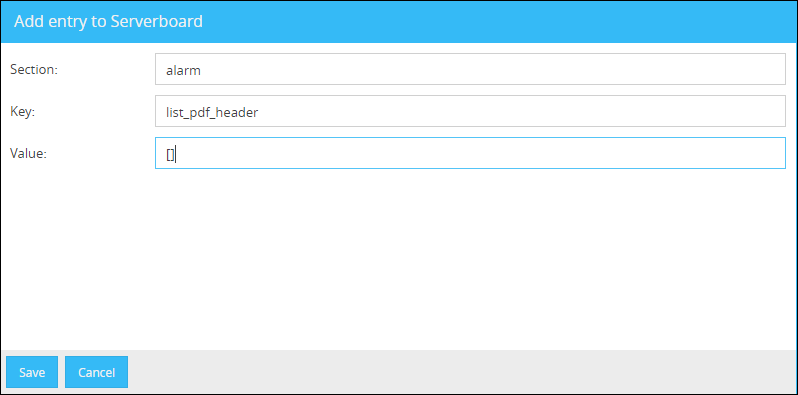
In the field Value, you can set the following items:
•Image
{"image" : "encoded image"}, in the "encoded image" field, enter the code of the
encoded image.
How to encode an image is shown in the following example:
At first, follow the link https://www.base64-image.de/ , on the opening page, you can select an image file. If you click on the ENCODE button a window will open where you can get the encoded code (see below, red market) for the entry on the Serverboard.
|
Please note: The suggested link is just an example of how to encode a picture file. Of course you can also use other tools. |
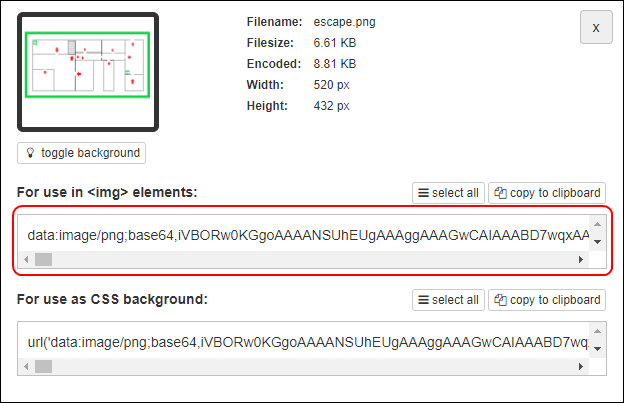
|
Please note: We recommend to create the value completely in an editor and make a copy. This copy you can insert into the Serverboard and save it. |
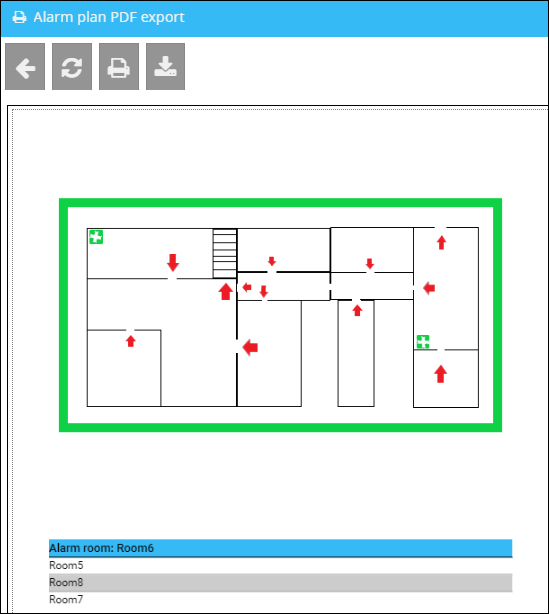
After saving the entry in the Serverboard, you will see your setting in the overview.

The entry is immediately implemented and the header is now visible in the alarm plan.
•Text
{"text" : "Hello World!"}, in the field "Hello World!" you can insert any text.

|
Please Note: If you want to use quotation marks in the text, use \ ". |
The text as header in the alarm plan:
In addition, with the value "margin": [left, top, right, bottom] you can define the gap to other elements. The 4 placeholders (left, top, right, bottom) are to be replaced by integers.
The following example combines the elements text, image, and gap:
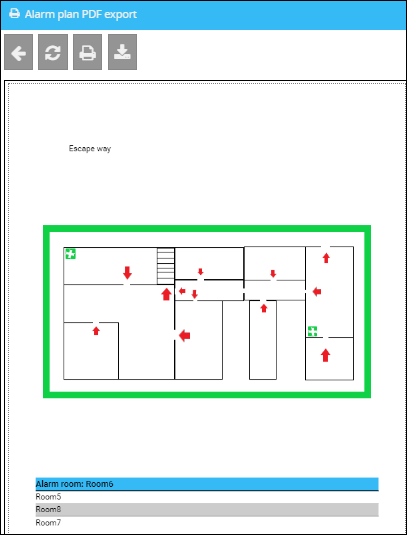
The value in the server board is [{"text": "Escape way", "margin": [50, 50, 50, 50]}, {"image": "data: image / png; base64, ..... "}].
This must start with [ and ends with ]. The element "margin", which defines the gap to text or image is inserted behind the corresponding element.
|
Please note: The above value is not complete and is only an example of how elements are combined and entered as a whole value into the server board. |
Customize the colors:
In addition to the integration of an individual header, it is also possible to customize the table of the alarm plan in color (e.g. to your company).
It is possible, to customize three different colors:
•The color of the title (1)
Key: list_pdf_table_color_header, value: enter a hexadecimal color code here
(default value: #35baf6)
•The color of the rooms (2,3)
Key: list_pdf_table_color1 (3) value: enter a hexadecimal color code here
(default value: #cccccc)
Key: list_pdf_table_color2 (2) value: enter a hexadecimal color code here
(default value: empty)

To do a customization, navigate to Serverboard (System -> Serverboard). Click on ![]() (New Serverboard insert)
(New Serverboard insert)
This will lead to a forum.
After saving this dialog, the changes made are immediately visible on the alarm plan.
