A main feature of Cordaware bestinformed is the simple inclusion of an existing domain or directory service. Appropriate recipient Filters or recipient Groups can be created with the help of existing and centrally administrated data.
Additionally you can realise a Multiuser concept with the binding of domains, where authorized domain users can log in to certain profiles with assigned rights and resources. Read more about this topic in the chapter Profiles.
With the App Domains (System -> Domains) you can register your domains in Cordaware bestinformed. In this app an infinite amount of domains can be bound to the system of Cordaware bestinformed.
|
Please note:
Please also take note of the additional information regarding the hardware usage in combination with the "domain connection" app. |
Domain registration
In the App Domains you can register a new domain through the button ![]() (New). A variety of settings is available in the appearing form.
(New). A variety of settings is available in the appearing form.
Here is an overview and explanation of the different setting opportunities (* = required field):
Server-settings
Appropriate settings for the connection and authentication to the host of the directory service will be made here.
Field |
Description |
Domain |
|
Domain (Alias)* |
Enter an alias for the domain here. This value will only be used for the identification in the web interface. |
Description |
Enter a description, which will be displayed in the overview, here. This value will only be used for the identification in the web interface too. |
LDAP-Server |
|
Server-type* |
Type of the used directory service. Common directory services can be selected from the list directly. For other types, use the option other directory service. |
Servers* |
Enter the server address (host) of the directory service here. It can be declared as FQDN, IPv4- or IPv6-address. You have the opportunity to declare more server addresses through a line break. A connection to the service will be tried with every mentioned address. |
Port* |
The port for the LDAP-server. The port 389 is used by default. |
SSL |
Mark this field in order to use a SSL-connection to the LDAP-server. |
SSL-options |
(optional) Here you can enter TLS ciphers which you want to use, please be sure which TLS or cipher must be set to establish a LDAPs connection. The ciphers need to be entered in the following format:
[{versions,['tlsv1.2']}, |
RootDSE* |
LDAP-syntax starting point (Example: “dc=infoserver,dc=local”). |
Paging |
Limits the amount of entries for each LDAP-query. The default value is 1000. |
Timeout (in sec.) |
Timeout in seconds for the LDAP-query. The default value is 60 seconds. |
Authentification |
|
Username (domain)* |
Username (DN/Distinguished Name) for the authentication at the named LDAP-service. (Example: “cn=john.doe,cn=users,dc=mydomain,dc=local”) |
Password* |
Password for the authentication of the username. |
Confirm Password* |
Field for password confirmation. |
More settings |
|
Domains |
Generally clients can only be addressed via the domain with which they are registered on the Infoserver. If you want to address clients via other domains already registered in Cordaware bestinformed 6, enter them here. |
Filter-Settings
In this tab the names of the attributes can be entered here which will be used to identify LDAP Objects.
Field |
Description |
LDAP Filter settings |
|
User* |
Filter for the identification of user-objects in the LDAP. (Example: “(&(objectClass=person)(!(objectClass=computer)))”) |
Computer* |
Filter for the identification of computer-objects in the LDAP. (Example: “(objectClass=computer)”) |
Groups* |
Filter for the identification of group-objects in the LDAP. (Example: “(objectClass=group)”) |
OU |
Filter for the identification of organizational units (OrganizationalUnits) in the LDAP. (Example: “(objectClass=organizationalUnit)”) |
More filters |
Optional field for more filters. |
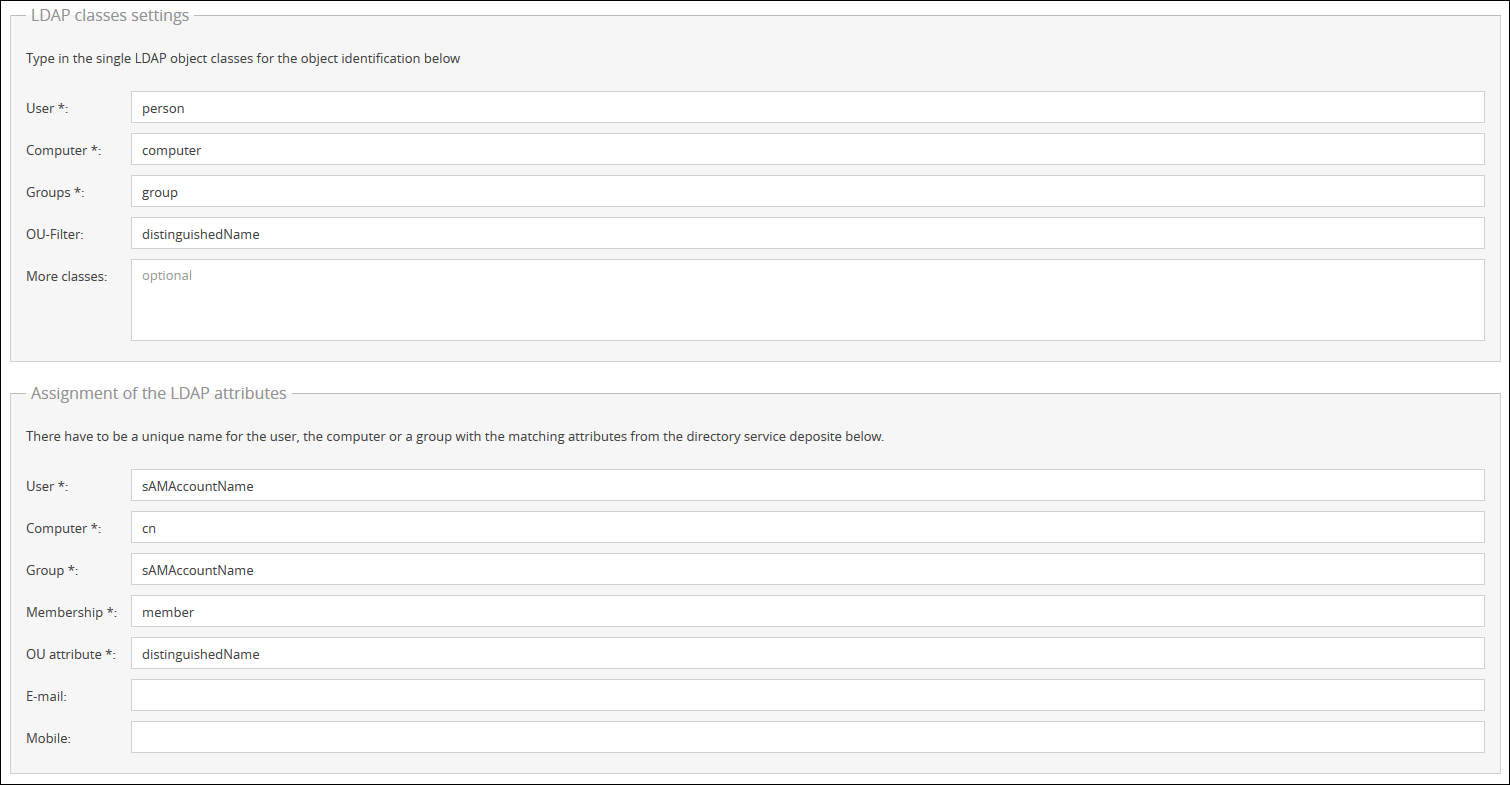
LDAP classes settings |
|
User* |
Object class for the identification of the user-objects in the LDAP. (Example: “person”) |
Computer* |
Object class for the identification of the computer-objects in the LDAP. (Example: “computer”) |
Gruppen* |
Object class for the identification of the group-objects in the LDAP. (Example: “group”) |
OU-Filter |
Object class for the identification of the OrganizationalUnits in the LDAP. (Example: “ou”) |
More classes |
Optional field for more classes. |
Assignment of the LDAP attributes |
|
User* |
Clear key of the user-attribute, which is used in the directory service. (Example: “sAMAccountName”) |
Computer* |
Clear key of the computer-attribute, which is used in the directory service. (Example: “cn”) |
Group* |
Clear key of the group-attribute, which is used in the directory service. (Example: “sAMAccountName”) |
Membership* |
Declare the membership-attribute here, with which every single user or member of a group will be identified. (Example: “member”) |
OU attribute* |
Clear key of the OrganizationalUnit-attribute, which is used in the directory service. (Example: “ou”) |
Clear key of the Email-attribute, which is used in the directory service. (Example: “mail”) |
|
Mobile |
Clear key of the mobile-attribute, which is used in the directory service. (Example: “mobile”) |
Automatic refresh for domain

In the following section you have the option to activate the automatic update of your domain. You can define the interval (in which changes are queried) yourself. If your directory service does not support this function, possible changes are queried and loaded into the domain in a 24-hour interval. If you deactivate this function, the same principle applies.
Importing Attributes
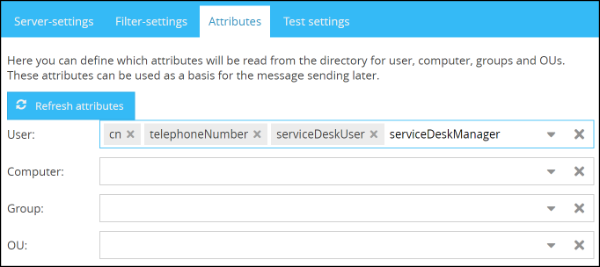
In the tab Attributes you'll have the opportunity to select the domain-attributes which can be used to create Filters. Filters are summarized with the help of one or more rules, where domain attributes are matched with specific values.
The attributes from the declared directory service can be queried and selected through selection lists, after clicking on the button Refresh attributes.
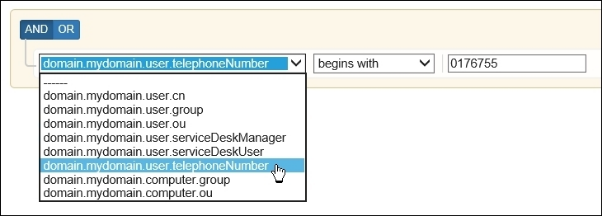
If you want to summarize domain users by means of their phone numbers (which are deposited in the domain) in a filter and address them or assign them to a role, you can select the appropriate attribute(s) (in this case telephoneNumber) in the field User from the list.
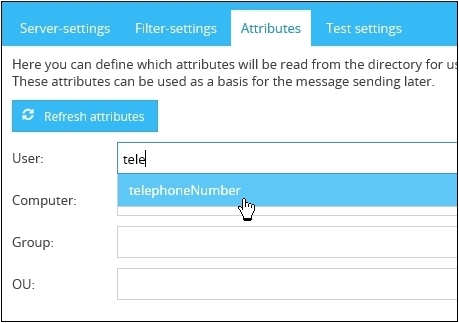
The selection list can be filtered by typing the value in the field.
If a attribute doesn’t exist in the list, it can be added by typing it into the field manually. After typing it in, the new attribute can be confirmed by pressing the enter key.
 |
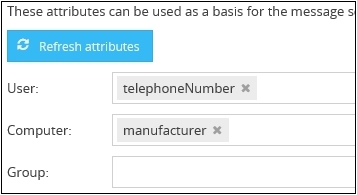
Example:
If you are having computers in the domain, which are deposited with the name of the manufacturer and you want to summarize them in a filter, then select the appropriate attribute (in this case "manufacturer") in the field Computer.
Testing the settings
Before saving the domain, you have the opportunity to test the connection to the domain and your inputs. With the previous entered data will be tried to set up a connection to the domain. The possible results or errors will be shown here. Navigate to the tab Test settings in order to review connection details and results.
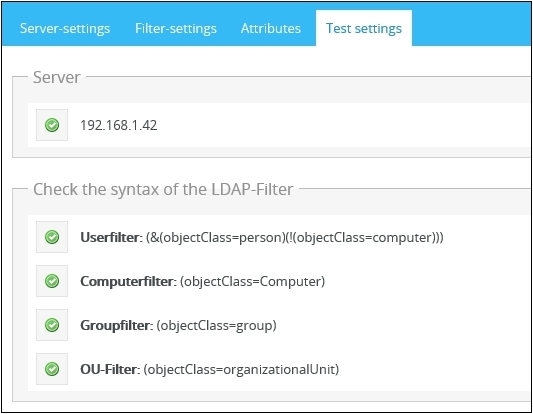
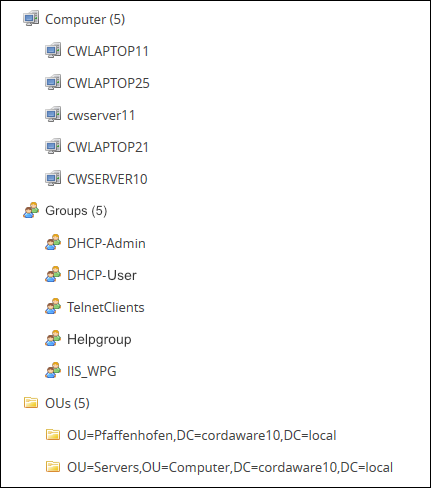
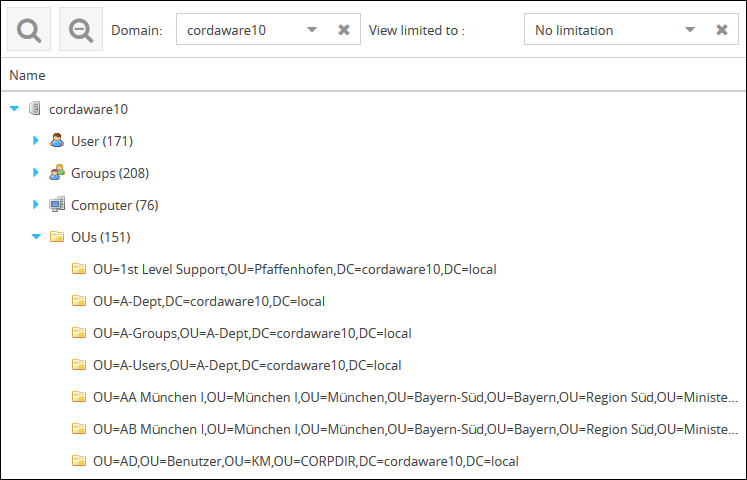
In order to review the queried objects, you’ll find a limited preview of the found objects below.
The domain will be saved after clicking on Save. All selected attributes will be available for the creation of Filters afterwards.
Read more about this topic in the chapters Filter and Team.
After saving, the overview of the domains shows the progress of the LDAP image. Upon reaching 100%, the LDAP was fully loaded and can be used.
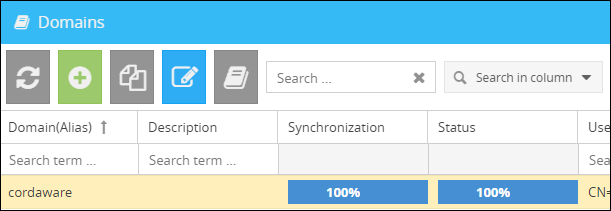
Update LDAP-attributes:
After creating a domain, you have the option to update all LDAP attributes in the overview of the domains with the button ![]() (Refresh LDAP...). This process is performed automatically every 24 hours.
(Refresh LDAP...). This process is performed automatically every 24 hours.
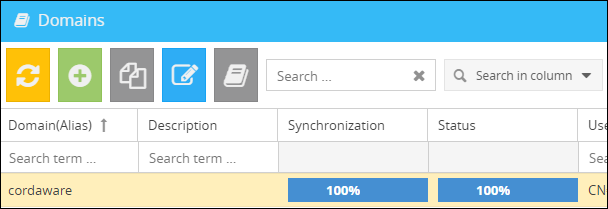
During the update process, you can see in the Synchronization column how much % the update has completed. During the update process, the last full image of your LDAP is used fpr addressing.
Addressing OUs of a domain via their distinguishedName
Via the following settings you have the possibility to address the exact OU, even if your domain contains multiple OUs with the same name.
e. g.
There are multiple OUs with the name "department" in your domain. These OUs are sub OUs of another OU (e.g. "Building").
In order to be able to address the right OU, the following settings need to be adjusted. |
Please note:
The following settings are also needed in order to create filters which address via the distinguishedName. |
In order to address the OUs via the distinguishedName, proceed as follows:
1.) Open the domain overview on the web interface of Cordaware bestinformed and edit your domain.
2.) In the Filter settings you can edit the LDAP Class settings and the Assignment of the LDAP attributes. For the OU Filter and the OU attribute the distinguishedName needs to be used.
3.) Now you can save your settings and open the Group Manager afterwards. In the Group Manager the distinguishedNames for your OUs will now be displayed.
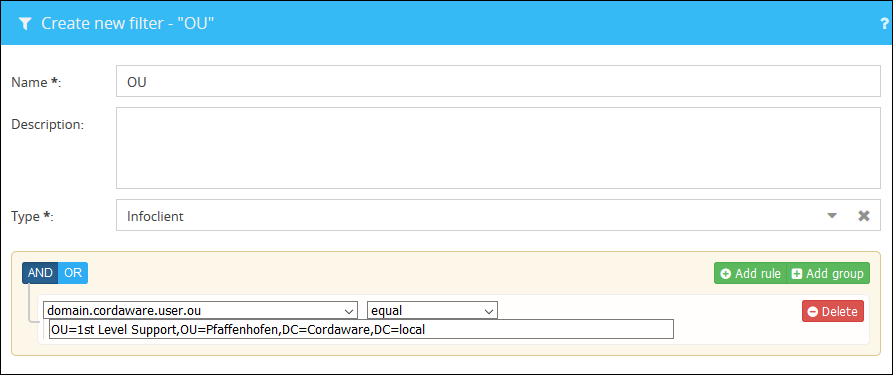
Additionally you have the possibility to create filters, which will address your OUs. These filters require the following setup:
"domain.YourDomain.user.ou" equal "distinguishedName of your OU"