Infofields are used to add custom data to your Infos. They don’t have any influence sending or displaying Infos but are only used to link data to specific Infos, e.g. ticket numbers or statuses.
Create Infofields
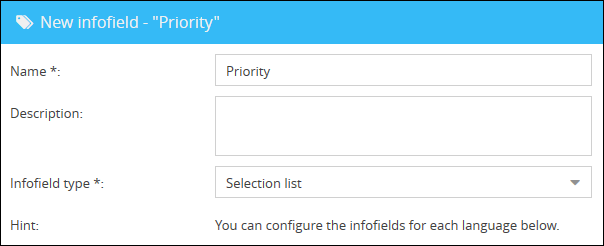
With the app Infofields (Infos -> Infofields) you can manage these Infofields, which will be made availabe when creating an Info. To create a new Infofield click on the button ![]() (New) in the toolbar which opens a new form.
(New) in the toolbar which opens a new form.

Use this form to enter a new for the Infofield and select the type of value you wont to provide. This type defines which values can be entered into the field. The following types are availabe:
Text |
Used to enter a short text value. |
Number |
Used to enter a numeric value. |
Date / Time |
Use this field to enter a date and time. |
A special field for entering an E-Mail address. |
|
URL |
You can enter a hyperlink here. |
Checkbox |
Use this type to provide a simple checkbox. |
Memo |
Use this field to enter longer text. |
Selection list |
Provides a list of values where users can select one from a dropdown list. |
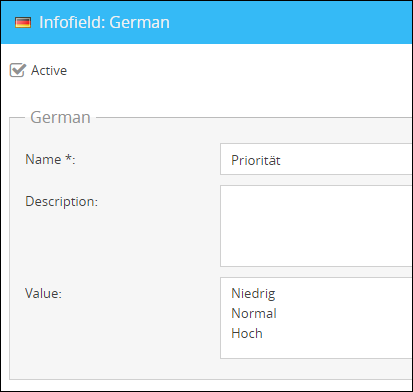
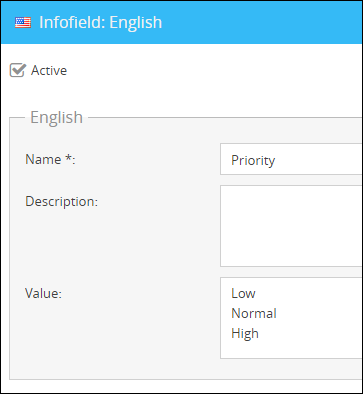
The following sections, German and English are used to define how the field will be displayed for each web interface lanuage. To provide the Infofield for the respective web interface check the box Active.

Each language has a form to define the Infofield for.
Use the field Name to provide a name for each language.
If the type Selection list is selected you can use the field Value to define the values for the dropdown list. These values need to be entered line by line.


You can now save the Infofield. Afterwards you are able to select it during the creation of a new info.
You can now set the priority of an info with the Infofield created during the example:
