In the settings you have the possibility to influence the behavior of the ALM in different ways.
The settings can be accessed through the following button:

General settings:

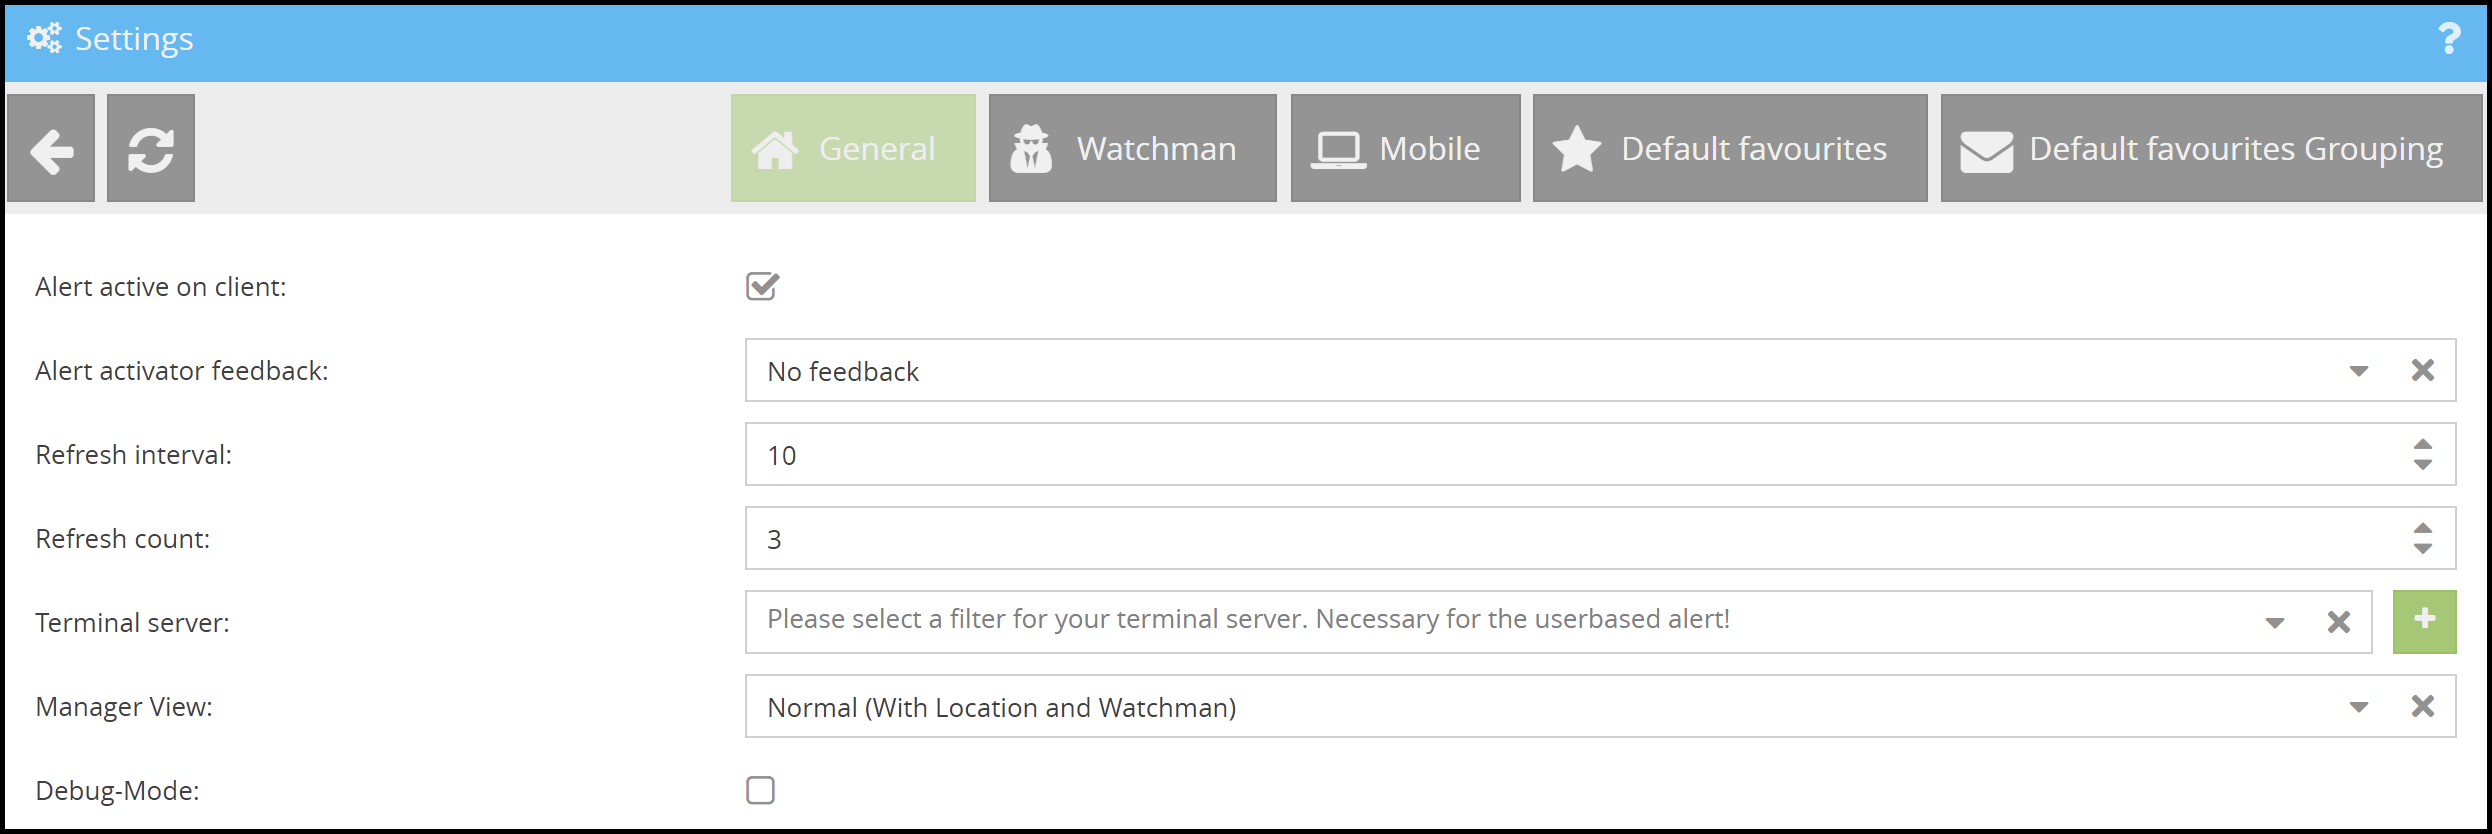
Alert active on client |
Here you can specify whether the Infoclients can trigger an alert or not. Caution: If the check mark is not set, an alert is not possible! |
Alert activator feedback |
Here you define which feedback the alert trigger receives after an alert has been triggered. You have various options here:

|
Refresh interval |
Interval at which the feedback of the alert trigger is updated. (By default 10 seconds are set here) |
Refresh count |
Number of updates of the confirmation window. (By default 3 updates are set here) |
Terminal server |
Enter a filter here that contains the users who log on to a terminal server environment. Further details can be found in chapter Step 3: Managing devices. |
Manager View |
Change the view of the managers here between Normal (With Location and Watchman) and Limited (Just devices and alerts). |
Debug-Mode |
Activates the debug mode.
In debug mode all activities are logged on the right side of the web interface in the "Messages, Authorization" panel. |
Watchmen settings:

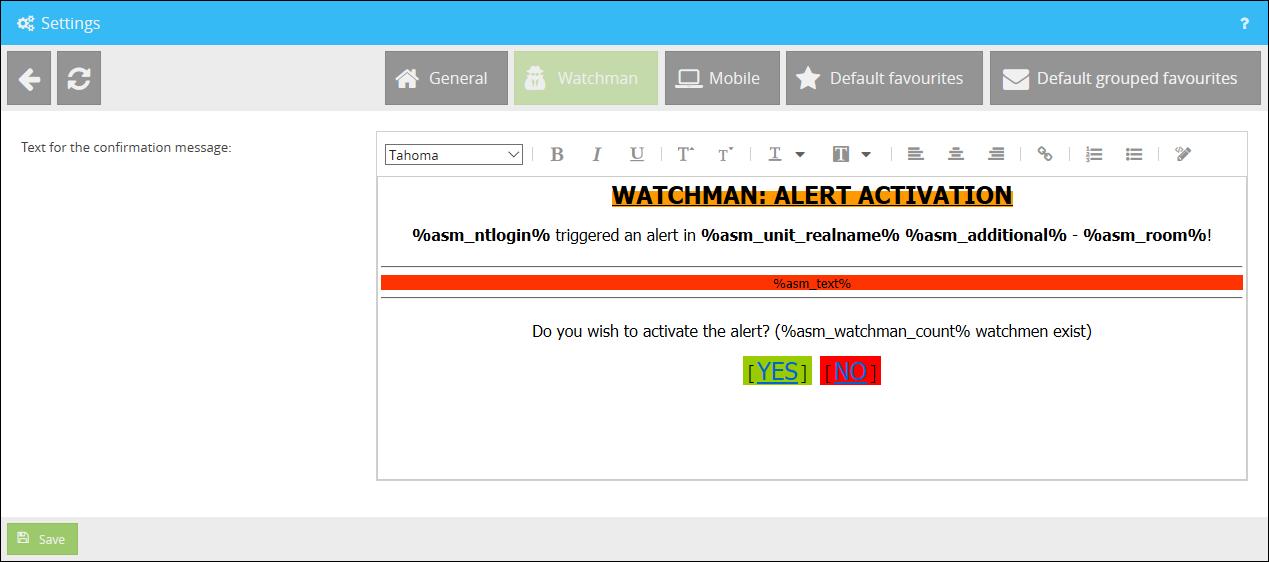
In the Watchman tab you can adjust the template for the alert activation.
This template is displayed to the watchmen when they need to activate an alert. The common formatting options are available to you when editing the template.
In the default template for the watchmen are used several environment variables, explained as follows:
%asm_ntlogin% |
Display the ntlogin username of the alert sender. |
%asm_unit_realname% |
Displays the name of the alert unit. |
%asm_additional% |
Displays the additional address defined for the alert unit. |
%asm_room% |
Displays the room where the alert was sent. |
%asm_text% |
Displays the actual infotext used in the triggered alert. |
%asm_watchman_count% |
Displays the number of all watchman existing. |
Settings for mobile workstations:

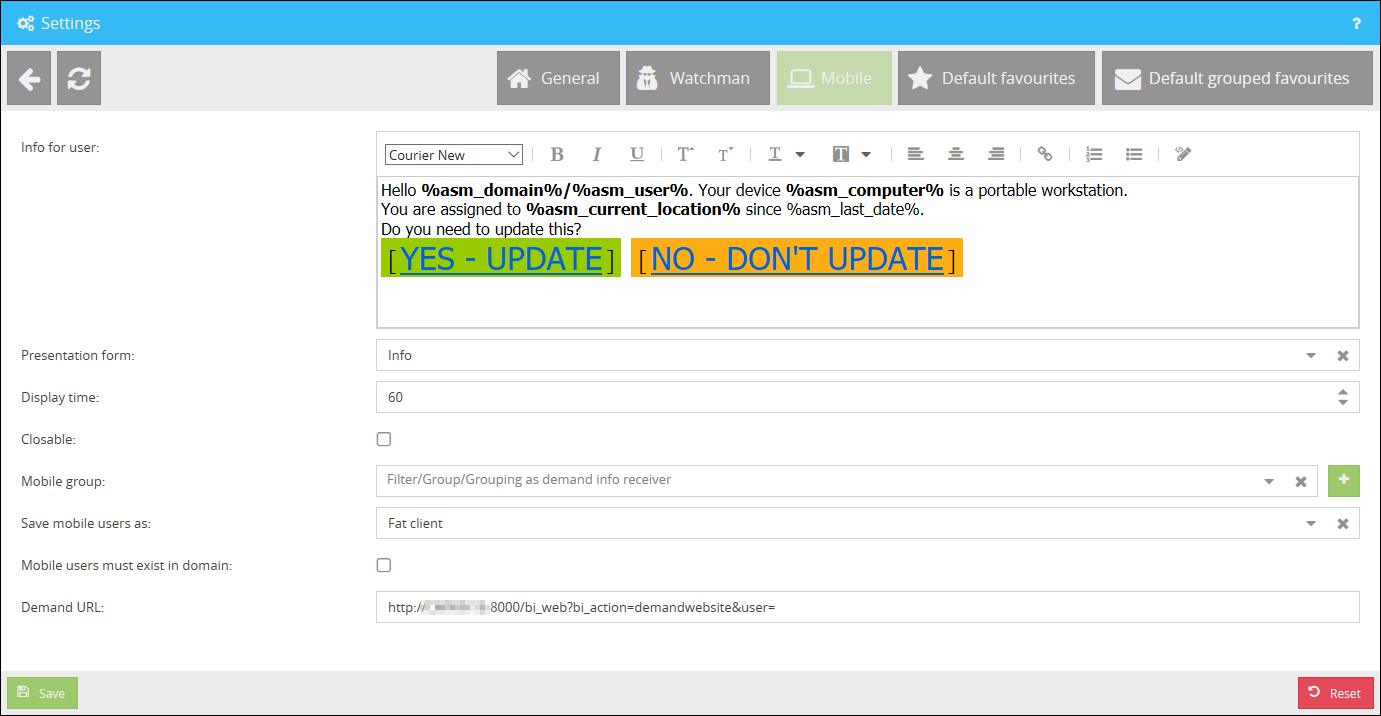
Info for user |
Here you can edit the information that appears to your mobile users as soon as they log on to a mobile workstation. |
Presentation form |
The display form of the info can be edited here. You can differentiate between a news ticker and a popup notification. |
Display time |
The display time of the info (in minutes) can be adjusted here. |
Closable |
With this option you can determine whether the info can be closed or not. |
Mobile group |
Enter a filter, a group, or a grouping here which should receive the demand info on the mobile workstations. |
Save mobile users as |
Select here how the mobile users will be entered after changing location. You can choose between Fat Client, Thin Client or User. |
Mobile users must exist in domain |
Here you can specify whether the mobile users must be present in the domain or not. |
Demand URL |
Here you can enter the URL to the Demand website where your mobile users can enter their master data. |
Automatically query only after ip change |
If active, then mobile users need to enter their location only after they have switched their IP-address. |
More details regarding mobile workstations can be found in the chapter Demand Info.
Settings for default favourites / grouped favourites
In the default favourites you can create favourites which can be selected directly by your mobile users. The advantage here is that the data do not have to be entered again if your users have changed workstations, but can select them directly from a drop-down menu.

Use the button ![]() to create a new favourite. After the creation it will be available for your mobile users.
to create a new favourite. After the creation it will be available for your mobile users.
In the default grouped favourites you can divide your created favourites into groups. This has the advantage of clarity if you have created many default favourites.
