E-mails can be “converted” into Infos through the MailToInfo interface. This enables every system, which is able to generate e-mails and send them to the Infoserver, to communicate with Cordaware bestinformed. Thus can error or status messages from external systems or databases be automatically reported to affected persons with a news-ticker or popup.
The Cordaware bestinformed Infoserver already contains an integrated SMTP server and can instantly receive and convert e-mails after its execution.
Ports
Port |
Function |
8025 |
SMTP Port of the Infoserver for the MailToInfo Interface - Unencrypted and STARTTLS encrypted at the same time. |
8465 |
SMTP Port - Secured via SSL |
Starting with best_web 6.1.9.2, both ports can run parallel.
Configuration
Changing the MailToInfo password
The admin password will automatically be set as MailToInfo password after the installation. The MailToInfo password is a special password, which is required for the usage of the MailToInfo interface. In order to change it, please proceed as follows:
1. Open the System Settings (System > System Settings) app on the web interface.
2. Click on the button ![]() in the area system settings inside the options.
in the area system settings inside the options.
3. Enter the old password in the first, afterwards the new password and as a confirmation you enter the new password again.
4. In order to save your changes, click on Save.
Further settings for the MailToInfo interface can be found on the serverboard. |
Test applications
With the following link you can download an application (MailToInfoDemo.exe) from your Infoserver in order to test your MailToInfo interface fast and easily:
http://download.cordaware.com/tools/MailToInfoDemo.exe |
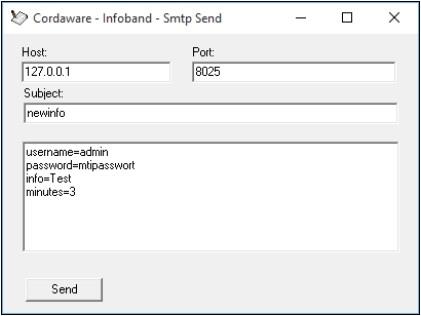
Sending
When converting an email with MailToInfo, send an e-mail through a mail-able system to the SMTP server which is integrated in the Infoserver. The server address of the receiver SMTP server is the same as the one from the Infoserver, but a special port will be used for this component. The default port is 8025. If this port is changed manually, please match it appropriate.
The receiver and sender email address can be chosen randomly (e.g. test@test.com).
The important part of the email is the subject. It defines the action of the info.
•newinfo - Creates a new Info.
•editinfo - Edits an Info.
•cancelinfo - Cancels an Info.
Creating a new Info - newinfo
Send an email with the subject newinfo and the following content in order to generate a new Info with MailToInfo:
username=admin password=mtipassword info=Infotext |
These are the configurations which are required for the creation of a new Info. It is important to name a user with his MailToInfo password, who is allowed to use the MailToInfo interface. The administrator account admin, which has no restrictions, is used in the following examples.
The info text has to be entered in the field info=. The usage of HTML tags is allowed.
With the above used example, the news-ticker will be sent to all connected clients. But you have the opportunity to define the receivers through their filters and groups in addition.
Both settings have to be declared as lists.
username=admin password=mtipassword info=Infotext groups=["Group1","Group2"] filters=["Filter1","Filter2","Filter3"] |
Infos, which have been created with MailToInfo, can be edited and canceled with the MailToInfo interface when using the key myid= for any clear ID. This step id not required, but we recommend to use a clear ID when creating with MailToInfo, so the Info can be edited or canceled. Without an ID the only possibility to do this is over the web interface.
Subject: newinfo
|
You can use a created template with the key templatename=. Keep in mind that the specification of the template name is case-sensitive.
Subject: newinfo
username=admin password=mtipassword templatename=MyTemplate |
Editing a new Info - editinfo
An existing Info can be edited with the subject editinfo when using MailToInfo.
An Info can be edited through MailToInfo (editinfo) when you name the ID (with myid=) and the settings which have to be changed.
Subject: editinfo
username=admin password=mtipassword myid=1234 info=New Infotext minutes=10 |
Canceling an active Info - cancelinfo
With the subject cancelinfo can an Info be canceled through MailToInfo.
Comparable with the editing of Infos, Infos can be canceled with MailToInfo when they have been created with an ID (myid=). Enter any clear ID in the field myid= so the info can be identified and addressed later.
Example:
Subject: newinfo
username=admin password=mtipassword info=Infotext myid=1234 |
You can cancel an Info with MailToInfo when entering cancelinfo as the subject and naming the login information with the additional ID of the Info. More data is not needed for the cancellation of the Info.
Subject: cancelinfo
username=admin password=mtipassword myid=1234 |
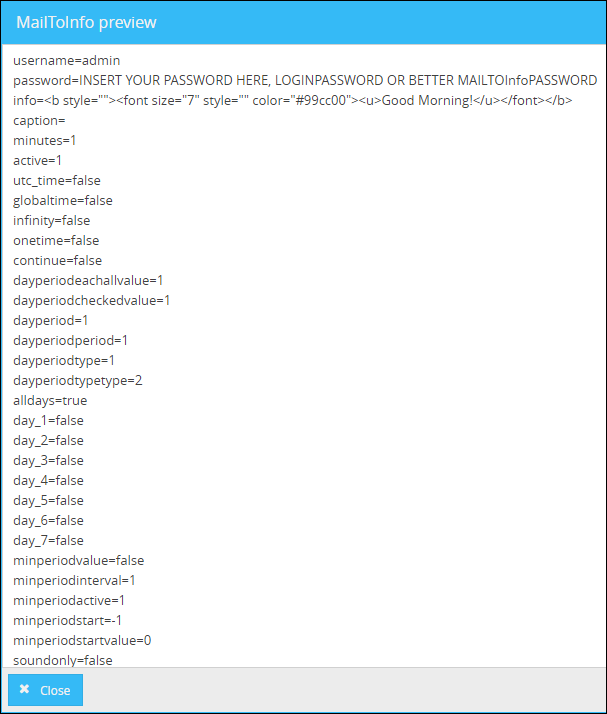
Additional settings / MailToInfo preview
The MailToInfo preview:
The MailToInfo preview can be used in order to view your info in the MailToInfo syntax.
Click on the button ![]() in order to view the MailToInfo syntax.
in order to view the MailToInfo syntax.
Afterward your info will be shown in the MailToInfo syntax.
Additional settings
All settings are declared with the format key=value. Functions have to be declared with the value ON. If you want to deactivate a setting, please use the value OFF:
Examples:
minutes=10 popup=ON cancloseonuserdesktop=OFF |
setting |
description |
|
caption |
Additionally to the Info (via "Info=") you have the possibility to add a caption to your Info. HTML tags can also be used. |
|
minutes |
This setting declares the time the Info is displayed on the client in minutes.
Example: With minutes=5 the Info will be displayed for 5 minutes on the client. |
|
begin |
Here you set the begin of the Info in the format DD.MM.YYYY HH:MM:SS. If this setting is not used, the Info will be displayed instantly. |
|
end |
Sets the end of the Info. The format is equal to the one used at begin=. |
|
begindate |
Here you can enter the date on which the info should start. (DD.MM.YYYY) |
|
begintime |
Here you can enter at what time the info should start. (HH:MM) |
|
enddate |
Enter the date at which the info should stop here. (DD.MM.YYYY) |
|
endtime |
Here you can enter at what time the info should stop. (HH:MM) |
|
Please note:
The active time will be calculated automatically with the option begin, end, begindate, enddate and endtime. |
||
dynamicaddressing |
Enter a guardians name which you want to execute, here. |
|
infinity |
If active (ON), the Info will be created with an open end. |
|
active |
Here you set the validity of the Info in minutes. Example: If you enter the value 60, the Info is valid for one hour from its begin. Clients, who connect themselves to the Infoserver in this period, will receive the Info. |
|
Please note:
If you want to edit the active time via editinfo, the following settings need to be added to the syntax with the value "0". Otherwise the active of the info you have sent out first will be used.
begindate=0 begintime=0 enddate=0 Endtime=0 |
||
beep |
If this setting is set to ON, a sound can be played when the client receives the Info. Generally it's the default warning tone of the operating system, but it is possible to change the tone. |
|
onetime |
If this setting is set to ON, the client will receive the Info only once. Even if the client will login again or the Info will be restarted, he won't receive it a second time. |
|
popup |
Displays the Info as a popup. If this setting is not set or is deactivated, the Info will be display as a news-ticker. |
|
filters |
Enter the recipient filters as a list like in the following example (The filter names are case-sensitive):
|
|
not_filters |
Enter the list of filters which you want to exclude from the recipients as a list. (The filter names are case-sensitive):
|
|
groups |
Enter the recipient groups as a list like in the following example (The group names are case-sensitive):
|
|
not_groups |
Enter the recipient groupedgroups as a list like in the following example (The group names are case-sensitive):
|
|
groupedgroups |
Tragen Sie hier Ihre gewünschten Empfängergruppierungen wie folgt in einer Liste ein (Groß-/Kleinschreibung des Namen der Gruppierung muss beachtet werden):
|
|
not_groupedgroups |
Enter the grouped groups which you want to exclude from the recpients as a list. (The group names are case-sensitive):
|
|
channels |
Enter the channels as a list like in the following example (The channel names are case-sensitive):
|
|
showonuserdesktop |
This setting determines, if the Info will be displayed on the user desktop. If this setting is not set, the Info will be automatically displayed on the user desktop. Use this setting only in the format showonuserdesktop=OFF if you want to pretend Infos from being displayed on the user desktop. The result will be that all Infos are only displayed on the win logon screen. |
|
showonwinlogondesktop |
This setting determines, if the Info will be displayed on the win logon screen. With OFF you will pretend the Info from being displayed on the win logon screen. |
|
cancloseonuserdesktop |
This setting determines, if the users are allowed to close the Info on the user desktop. With OFF the info can’t be closed by the user. |
|
cancloseonwinlogondesktop |
This setting determines, if the users are allowed to close the Info on the win logon screen. With OFF the Info can't be closed by the user. |
|
days |
Determines the days when using a periodic Info. The weekdays will be declared as numbers (e.g. Monday = 1, Tuesday = 2 etc.). If more days are declared at once, they have to be separated with a semicolon (days=1;2;3). |
|
continue |
If active, a periodic recurrently Info will be created. Declare an interval for the Info, the period and other input parameters.
Example: You want to send an Info for one year, that will be active every Tuesday and Wednesday at 3 pm for 60 minutes and has a runtime of 10 minutes on the client. Syntax:
|
|
offline |
Set offline=ON, if an Info should be available offline. Allows the reception of Infos when the receivers don't have a constant connection to the Infoserver. |
|
isinifile |
With this setting the client configurations can be changed through the Infoserver. The fitting syntax has to be declared in the field info=. |
|
Quickuser selection in the MailToInfo Syntax
If you want to address quickusers in via MailToInfo message, the following syntax needs to be used:
quickusers=[{"computer":"COMPUTERNAME","user":"USERNAME","ipaddress":"IPADDRESS","domain":"DOMAIN"}] |
In this syntax the computername, username, ipaddress and domain need to be entered instead of the placeholders. You can also use "*" and "?" wildcards!
Access to status Infos
Statusinfos can be controlled with the MailToInfo interface too. But you only have the opportunity to change the status of a statusinfo. The creation and edit of statusinfos can only be done with the web interface.
You can change the statusquo of a statusinfo through the subject statusquo and the specification of the statusinfo-ID(id=) and the statusquo-ID (statusquoid).
This step requires, that you know the ID of the statusinfo and of the statusquo. Both can be found in the application Statusinfos in the web interface. Through the columns menu of the table you can display an additional dataset-ID column.
Subject: statusquo
username=admin password=mtipassword id=bi-statusinfo_59778ced93994ff83d2ece4dc80172d3 statusquoid=bi-status_59778ced93994ff83d2ece4dc80189c8 |
Simply use statusquoid=0 if you want to reset the statusquo of a statusinfo.
Using ScriptVars in Info-Templates
When addressing a template in the MailToInfo-syntax which contains ScriptVars, then you can also add content to these ScriptVars in the MailToInfo-syntax. Simply enter the @ symbol followed by the name of the ScriptVar and assign a value.
Example:
username=admin password=mtipasswort templatename=CurrentDisturbance @Starttime=13:00 @Endtime=15:00 |
In this example, the ScriptVars [Starttime] and [Endtime] in the Infotext of the template will be substituted with the assigned values in the Info-syntax.