After creating your alert structure, the administration of alerts is only a optional step depending of your requirements.
First call up the overview of alerts. Open the alert location manager and click on the following button:
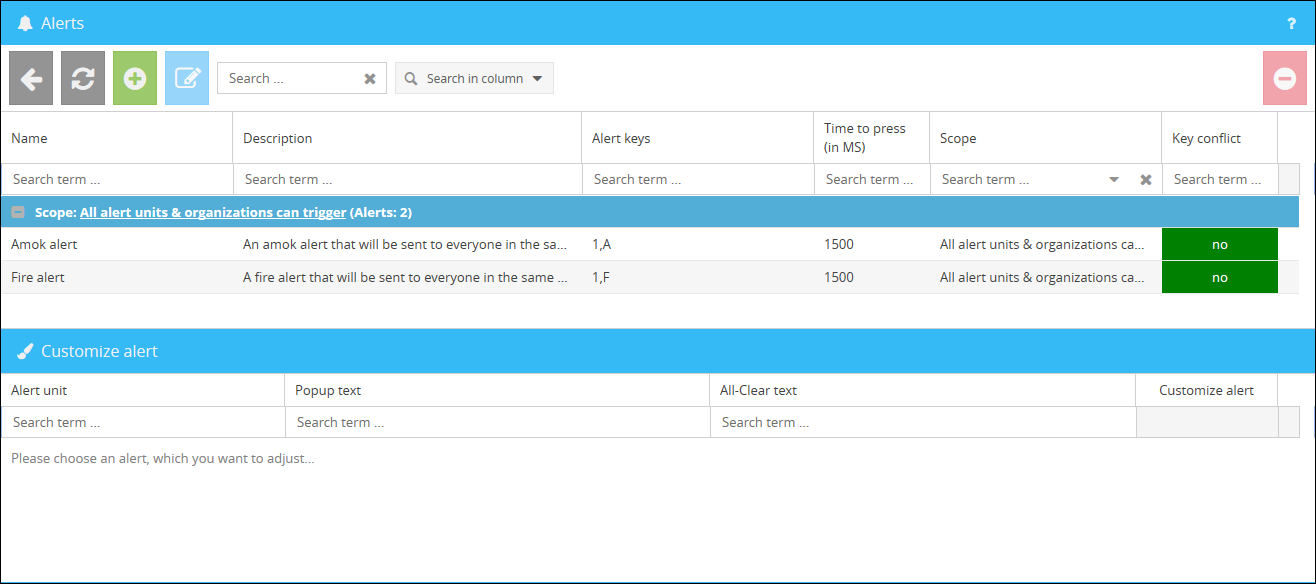
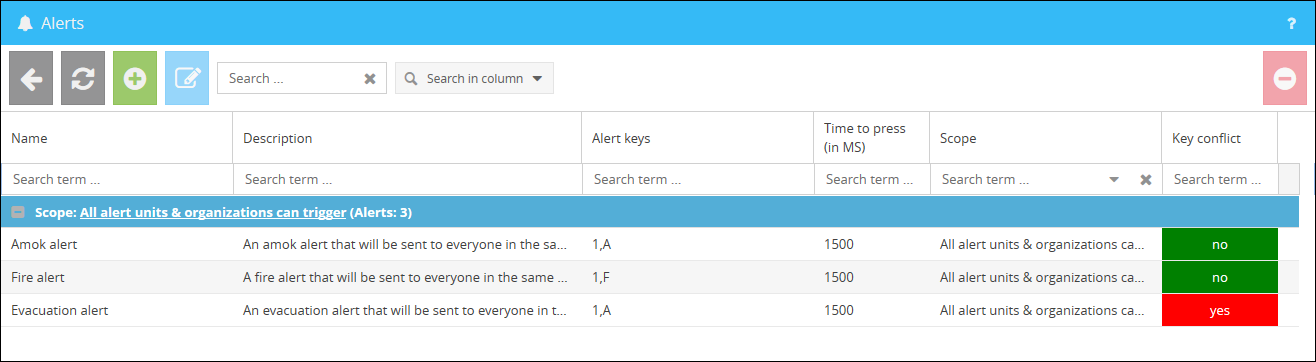
The appearing overview will show you all existing alerts.
Creating a new alert
In order to create a new alert, you can click on the button  so an interface for the creation will open.
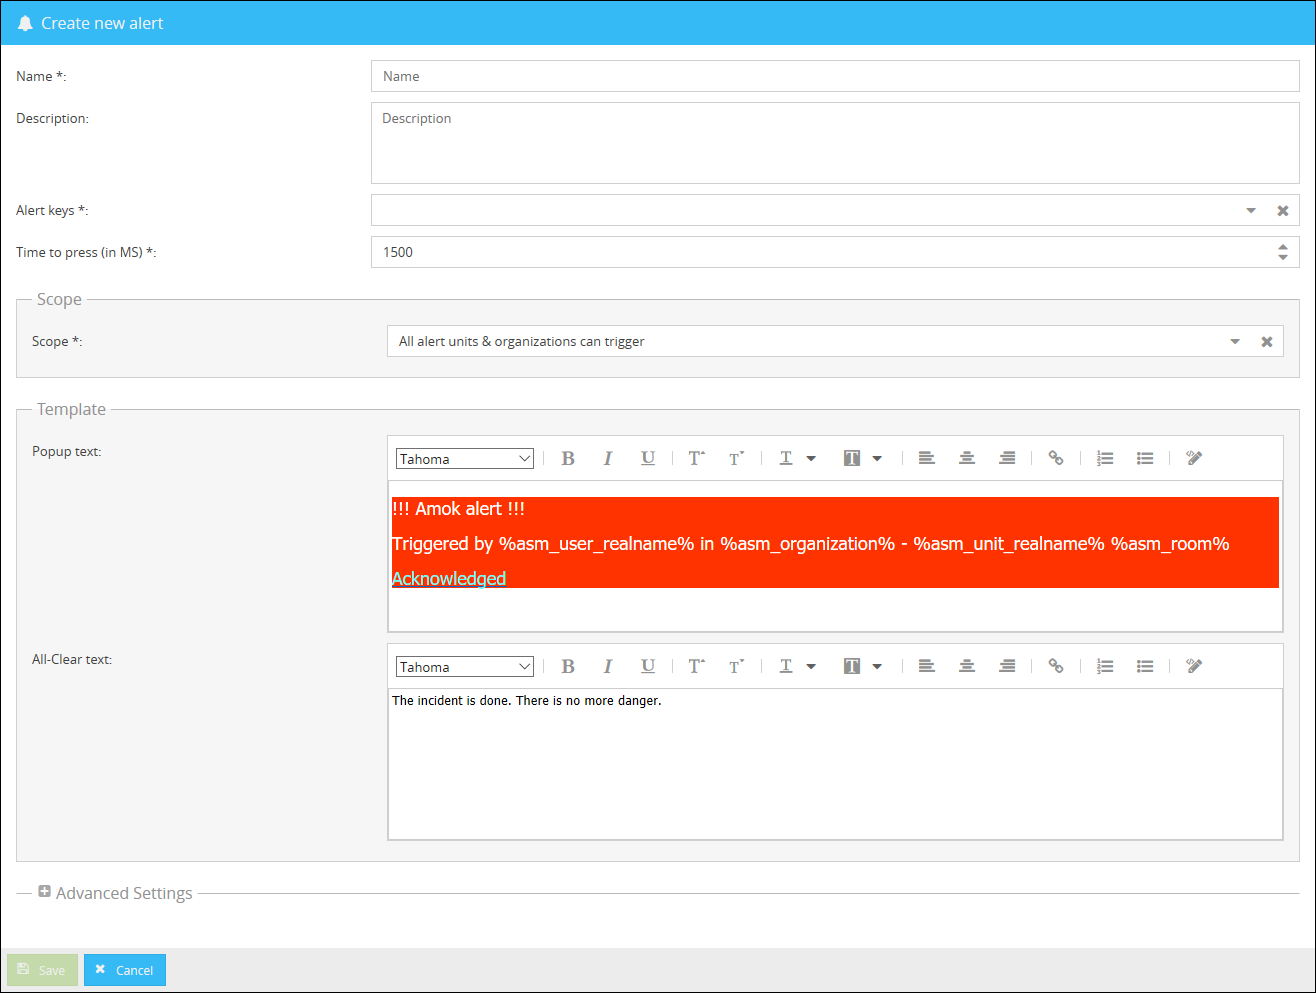
The following information can be entered here:
Name |
Here you can enter the name of your alert. |
Description |
Here you can optionally enter a description for your alert. |
Alert keys |
Here you can select keys from a defined list which should be used to trigger the alert. |
Time to press (in MS) |
Here you can define how long the key / key combination has to be pressed until the alert is triggered. |
Scope |
Here you can select whether all organizations and alert units can trigger the alert or only individual organizations or alert units. For individual organizations or alert units, you have an additional selection option, which looks as follows:
 |
Popup text |
By default, a text is always predefined here, which is then displayed when the alert is displayed on all relevant Infoclients. You can change this text to suit your requirements. Alternatively, you can define an HTML code via the button |
All-Clear text |
Here you can define an all-clear text for your alert. Due to the default advanced settings, the all-clear text will be displayed as a news ticker. |
 .
.
You can also use the following variables in the popup text, which are automatically replaced in the alert message:
%asm_user_realname% |
Replaces the variable in the alert message with the user name of the alert issuer. |
%asm_organization% |
Replaces the variable in the alert message with the defined organization of the alert issuer. |
%asm_unit_realname% |
Replaces the variable in the alert message with the defined alert unit of the alert issuer. |
%asm_roomname% |
Replaces the variable in the alert message with the defined room name of the alert issuer. |
The button  provides you options for defining / changing the feedback message for triggering an alert and the display of the the all-clear message.

The following settings can be defined here:
Status text |
Here you can define the text that will be displayed to the issuer when an alert is triggered. |
Display time of the status text (in seconds) |
Here you can define how long the status text should be displayed. |
All-Clear |
You can use several settings here to define how the all-clear message should look like. By default, the all-clear is a simple news ticker shown at the top of the screen. |
By clicking on the button  you can save your new created alert.
|
Please note:
As the number of alerts per unit can become complex regarding the used key combinations, the overview of your alerts, as shown below, will show you as soon as there is a key conflict. A key conflict occurs when two alerts have defined the same key combination.
 |
Editing / Customizing an alert
In order to change an existing alert in general, you can select it in the alert overview and edit it via the button  .
.
If you are using an alert that has to be displayed differently for certain alert units than normally defined, the lower part of the alert overview gives you the opportunity to do so.
After you have selected an alert the following interface appears in the lower area:
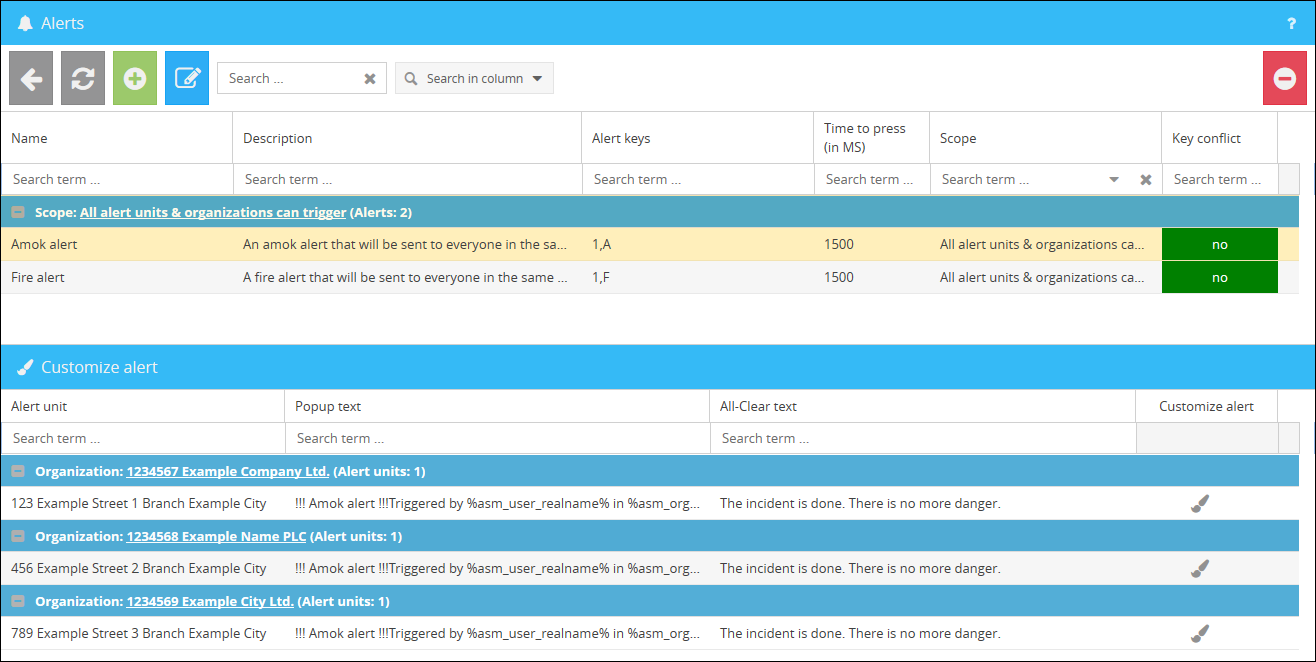
In the section "Customize alert" you can select an alert unit you want to customize the displayed text and click on the button  in order to open an interface.
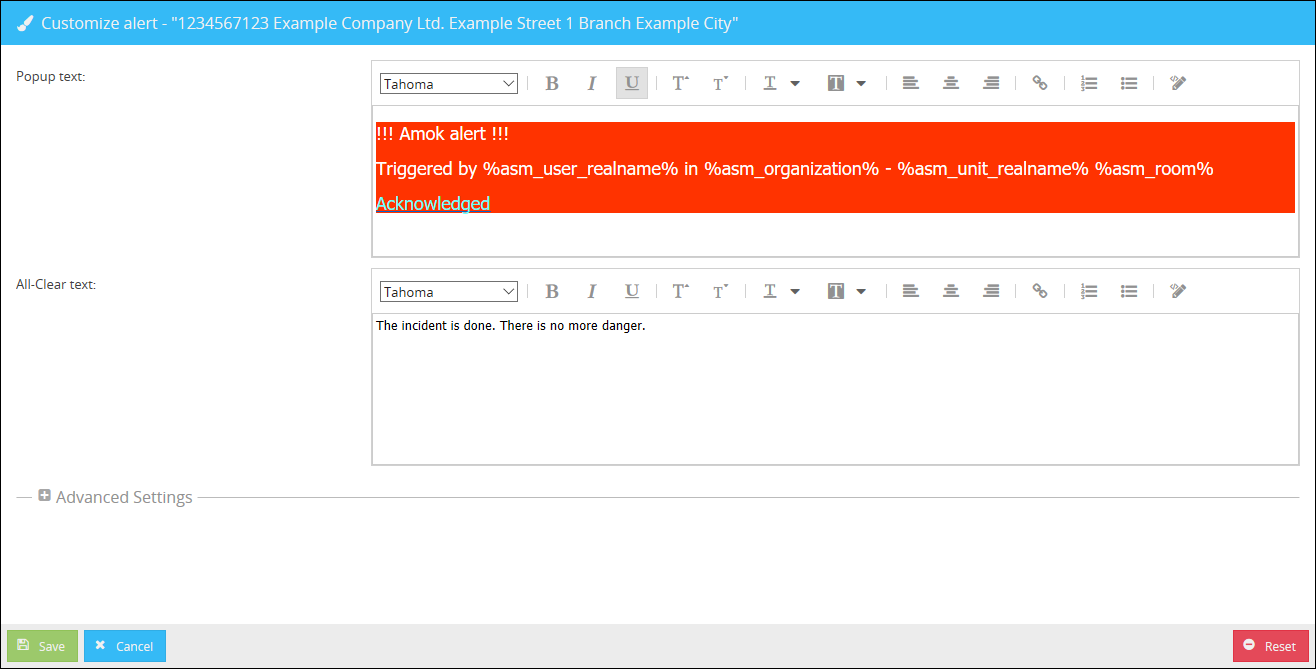
In this overview you can adjust the text of the alert or its all-clear. Additionally you have the possibility to edit the feedback message or all-clear as above by expanding the section .
You can then apply your changes by clicking on the button or undo them using the button  . You can use the button
  in order to return to the overview of the alerts.