To trigger an alarm without a PC, it is possible to connect SMART Wi-Fi buttons. These can either be carried along or installed stationary in the premises.
The following examples describe how a Shelly Smart Wi-Fi Button is configured in the network and connected to the Cordaware bestinformed Alarm Edition.
Network configuration of the Shelly Button
1. Connect the Shelly Button via micro USB cable to a power source, e.g. to your desktop PC or via adapter to a power outlet. The active power connection will wake up the Shelly Button and it will enter "ACCESS POINT" (AP) mode.
2. Now connect to the WLAN of the Shelly Button via a desktop PC. This is available to you with a Shelly Button in AP mode and the SSID of this network consists of the string "shellybutton1-" followed by 12 random hexadecimal characters, e.g. "shellybutton1-1234567890AB".
3. If you have successfully connected to the Shelly Button's WLAN, open the configuration web interface via the address "http://192.168.33.1/".
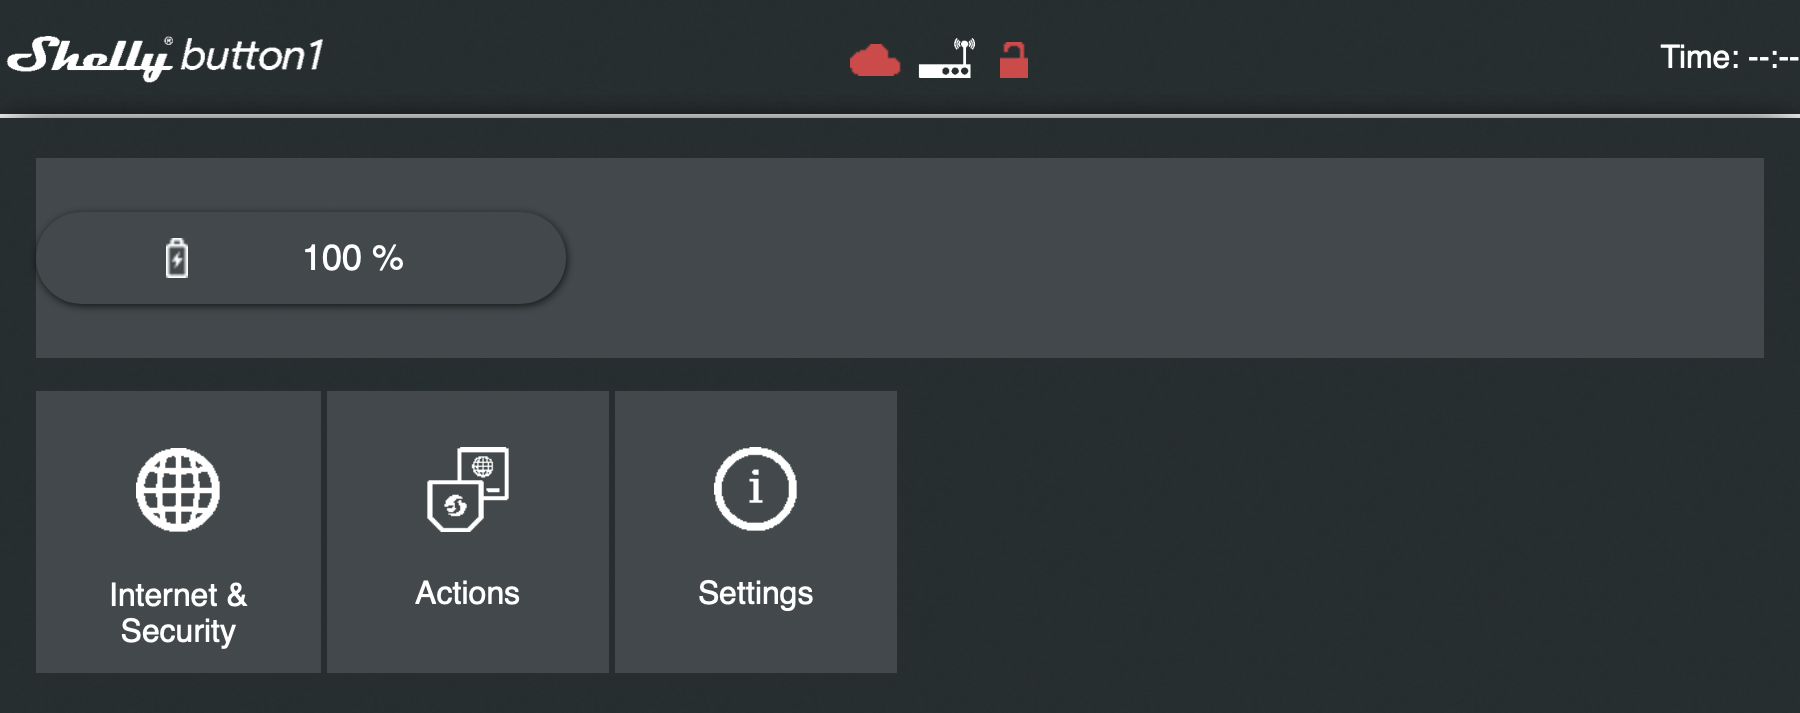
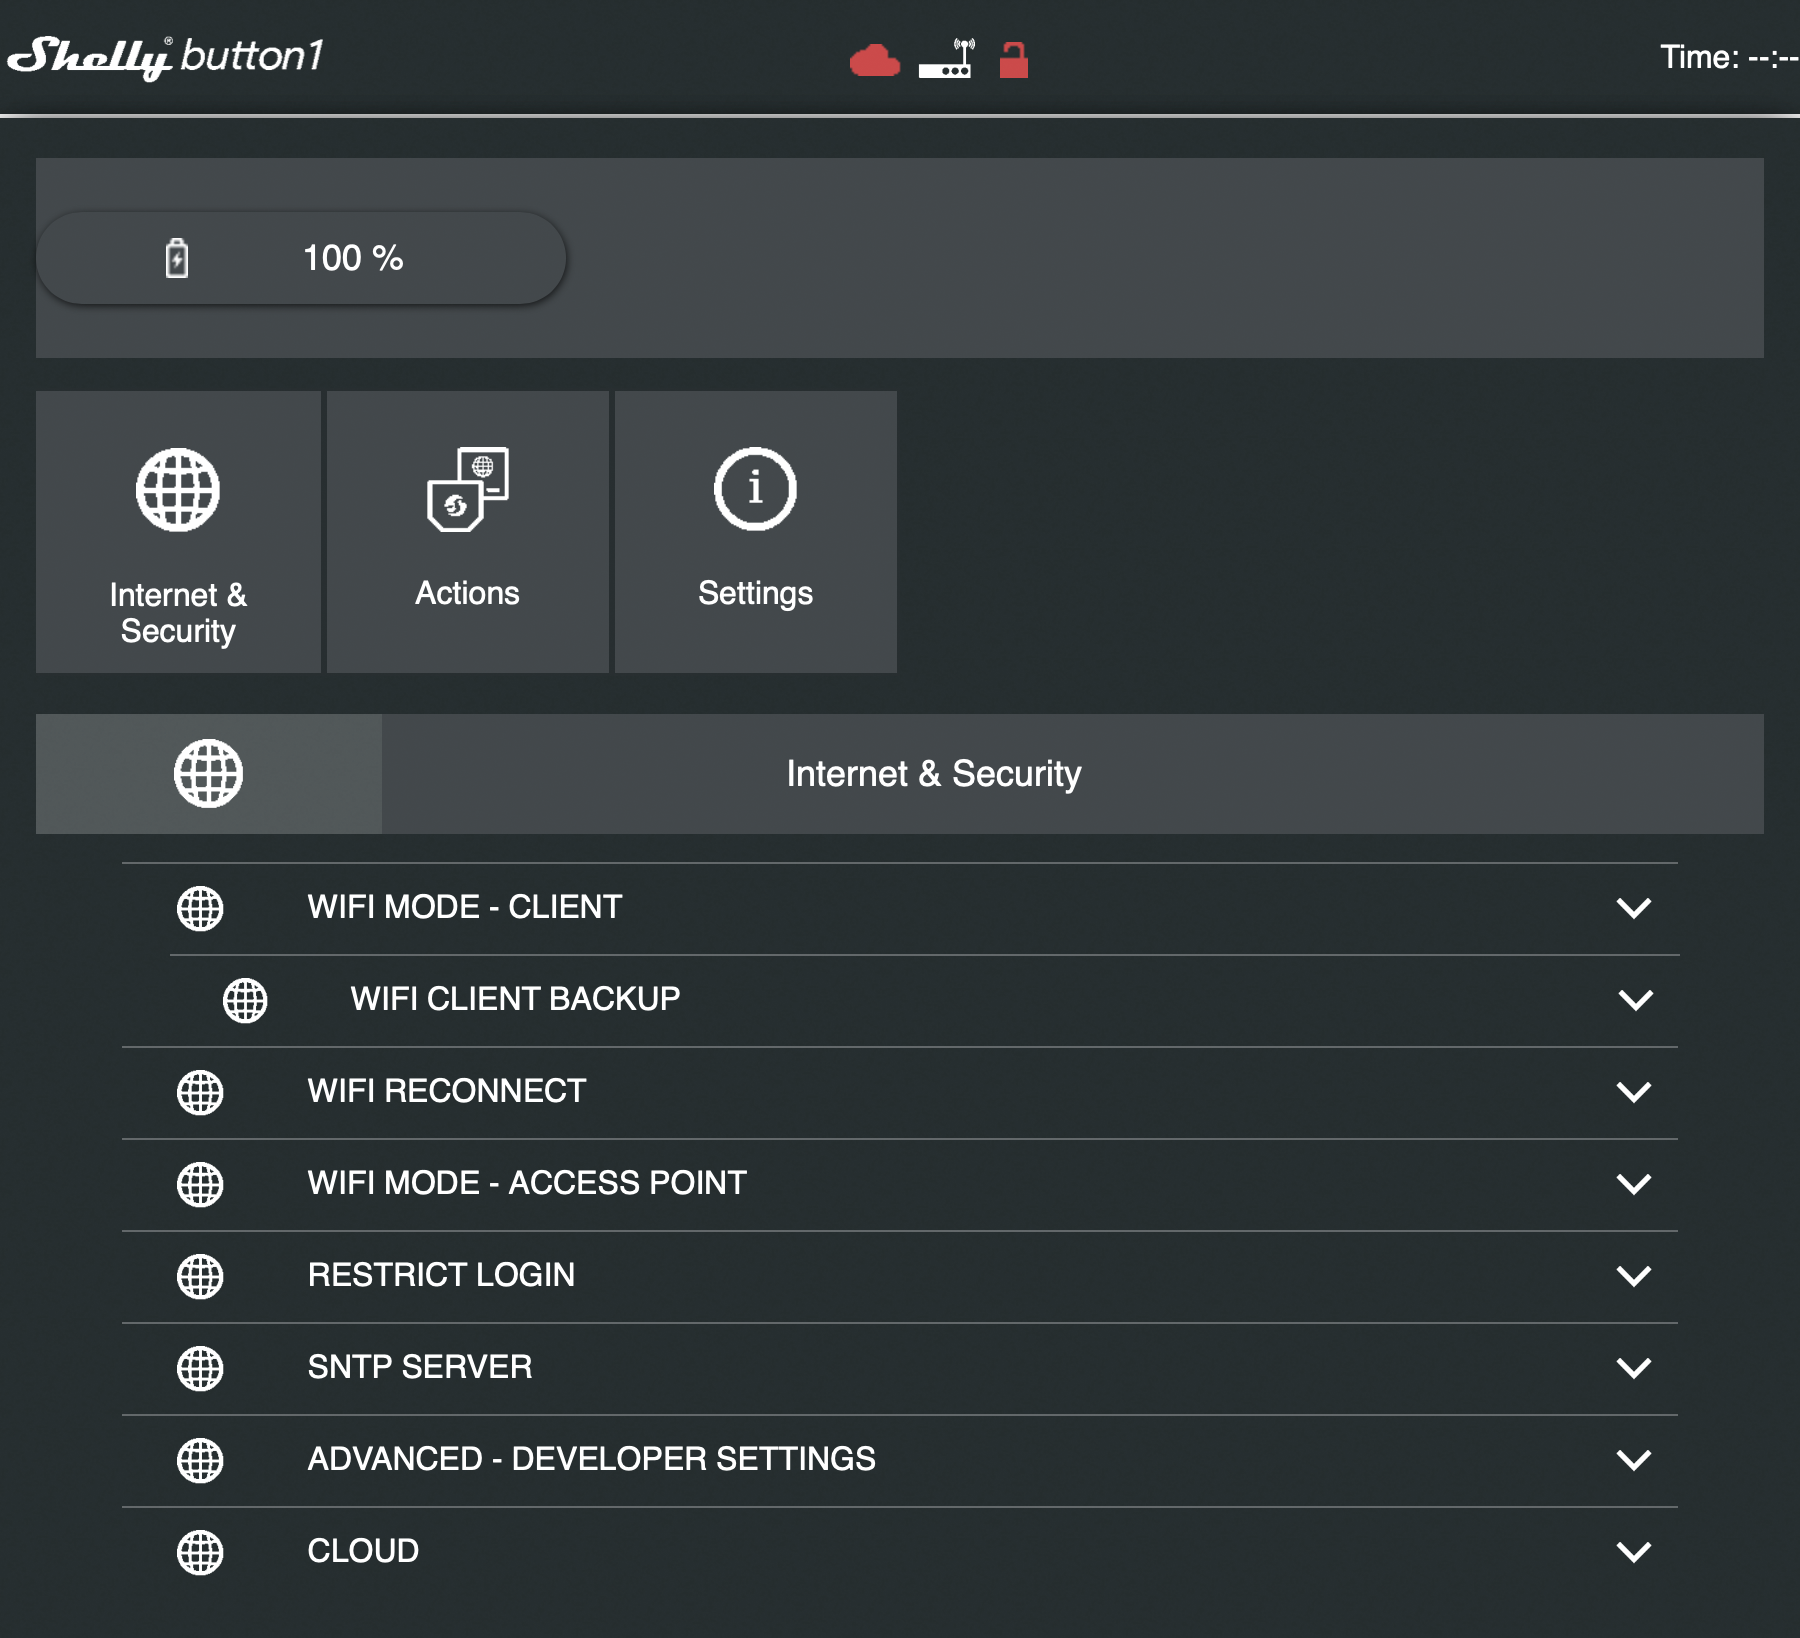
4. Switch to the "Internet & Security" tab, there you can change the WLAN settings of the Shelly Button.
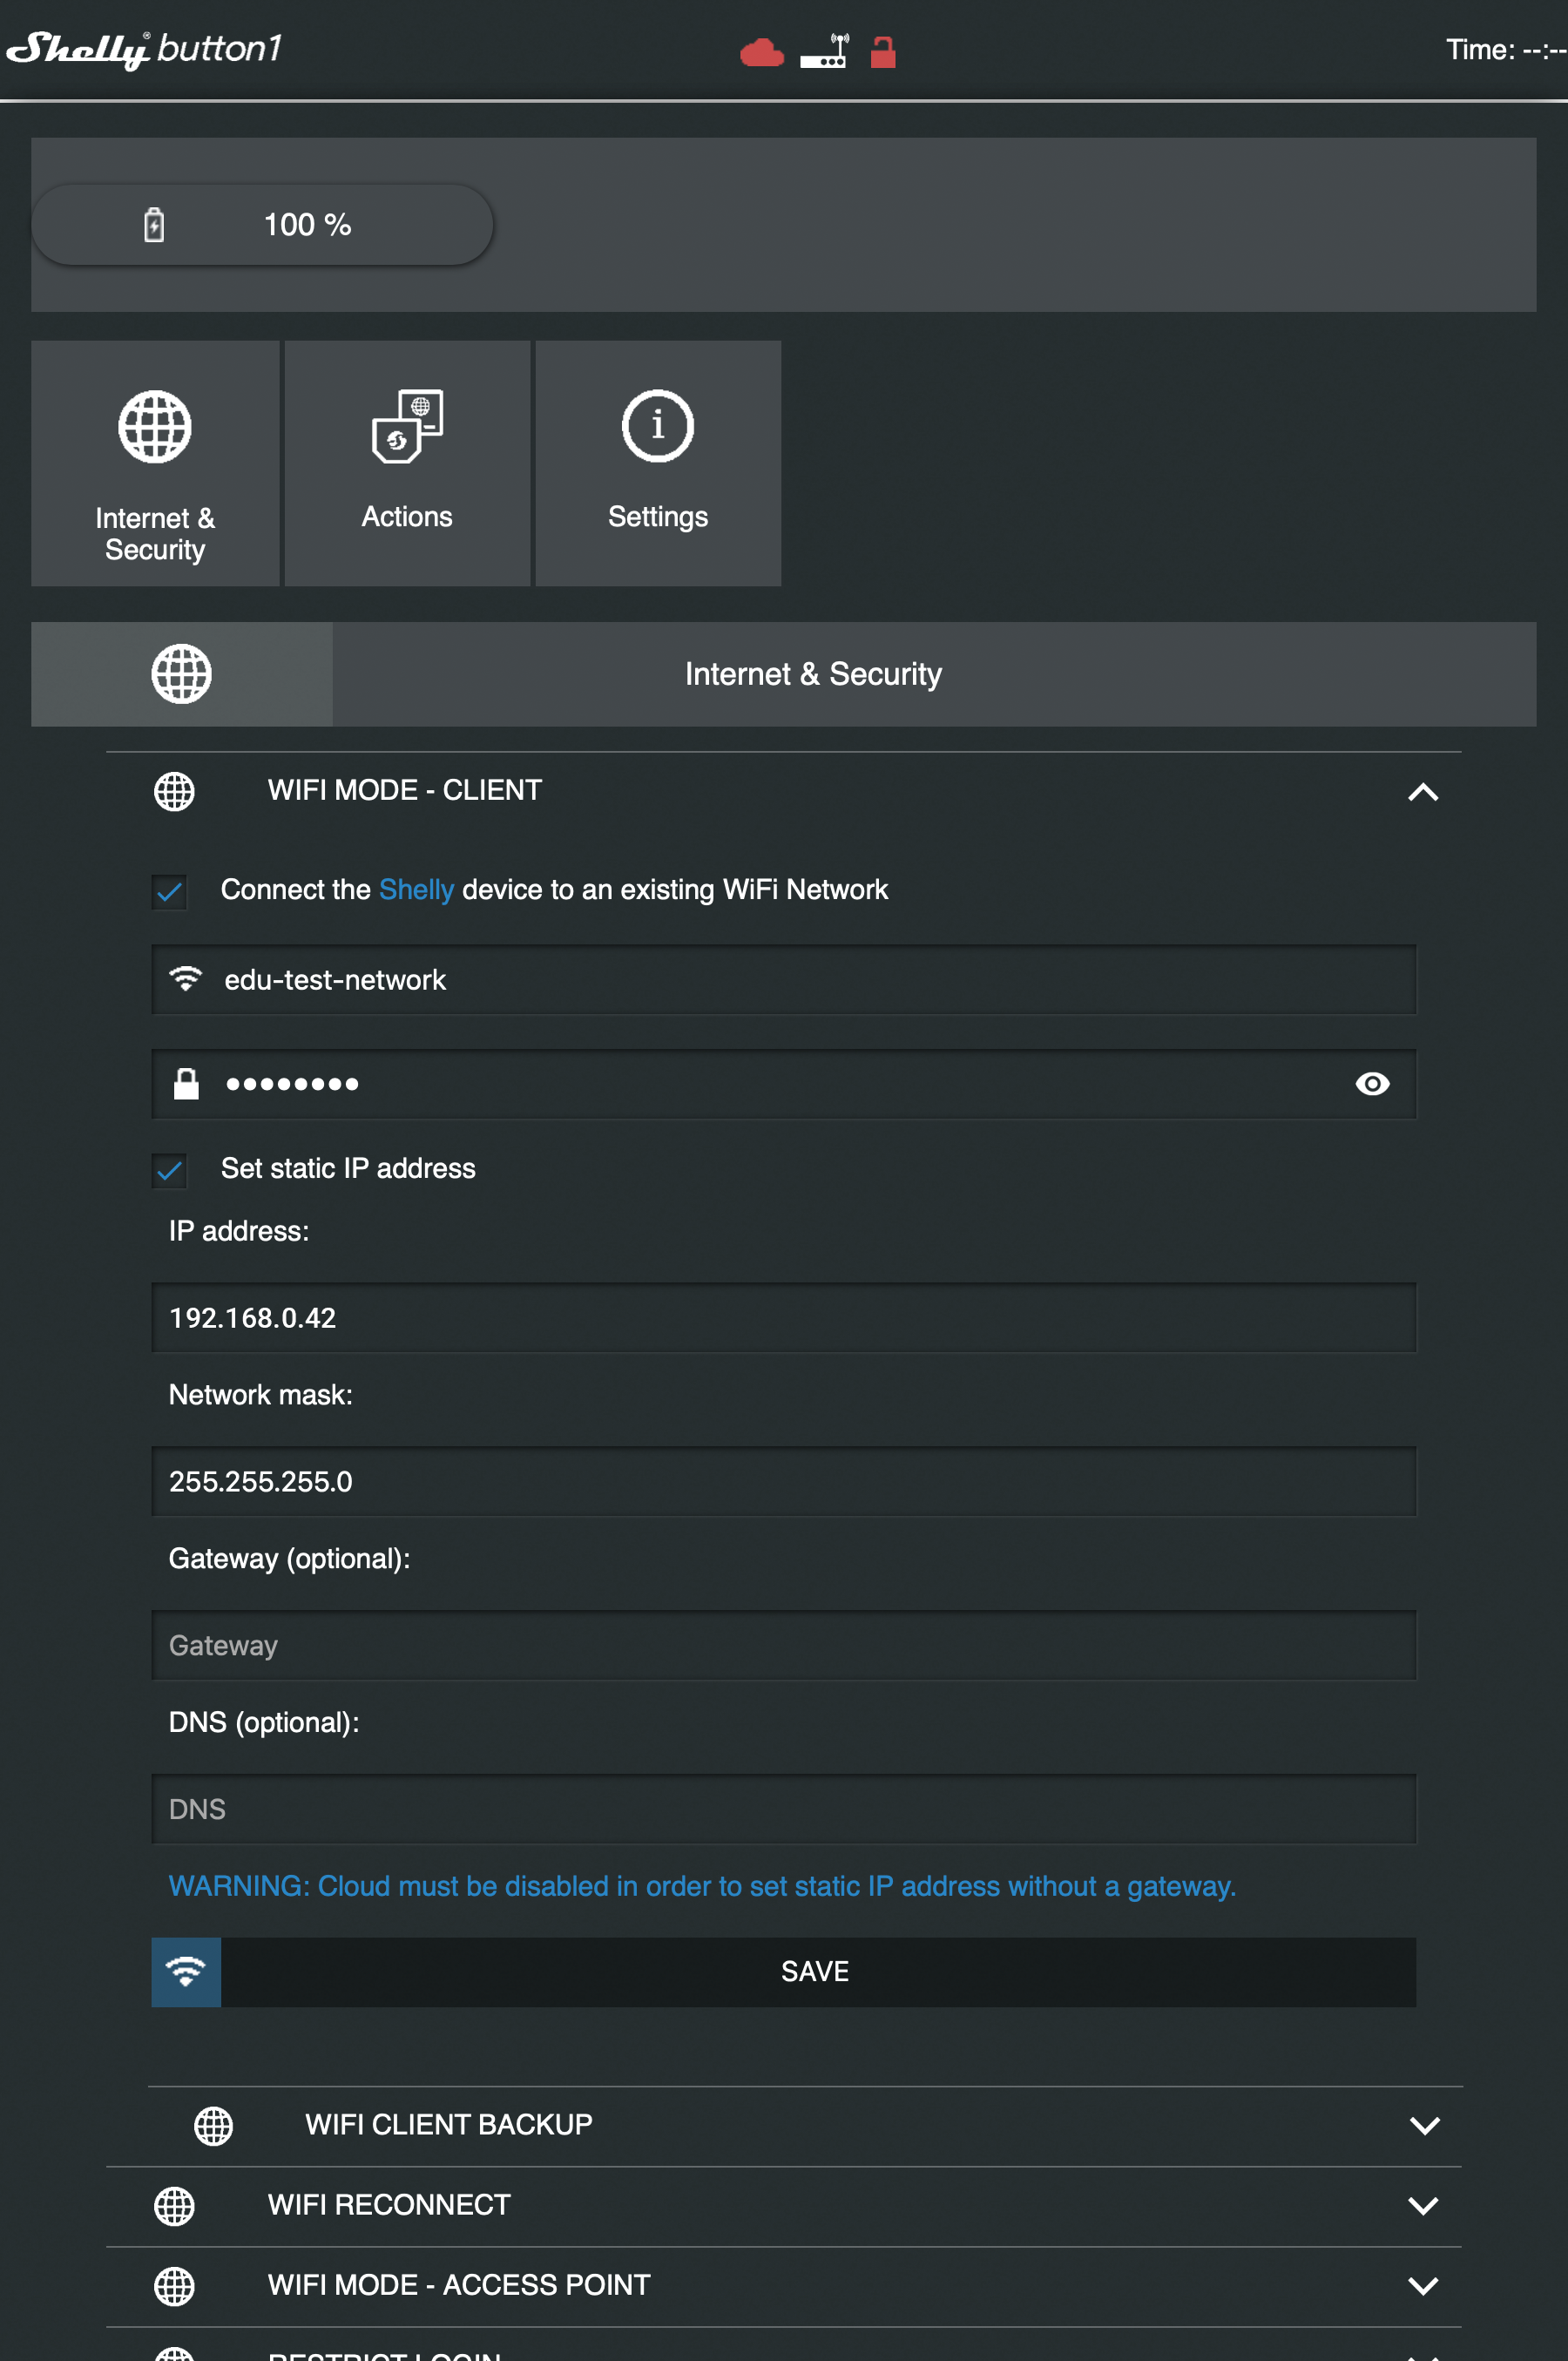
5. Expand the "Wi-Fi MODE - CLIENT" item and check the "Connect the Shelly device to an existing Wi-Fi Network" checkbox.
Now enter the SSID and password of your WLAN network.
Optionally, you can also assign a static IP address to the Shelly Button by checking the "Set static IP address" checkbox. Now enter your static IP address, the network mask, and optionally the address of your gateway and your DNS server below.
Then click on the "SAVE" button to confirm your changes. The Shelly Button will then log on to your network using this information.
|
1. Connect the Shelly Button via micro USB cable to a power source, e.g. to your desktop PC or via adapter to a power outlet. The active power connection will wake up the Shelly Button and it will go into "ACCESS POINT" (AP) mode.
2. Now connect to the Shelly Button's WLAN via a desktop PC. This is available when you have a Shelly Button in AP mode and the SSID of this network consists of the string "shellybutton1-" followed by 12 random hexadecimal characters
3. If you have successfully connected to the Shelly Button's WLAN, open the configuration web interface via the address "http://192.168.33.1/".
4. Switch to the "Internet & Security" tab, there you can change the WLAN settings of the Shelly Button.
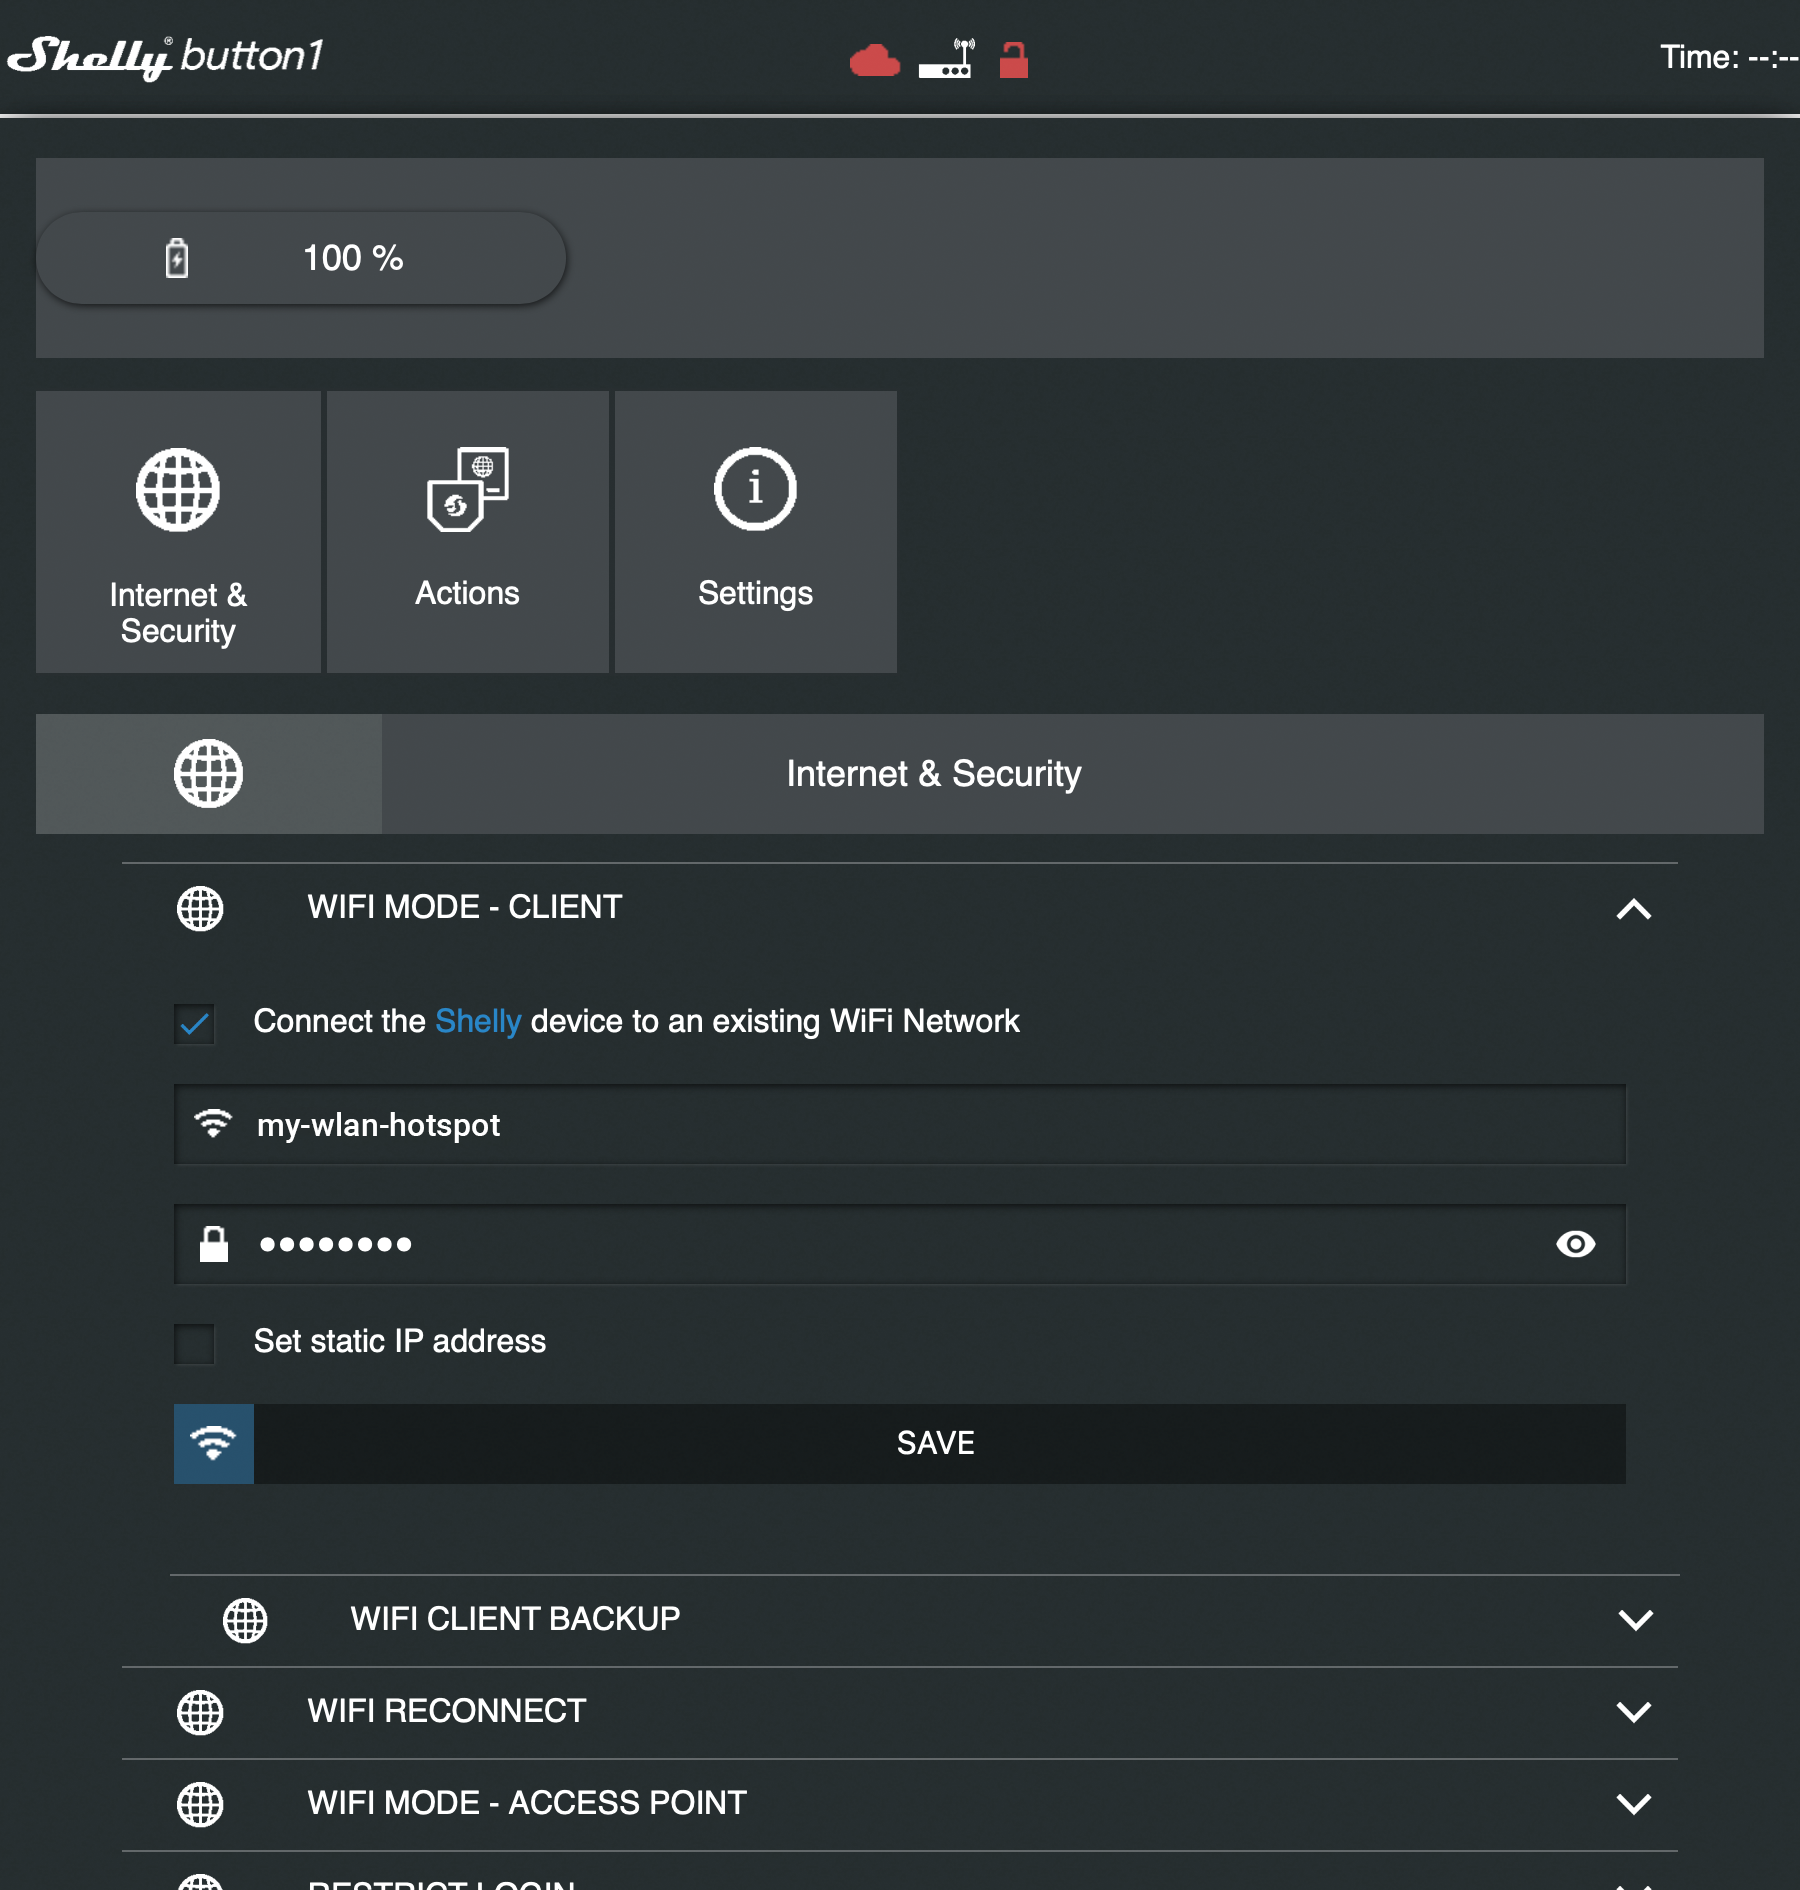
5. Expand the "Wi-Fi MODE - CLIENT" item and check the "Connect the Shelly device to an existing Wi-Fi Network" checkbox.
Make sure that your WLAN hotspot is enabled on your device and specify its SSID and password in the WLAN configuration.
Optionally, you can also assign a static IP address to the Shelly Button by checking the "Set static IP address" checkbox. Now enter your static IP address, the network mask, and optionally the address of your gateway and your DNS server below.
Then click on the "SAVE" button to confirm your changes. The Shelly Button will then log on to your network using this information.
|
Keypress configuration
1. Open the configuration web interface of your Shelly Button and switch to the "Actions" tab.
|
If you did not specify a static IP address during WLAN configuration, Shelly provides a simple tool for locating Shelly devices on the local network:
•Windows: https://shelly.cloud/documents/device_finders/ShellyFinderWindows.zip •Mac OS: https://shelly.cloud/documents/device_finders/ShellyFinderOSX.zip |
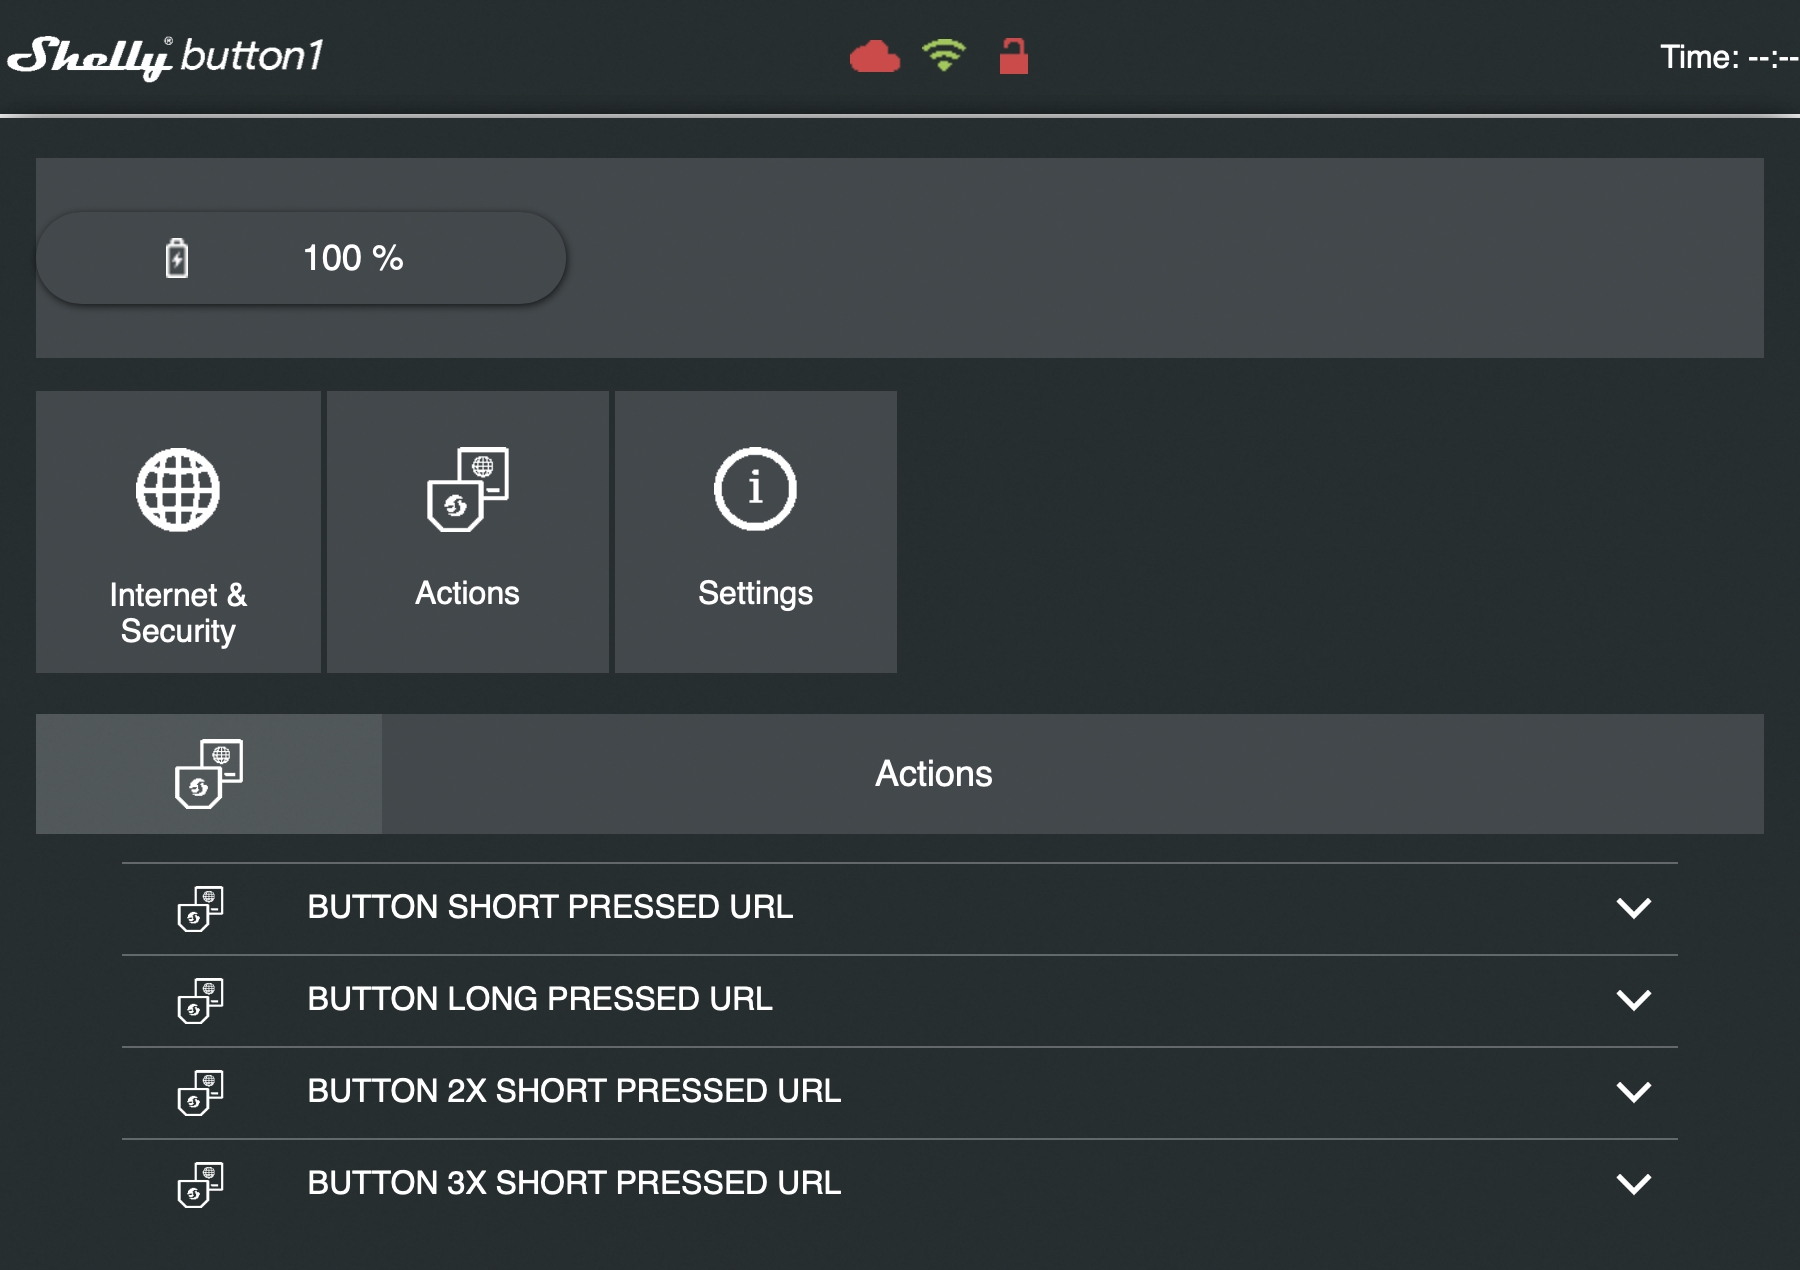
2. Now expand the action you want to configure.
If you want an action to be executed when the button is pressed short, then expand the "BUTTON SHORT PRESSED URL" item.
Activate the "Enabled" checkbox and enter a URL under "Url to be hit when the button is pressed short", which should be called when the button is pressed short.
To trigger PC-independent alarms, a PHP script can be addressed here, for example, which uses the MailToInfo interface of Cordaware bestinformed to generate a corresponding info.
Afterwards, click on the "SAVE" button to confirm your changes.
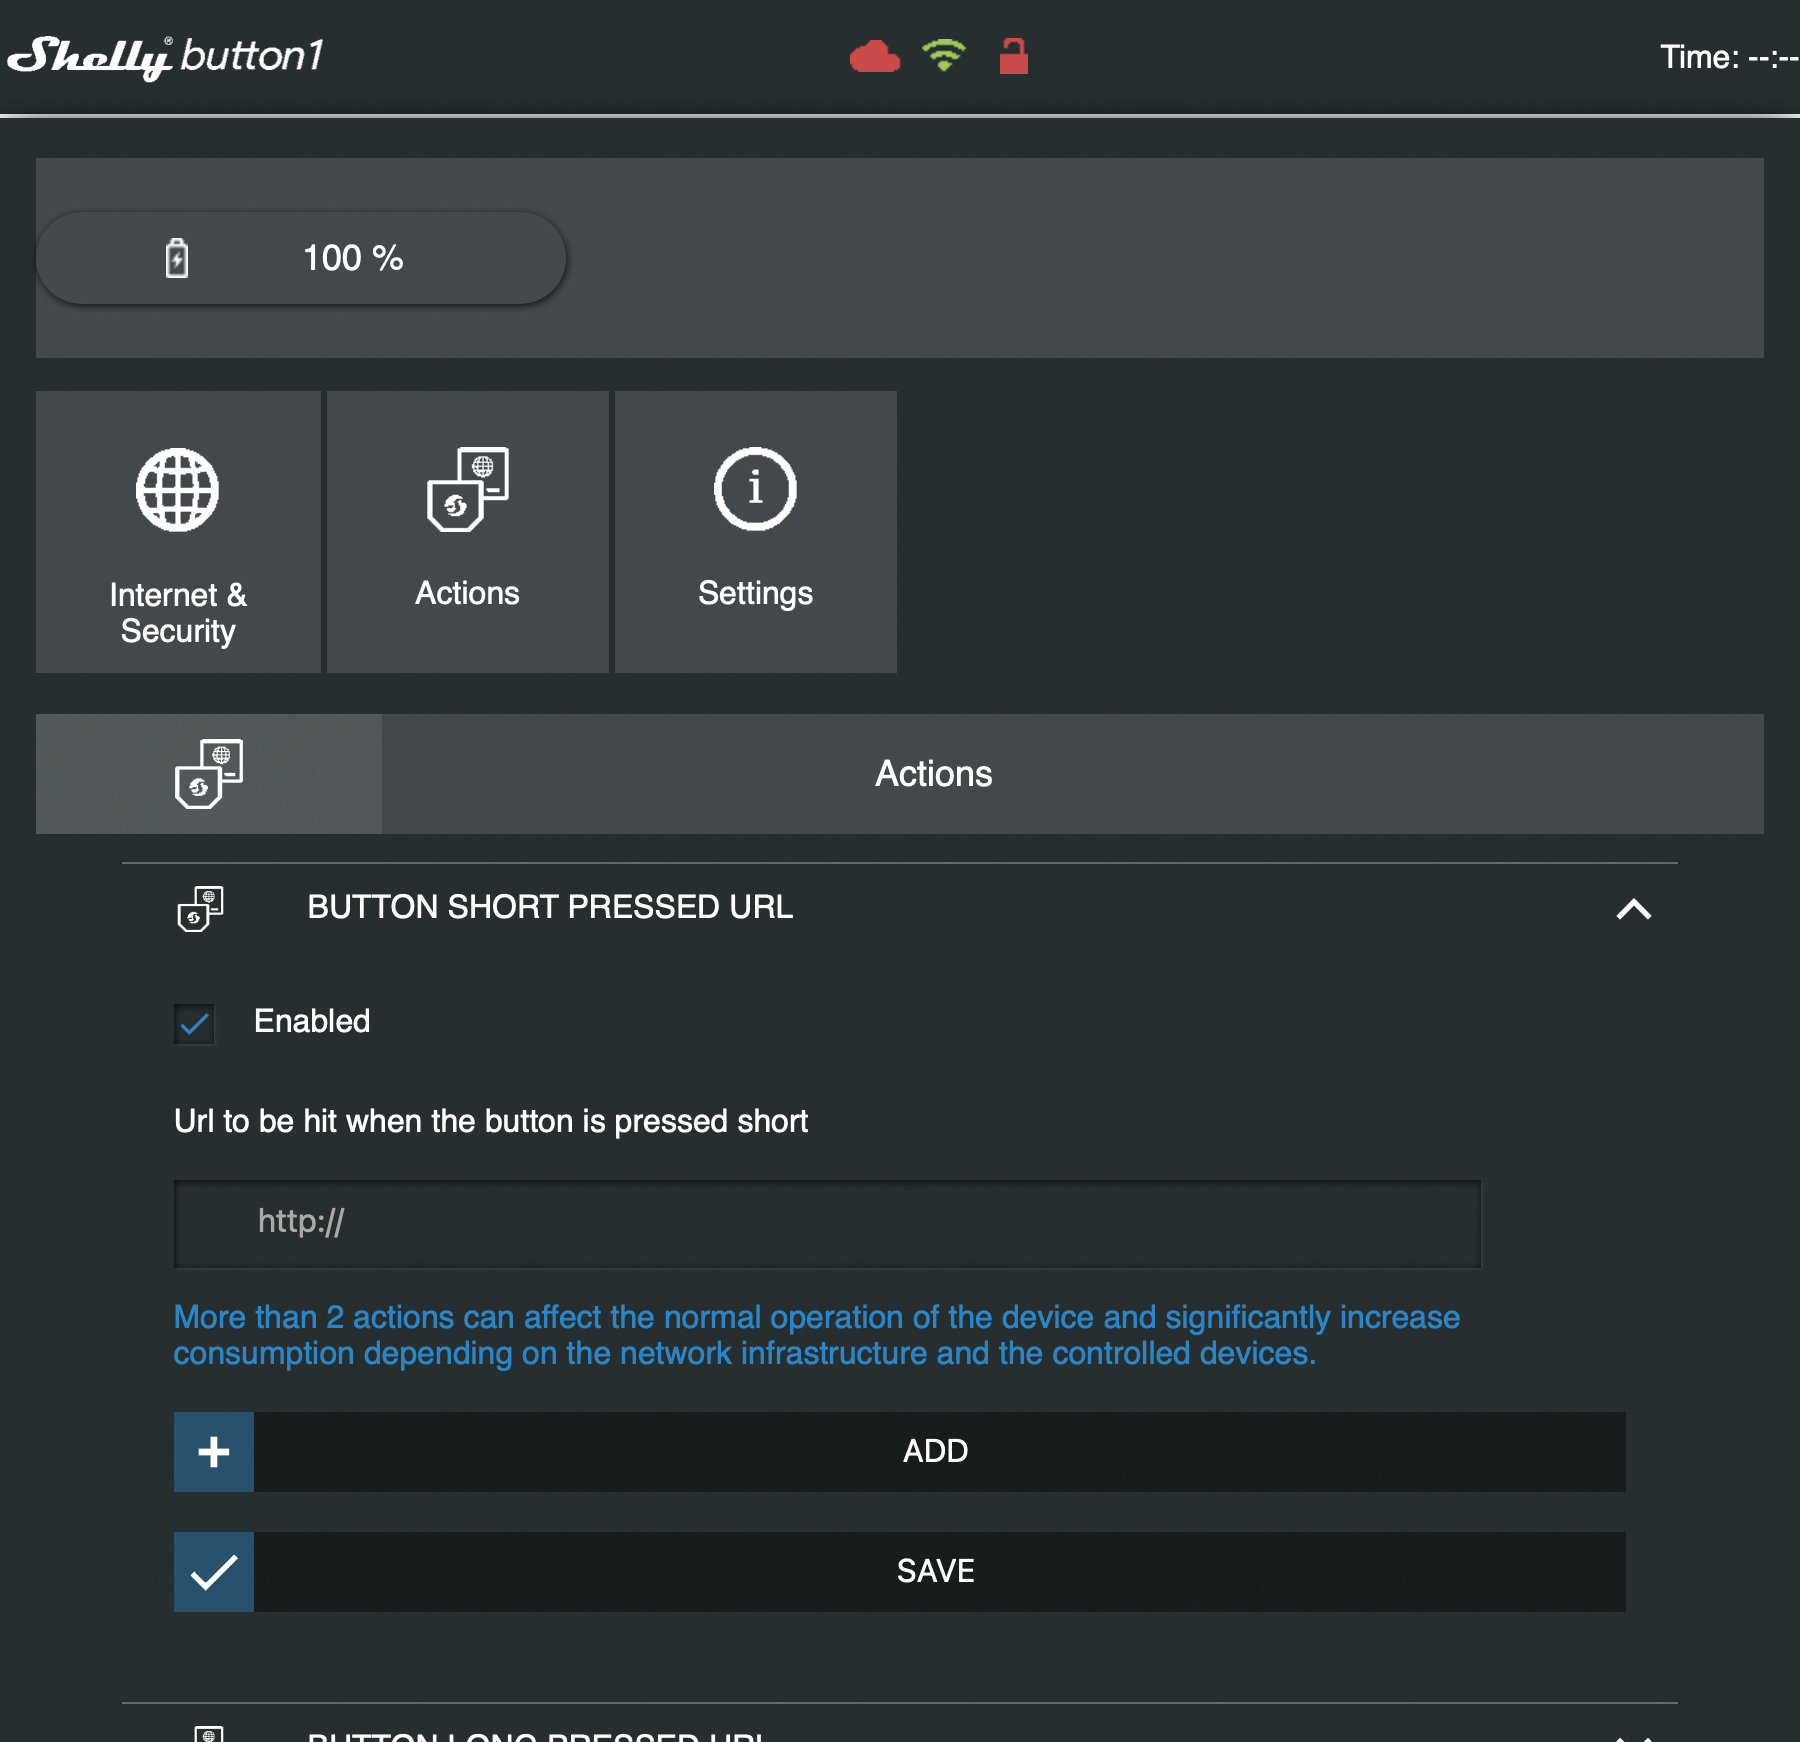
|
You can find a sample PHP script below that uses the external library "PHPMailer" to address the MailToInfo interface of Cordaware bestinformed.
1. Copy the script below into any text editor and save the file as a PHP file in any directory. Fill in the necessary variables in the "CONFIGURATION" section for your installation and save the script again.
2. Download the "PHPMailer" library: https://github.com/PHPMailer/PHPMailer/archive/master.zip Unzip it to the same directory as the PHP file and rename the folder "PHPMailer-master" to "PHPMailer". This sample script was implemented on the basis of PHPMailer 6.
To use this script with the Shelly button, you have to provide it on a web server accessible for your network.
In addition, you must specify the name of an existing alarm template in Cordaware bestinformed when calling the script. To do this, specify a query parameter "templatename" with the name of the template as value in the URL.
Additionally, you can specify any other query parameters that will be passed to the template as values for ScriptVars with the same name.
Examples:
http://your.server.address/shelly_button/alarm_script.php?templatename=Basic%20Alarm
The alarm template "Basic Alarm" is used here.
http://your.server.address/shelly_button/alarm_script.php?templatename=Extended%20Alarm&realname=Max.Mustermann&alarmroom=Mobile%20workplace
In this example, the alarm template "Extended Alarm" is used, which contains the two ScriptVars "realname" and "alarmroom" in its infotext. These were also appended to the URL as query parameters and thus the value "Max.Mustermann" is used for the ScriptVar "realname" and the value "Mobile workplace" for "alarmroom". |
|
<?php
// PHPMailer 6.x - PHPMailer as ZIP Archive // https://github.com/PHPMailer/PHPMailer/archive/master.zip require('PHPMailer/src/PHPMailer.php'); require('PHPMailer/src/SMTP.php'); require('PHPMailer/src/Exception.php'); use PHPMailer\PHPMailer\PHPMailer;
///------------------------------------------------------------------- /// CONFIGURATION ///-------------------------------------------------------------------
// Enter here "admin" or the login name of a user who has the rights to use the MailToInfo interface of Cordaware bestinformed. $username = "admin";
// Enter the MailToInfo password of your bestinformed installation here. // By default, the default admin password is also used for this interface. // In the web interface under "System > System (local)" you can adjust the password of this interface at any time. $password = "PASSWORD";
// Enter the address of your Cordaware bestinformed server here. $host = "SERVER_ADDRESS";
// Enter your SMTP port configured in Cordaware bestinformed here. (Default: 8025) $port = 8025;
// The connection is unencrypted, to activate TLS, set the value "SMTPAutoTLS = true;" in “INTERNAL FUNCTIONS” -> “Server settings”.
///------------------------------------------------------------------- /// INTERNAL FUNCTIONS ///-------------------------------------------------------------------
if (isset($_GET["templatename"])) { $templatename = $_GET["templatename"]; $body = implode("\r\n", explode("\n", trim(<<<BODY
username=$username password=$password templatename=$templatename
BODY)));
// ScriptVars foreach ($_GET as $script_var => $script_var_value) { if ($script_var == "templatename") { continue; } $body .= "\r\n@" . $script_var . "=" . $script_var_value; } if (!isset($_GET["realname"])) { $body .= "\r\n@realname=Someone"; } if (!isset($_GET["alarmroom"])) { $body .= "\r\n@alarmroom=Unknown"; }
$body .= "\r\n";
$mail = new PHPMailer();
// Server settings $mail->SMTPDebug = false; $mail->isSMTP(); $mail->Host = $host; $mail->SMTPAuth = false; $mail->Port = $port; $mail->SMTPAutoTLS = false;
// Receiver $mail->setFrom('shelly.button@cordaware.com', 'Shelly Button'); $mail->addAddress('shelly.button@cordaware.com');
// Content $mail->Subject = "newinfo"; $mail->Body = $body; $mail->ContentType = "text/plain"; $mail->CharSet = "utf-8";
// Send e-mail $mail->Send();
echo '<strong style="font-family: Verdana, Geneva, Tahoma, sans-serif;">Alarm was sent!</strong>'; }
?> |
Once everything is set up correctly, the Shelly Button can now be mounted in a central location or used from anywhere via mobile hotspot.
